
How to Drill Out a Stripped Screw Without Breaking Your Bit
This post contains affiliate links. As an Amazon Associate, we earn from qualifying purchases.
To drill out a stripped screw, you follow three non-negotiable steps: select the correct extractor size, drill a pilot hole to the specified depth, and then drive the extractor counter-clockwise with steady pressure. The Milwaukee 49-57-9001 extractor, for example, requires you to pre-drill with side A at high speed, then flip to side B and finish at low speed in reverse. Skip the pilot hole or use the wrong speed, and the hardened steel bit snaps inside the screw head 90% of the time.
That pilot-hole step is where every generic tutorial stops and reality starts. The size stamped on the extractor isn’t a suggestion, it’s the maximum diameter your drill bit can be before the extractor’s threads have nothing to bite. Go one millimeter over, and the bit spins uselessly. Go one millimeter under, and you wedge it tight enough to shear the tip.
What follows is a breakdown of the two extractor families that actually work, the one step every manual assumes you’ll get wrong, and the three scenarios where drilling is the worst thing you can do.
Key Takeaways
- Match the extractor to the screw size, not the Allen key size. A #2 Milwaukee bit fits No. 8-10 screws; a Sock It Out extractor sized for a 1/4″ bolt won’t touch a No. 10.
- The pilot hole depth is critical. Drill only as deep as the extractor’s tapered section, any deeper and you remove the material the extractor needs to wedge against.
- An impact driver is only for low-speed final extraction on smaller screws (#1, #2, #3 Milwaukee bits). Using it for the pilot hole shatters the bit’s cutting edges.
- If the screw is in thin sheet metal, plastic, or an electronic device, do not drill. Switch to manual methods like a rubber band grip or locking pliers first.
- Penetrating oil needs 5-10 minutes to work on frozen threads. Applying it after you’ve started drilling does nothing but make a mess.
The Core 3-Step Process (And Why Step 2 Breaks Bits)
The internet is full of vague “drill and twist” advice. It’s wrong because it treats all stripped screws and all extractors as the same. A power-tool extractor like the Milwaukee 49-57-9001 follows a rigid, speed-dependent procedure. A hammer-in extractor like the Sock It Out skips drilling entirely. Using one method on the other tool guarantees failure.
Technical Overview: For traditional drill-type extractors, the process is drilling, driving, and removal. The Milwaukee 49-57-9001 screw extractor bit sizes #1, #2, and #3 are rated for use in an impact driver in low speed for the extraction phase only. The correct drill size for the pilot hole is stamped on each extractor, and the drill/driver must be set to reverse rotation before beginning.
Step 1: Size the Hole – The Stamped Number is Law
You are not guessing. The right drill bit diameter is physically stamped on the shank of every quality extractor, like those from ICS Cutting Tools. This number is the largest bit you can use. If the stamp says 3/16″, a 1/4″ bit will drill a hole too wide for the extractor to grip. A 5/32″ bit leaves too much material, jamming the extractor and often breaking it.
Why this matters: The extractor’s threads are tapered. They need a specific wall thickness to bite into. Too much wall and the threads can’t engage; too little and they slip. This is the first and most common point of failure.
Step 2: Drill the Pilot Hole – Depth Stops Are Not Optional
Drill the pilot hole only as deep as the stripped screw head, or to the length of the extractor’s tapered section, whichever is shorter. The goal is to remove the damaged head but leave enough shaft for the extractor to wedge against.
Common mistake: Drilling all the way through the screw shank. Once you’ve drilled past the threads, the extractor has nothing to push against. It just spins in a hollow tube, enlarging the hole and making the problem permanent.
Use a center punch to dimple the exact center of the screw head. This keeps the drill bit from walking. Start slow, with steady pressure. Let the bit do the cutting; forcing it heats the metal and work-hardens it, making it tougher to drill.
Step 3: Insert and Turn – Slow Speed Wins
With the pilot hole clean, insert the extractor. For a Milwaukee-style bit, this means flipping to side B. Set your drill or impact driver to its lowest speed and ensure it’s in reverse. Apply firm, straight pressure and start the tool.
The feel is everything. If the extractor bites, you’ll feel a distinct increase in resistance followed by a smooth, constant rotation as the screw backs out. If it spins without grabbing, stop. The hole is either too wide or too shallow. Do not increase speed or force, that’s how you snap a $20 extractor tip off inside the screw.
| Symptom | Likely Cause | Immediate Fix |
|---|---|---|
| Extractor spins freely | Pilot hole too large | Use a larger extractor or try a hammer-in type |
| Extractor jams, won’t turn | Pilot hole too small/deep | Drill out the screw completely and re-tap hole |
| Screw turns but won’t back out | Threads fused (frozen) | Apply penetrating oil, wait 10 min, try again |
If the screw comes out stuck on the extractor, power down the tool. Wear gloves, the metal will be hot, and gently tap the screw sideways with a wrench to loosen it. Pulling straight off can break the tip.
When NOT to Drill: Edge Cases That Break the Rules
Drilling is a destructive last resort. In these three scenarios, it creates more problems than it solves.
1. Stripped Screws in Electronics or Thin Plastic. The Prusa Knowledge Base is blunt: methods for woodworking or metal can destroy your printer. A drill bit can slip, gouging a circuit board or cracking a housing. Before drilling, try a stronger grip first. * Place a wide rubber band or a piece of latex glove over the stripped head. * Press your Allen key or screwdriver down hard through the material and turn slowly. * If the head is protruding, use needle-nose locking pliers for a mechanical grip.
2. Frozen Fasteners in Critical Threads. If the screw is corroded in place (“frozen”), drilling through it transfers heat and metal shavings into the threads of the part you want to save. The Sock It Out manual says to use penetrating oil and let it soak for a few minutes first. Often, this loosens the bond enough that the screw can be turned out with vise grips, no drilling needed.
3. Stripped Screws in Thin Sheet Metal. A drill bit can catch, deforming the metal and enlarging the hole beyond repair. For a screw in thick wood, metal, or plastic, you can sometimes carve a new slot with a Dremel or hacksaw blade and use a flathead screwdriver.
Where this goes sideways: Drilling into a frozen fastener without penetrating oil. The heat from friction welds the screw shank to the surrounding material. You’ll extract a stub, but the threaded hole will be destroyed, requiring a helicoil or timesert repair.
Hammer-In vs. Power-Tool Extractors: A Side-by-Side Breakdown
Not all extractors work the same way. Choosing the wrong type for your job is the difference between a five-minute fix and a ruined workpiece.
| Feature | Power-Tool Extractors (e.g., Milwaukee) | Hammer-In Extractors (e.g., Sock It Out) |
|---|---|---|
| Method | Drill pilot hole, then drive with drill/impact | Hammer directly into stripped recess, turn with wrench |
| Best For | High-volume, repetitive work; screws in hard materials | Single, stubborn screws; situations where drilling is risky |
| Key Advantage | Speed; can be used with impact driver on low setting | No drilling required; less chance of damaging surrounding material |
| Key Limitation | Requires precise pilot hole; bits can wear | Requires clearance for hammer swing; not for tiny screws |
| Reusability | High, but cutting edges dull with use | Very high; hardened steel lasts for years with proper care |
The Milwaukee 49-57-9001 is your go-to for a shop full of stripped screws. Its four bit sizes cover No. 4 up to 3/8″ bolts. Just follow its specific, two-speed process.
Sock It Out extractors are the specialist. They wedge into the existing damage, so you don’t risk drilling off-center. They’re sized by the screw diameter, not the wrench size, which is a common point of confusion. If you’re unsure, their technical support can identify the right size, a service most brands don’t offer.
For the home DIYer facing one stripped bolt, a Sock It Out set is simpler and more forgiving. For someone restoring old machinery, the Milwaukee kit’s speed is worth the learning curve.
Essential Tools and Safety Gear You Actually Need
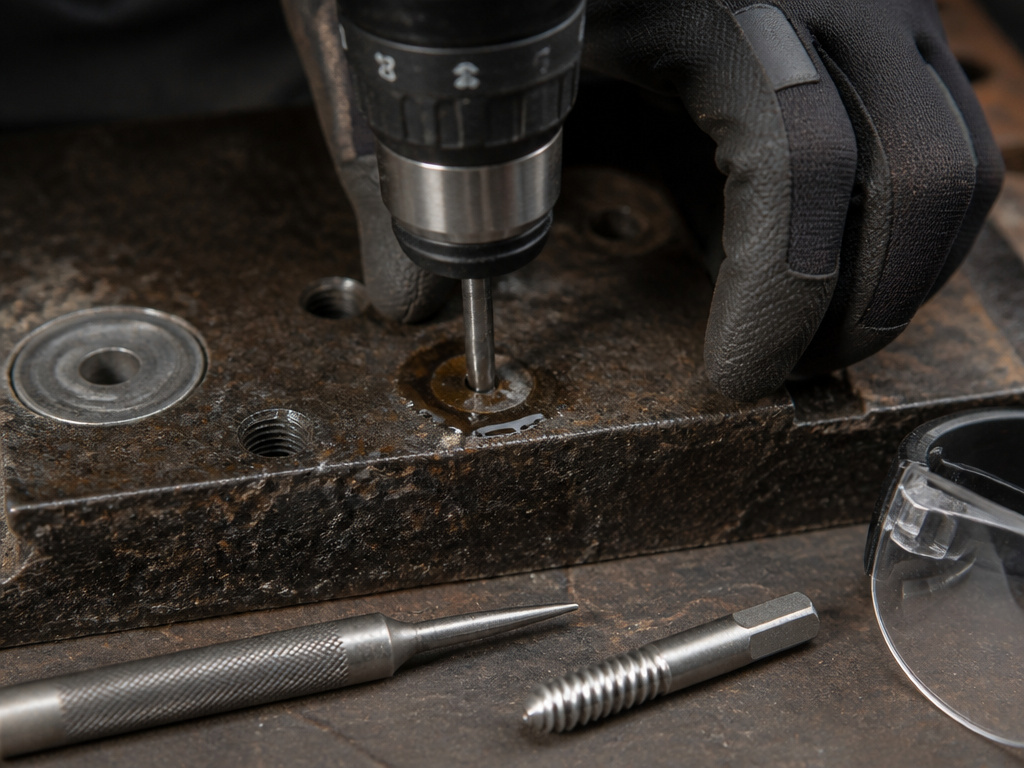 You can’t improvise this job. Having the right tools on hand before you start is the difference between success and a trip to the hardware store for a tap-and-die set.
- Quality Screw Extractor Set: Don’t buy a no-name bargain bin set. The steel isn’t hardened properly and will snap. The Milwaukee set or a reputable brand like Irwin or Grabit is a necessary investment.
- Center Punch: To create a starter dimple for your drill bit and prevent walking.
- Variable Speed Drill/Driver: With a reverse function and a clutch. An impact driver can be used, but only for the final extraction phase on smaller screws, per the Milwaukee manual.
- Drill Bits: A set of high-speed steel (HSS) bits in the sizes matching your extractors. A left-hand drill bit can sometimes back the screw out during the drilling phase, serving as a non-destructive first attempt.
- Penetrating Oil: Like Liquid Wrench or PB Blaster. Applied early, it can make extraction trivial.
- Safety Glasses: ANSI/OSHA compliant. Metal shards from drilling and broken extractors are sharp and travel fast.
- Work Gloves: The Milwaukee manual explicitly warns that the screw, extractor bit, and drill chuck get hot. Gloves prevent burns when handling the removed fastener.
Before you start: Wear ANSI/OSHA compliant safety glasses, metal fragments are a real hazard. Ensure your workpiece is securely clamped. Verify your drill is in reverse. And apply penetrating oil to frozen threads at least five minutes before you begin.
Troubleshooting: When the Extraction Fails
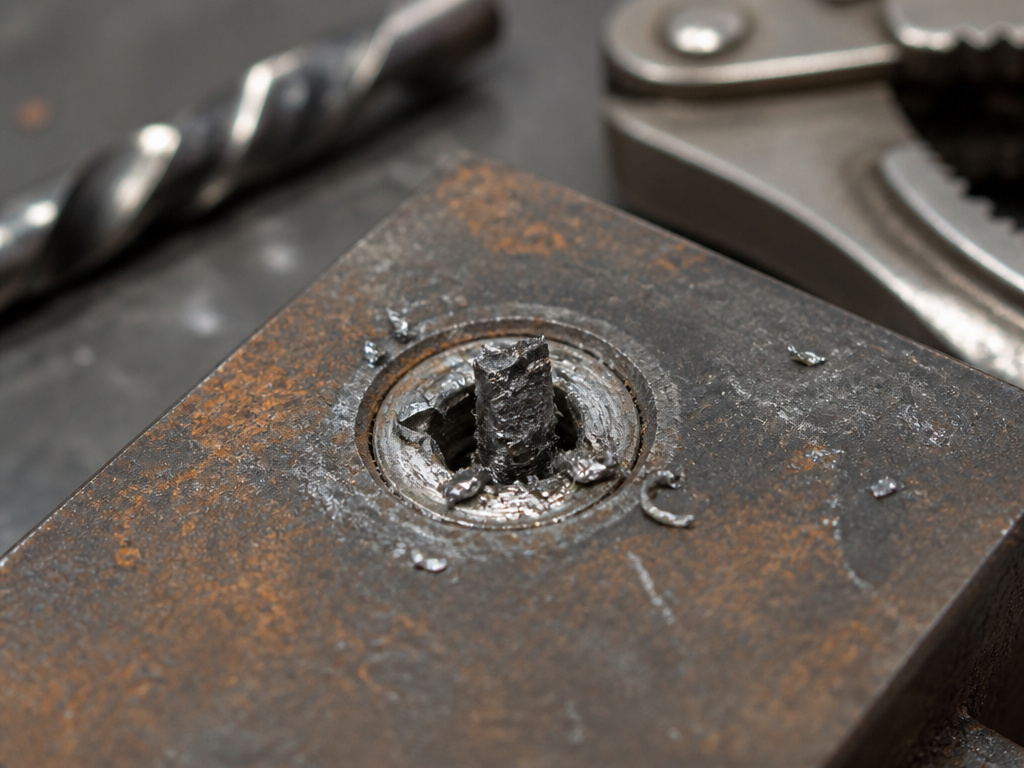 Even with perfect technique, some screws fight back. Here’s what to do when the process stalls.
The extractor snapped off in the hole.
This is the worst-case scenario. The extractor steel is harder than your drill bits. Your only option is to carefully use a carbide burr or an EDM (electrical discharge machining) tool to erode the broken piece, a job for a professional machinist in most cases. This is why controlled, low-speed pressure is non-negotiable.
The screw spins but won’t back out.
The threads are fused, or the screw is a “spinner” where the surrounding material is stripped. Stop drilling. Apply more penetrating oil directly into the threads. If possible, use vise grips on the screw head to apply upward pressure as you turn. If it’s a spinner, you may need to drill it out completely and install a threaded insert.
The hole is now off-center and enlarged.
This is a pilot-hole error. Your choices are to step up to a larger extractor (if the screw size allows), switch to a hammer-in extractor which doesn’t rely on a centered hole, or drill the entire screw out and plug/redrill the hole.
The bottom line: Patience and preparation beat force every time. Drilling out a screw is a controlled demolition, not a race.
Frequently Asked Questions
Can I use an impact driver with a screw extractor?
Yes, but only under specific conditions. The Milwaukee 49-57-9001 manual states its screw extracting bit sizes #1, #2, and #3 can be used in an impact driver in low speed for all steps. Do not use high-speed impact for the initial pre-drilling, as it will damage the bit. For other brands, assume your impact driver is only for the final, slow-turning extraction phase.
What’s the difference between an easy-out and a screw extractor?
“Easy-out” is a brand name that became generic for spiral-fluted extractors. A “screw extractor” is the broader category. In practice, they refer to the same type of tool: a tapered, left-hand threaded bit that bites into a drilled hole. Some newer designs, like Sock It Out, are not spiral-fluted and don’t require a pilot hole.
Do left-hand drill bits really work?
Sometimes, brilliantly. A left-hand (reverse rotation) drill bit can catch on the screw head during drilling and spin it out before you even need an extractor. It’s always worth trying as a first, non-destructive step, especially if you have a set of left-handed drill bits on hand. If it doesn’t work, you’ve created a perfect pilot hole for your extractor.
How do I remove a stripped screw without any special tools?
If the head is above the surface, locking pliers are your best bet. If it’s recessed, try the rubber band or latex glove trick for grip. For a Phillips or slotted head that’s partially intact, use a manual impact driver, a tool you strike with a hammer while holding it in the screw. It combines downward force with rotation and can break frozen screws free. We have a guide on manual screw extraction that covers these methods in detail.
Why did my extractor bit break?
The two most common reasons are excessive torque and an incorrectly sized pilot hole. Turning the extractor with a wrench longer than 8 inches applies more leverage than the hardened steel can handle. A pilot hole that’s too small jams the extractor, and the next turn shears the tip. Always use the drill size stamped on the tool and turn slowly.
Are screw extractors reusable?
High-quality ones like Sock It Out are designed to last for years with proper care. The key is removing the extracted screw from the bit without damaging the tapered threads. Don’t pry it off. Tap it sideways with a wrench or, as the manual suggests, place the extractor in a vise and drive the screw out with a punch.
Before You Go
Drilling out a stripped screw isn’t a mystery. It’s a mechanical process with three fixed variables: the right size, the right hole, and the right speed. The step-by-step screw removal process fails when one of those is guessed.
For most home workshops, a simple hammer-in extractor set covers the occasional stripped bolt without the fuss of precise drilling. For a pro or serious hobbyist, the Milwaukee kit’s speed is worth mastering its two-stage routine. And when you encounter a screw in a delicate laptop or a vintage engine block, remember the first rule: drilling is the last resort. Try a speed-out drill bit or manual grip first. The hole you don’t drill is the one you never have to fix.
