How to Cut Tile With a Wet Saw: A Step-by-Step DIY Guide
This post contains affiliate links. As an Amazon Associate, we earn from qualifying purchases.
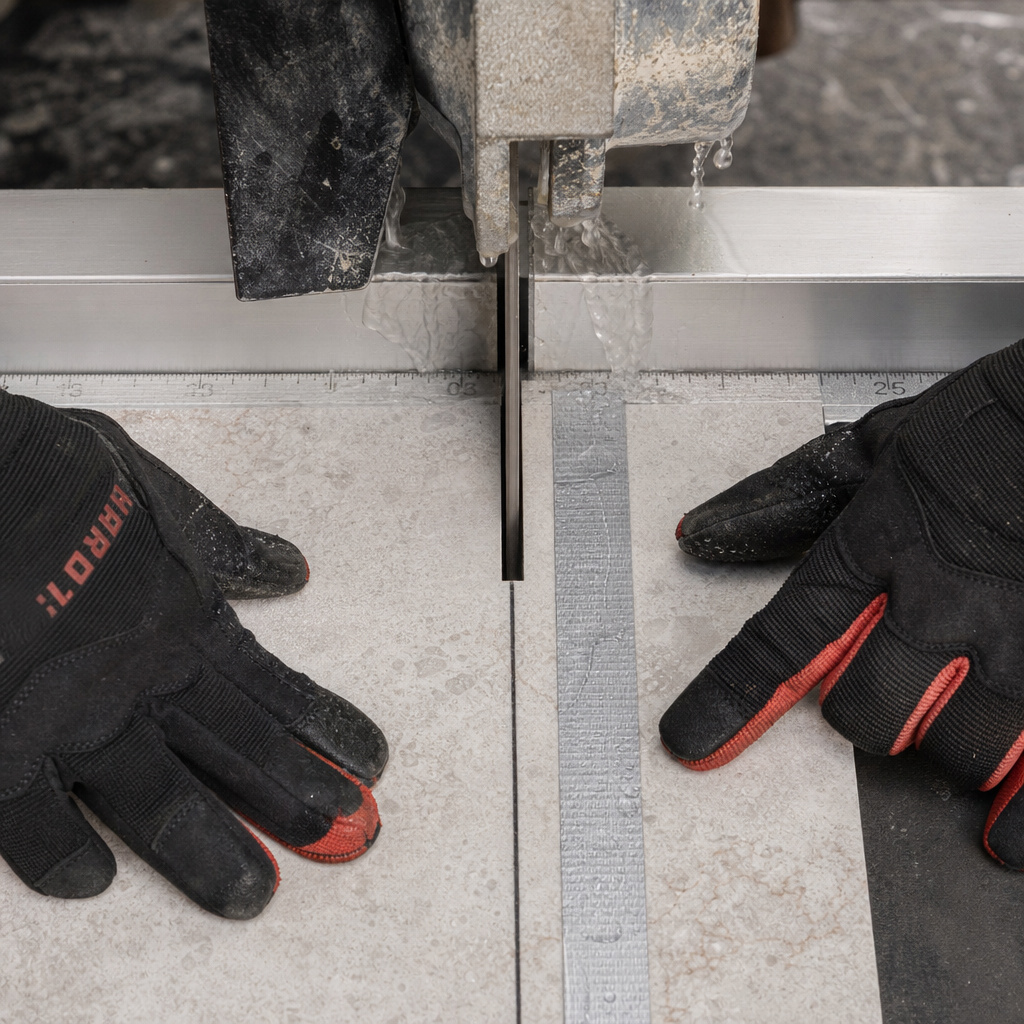
Cutting tile with a wet saw requires matching three things: a continuous-rim diamond blade, a steady flow of clean water for cooling, and a slow, consistent feed rate that lets the blade do the work. The side of the tile that the blade touches first will have the cleanest edge, so orient the tile face-up on sliding-table saws and face-down on tabletop models that cut from below.
Most people rush the feed. They see the blade spinning and push the tile through like it’s a piece of wood on a table saw. The motor groans, the tile chips, and the cut edge looks chewed. The blade needs time to abrade the hard ceramic or porcelain; forcing it just overheats the material, glazes the diamond segments, and guarantees a bad cut.
This guide walks through the setup, the safety non-negotiables, and the step-by-step technique for straight cuts, angles, and tricky notches. You’ll also learn how to diagnose a wandering blade, fix chip-out before it happens, and handle the messy cleanup that every article seems to forget.
Key Takeaways
- Always run the saw with water. A dry cut will overheat the diamond blade in under 30 seconds, permanently damaging its bond and reducing its life by half.
- Apply duct tape over your cut line, especially on natural stone or glossy porcelain. The tape holds the glaze and substrate together, preventing the small fractures that cause chips.
- Let the blade reach full speed before feeding the tile, and maintain a pace where you hear a consistent hiss, not a labored groan from the motor.
- Change the water after every 20-30 linear feet of cutting. Muddy slurry reduces cooling, loads the blade, and makes it cut slower and hotter.
- Support the cut-off piece with your free hand in the last inch. Letting it drop unsupported is the number one cause of corner snap-offs on L-shaped cuts.
Safety First: The Non-Negotiables
A wet saw combines electricity, water, and a diamond-coated blade spinning at 3,000 RPM. Respect all three.
Before you start: The blade can grab loose clothing or hair in a fraction of a second. Tie back long hair, remove jewelry, and wear close-fitting sleeves. The water pump will spray a fine, gritty mist, safety goggles are mandatory, not optional. Always plug the saw into a Ground Fault Circuit Interrupter (GFCI) outlet; a standard outlet with water present is a severe shock hazard.
The slurry, the muddy mix of water and tile dust, is a slipping hazard. Set up on a level surface and keep your footing clear. I learned this the hard way cleaning up after a large floor project.
A puddle of slurry on concrete looks like a shadow until your boot hits it. The slip was instant, and only a lucky grab at the saw table kept a stack of cut tile from becoming shrapnel. Now I lay down a scrap plywood sheet as a standing platform.
Hearing protection matters more than you think. A wet saw isn’t as loud as a circular saw, but the high-pitched whine of the diamond blade against porcelain, combined with the water spray, creates a unique frequency that leaves your ears ringing after an hour. Basic foam earplugs are sufficient.
What do you need before you start?
You need more than just the saw. Gathering everything first prevents mid-cut pauses that ruin your rhythm.
The Wet Saw: For most DIY backsplashes or floor projects, a basic 7-inch sliding-table model is perfect. I’ve used the Husqvarna TS 60 for years, it’s a rental-yard staple for a reason. For larger format tiles (24×24 inches and up), you need a saw with a sliding table and a deeper cutting capacity, like the Ridgid R4021. If you’re only doing a few cuts, renting is the smart move.
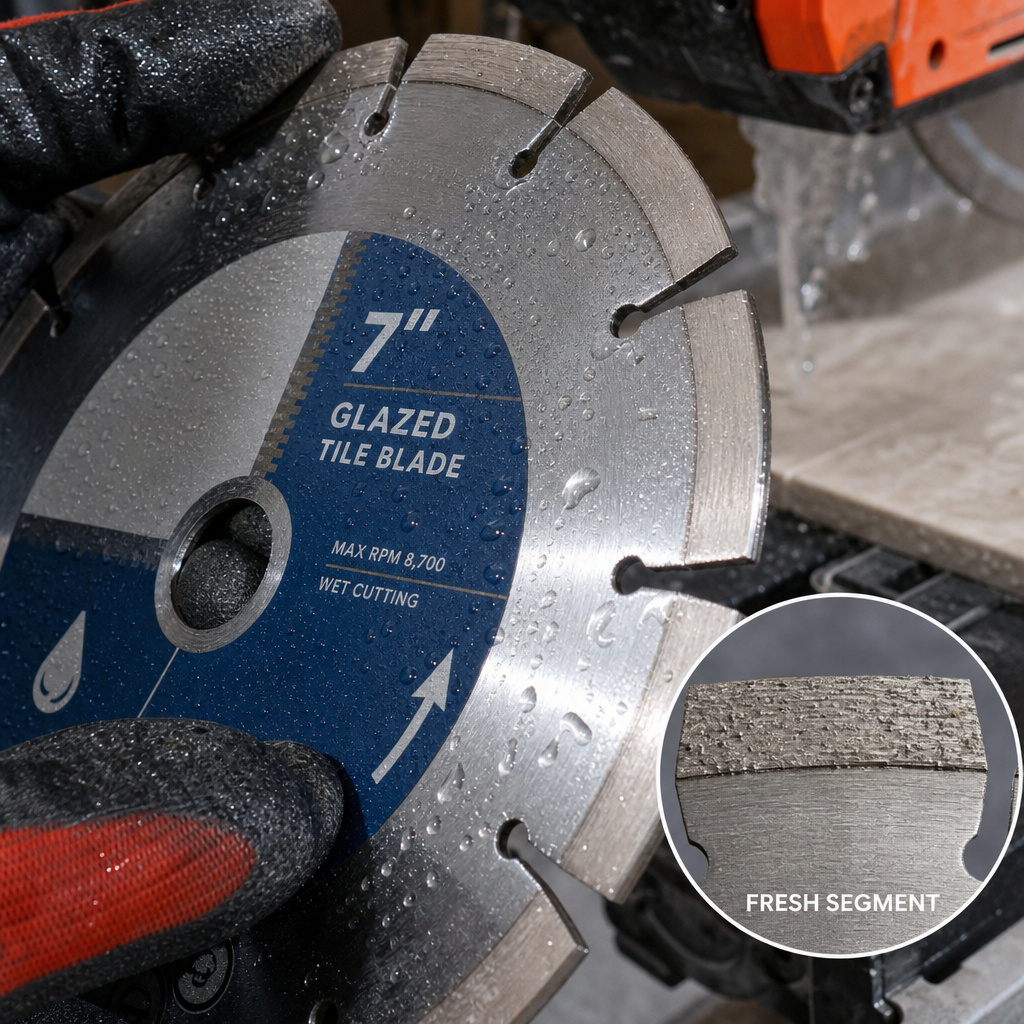
The Blade: This is not the place to use the blade that came with the saw. Invest in a high-quality continuous-rim diamond blade rated for your material. A “turbo” or segmented rim will chip ceramic and porcelain. For general use, a blade marked for porcelain/ceramic works. For natural stone, get a stone-specific blade. They’re cut differently.
The Consumables:
- Water: Use clean tap water. Never use dirty water from a previous project; the suspended grit acts like sandpaper on the pump.
- Duct Tape: The blue painter’s tape crowd is wrong here. You need the stronger adhesive of standard duct tape to bind the tile surface.
- Marking Tool: A china marker (grease pencil) or a fine-point permanent marker. Pencil will wash off.
- Straightedge: A metal ruler or speed square for layout.
- Tile File or Sanding Block: A carborundum tile file or 120-grit aluminum oxide sandpaper for dressing edges.
- Push Stick: A scrap of wood or a dedicated plastic push stick for guiding small pieces.
Workspace: A sturdy worktable outdoors or in a garage is ideal. The spray zone is about three feet in front of the saw. Protect anything you don’t want coated in fine grey dust.
How do you set up and calibrate your wet saw?
A wobbly saw or a misaligned fence guarantees crooked cuts. This takes ten minutes and saves hours of frustration.
First, position the saw. The feet must contact the table evenly. Rock it corner to corner; if it wobbles, shim under the feet with cardboard. An unstable saw will vibrate, causing the blade to wander and create a cut that’s wider than the blade, a phenomenon called “kerf wander.”
Next, check the fence for square. Place a known-square tile or a framing square against the fence and bring it to the blade. The gap between the square and the blade should be consistent from front to back. If it’s not, most fences have adjustment screws. Loosen them, tap the fence true, and re-tighten.
A fence out of square by just 2 degrees over a 12-inch tile will produce an error of nearly 1/4 inch at the far end, enough to throw off your entire tile layout and grout lines.
Now, fill the reservoir. Plug the drain, then pour in clean water until the pump intake is fully submerged, typically just below the table surface. Don’t overfill past the overflow mark. Turn on the saw for a few seconds to prime the pump and verify water is flowing onto the blade. You should see a steady drip or stream hitting the blade near its base.
Finally, do a test cut on a scrap tile. This verifies your setup and gets you accustomed to the feed pressure. Mark a line, tape it, and make a cut.
Inspect the edge. It should be smooth, with no large chips. If the blade drifts away from your line, your fence isn’t square or you’re applying uneven pressure.
How do you make a perfectly straight cut?
The sequence matters more than strength. Follow it exactly.
- Mark and Tape: Measure and mark your cut line clearly across the face of the tile. Then, apply a strip of duct tape directly over the line, pressing it down firmly. This is your chip guard.
- Position the Tile: Place the tile on the sliding table, face-up. Press the edge firmly against the fence. For a sliding-table saw, your marked line should be to the right of the blade (for a right-side blade). Slide the table forward to align the mark with the blade’s cutting edge.
- Start the Saw and Feed: Turn on the saw. Wait for the blade to reach full operating speed, you’ll hear the pitch stabilize. Then, with both hands on the tile, push the table forward steadily. The blade should make a constant hissing sound. If the motor pitch drops, you’re pushing too fast. Slow down.
- Consequence of rushing: Forcing the tile glazes the diamond blade. The diamonds get hot, the metal bond around them softens, and the diamonds pull out. The blade will cut progressively slower and generate more heat, which can crack delicate tiles.
- Support and Finish: As the blade nears the back edge of the tile, use your left hand to support the cut-off piece. Apply gentle upward pressure so it doesn’t sag and snap. In the last half-inch, ease your forward pressure to minimize exit chipping.
- Retract and Inspect: Once the cut is complete, slide the table fully back toward you. Turn off the saw and wait for the blade to come to a complete stop before removing the tile. Peel off the duct tape and inspect the edge.
| Problem | Likely Cause | Immediate Fix |
|---|---|---|
| Chipping on top edge | Blade is dull or wrong type; no duct tape. | Apply tape. If persistent, replace blade with continuous-rim type. |
| Cut veers off line | Fence not square; uneven hand pressure. | Re-square fence. Practice steady two-handed feed on a scrap. |
| Burn marks on edge | Blade is glazed from dry or forced cutting. | Dress the blade by making several slow cuts in a soft brick or abrasive stone. |
| Slow, laborious cut | Dirty water loading the blade; dull blade. | Change water immediately. Inspect blade for worn diamond segments. |
After cutting, the edge will have microscopic roughness. Drag a tile file or sanding block along it 2-3 times to remove the sharp glaze and any tiny nibs. This prevents cuts during handling and helps the tile fit snugly against its neighbor.
What about diagonal, L-shaped, and other complex cuts?
The wet saw can handle more than straight lines. The principles change slightly.
Diagonal Cuts (45-degree for corners): You use the miter guide, not the fence. Loosen the miter lock, set the guide to 45 degrees, and tighten it. The process for power tool operation is similar: you’re using a guide for precision instead of freehanding. Place the tile against the miter guide. The challenge is that the tile has less support. You must feed even more slowly and support the tile’s entire underside with your hands to prevent vibration.
L-Shaped Notches (for outlets or corners): This requires two cuts.
1. Mark the notch on the tile face.
2. Make the first cut along the longer line, stopping precisely where the two cut lines intersect. Do not cut past the intersection.
3. Carefully slide the tile over, realign the second cut line with the blade, and make the second cut. The waste piece should fall away.
4. The key is perfect line alignment for the second cut. If you’re off, you’ll have a small uncut tab that you’ll have to nibble away with pliers, which usually chips the tile.
Curved or Circular Cuts: A wet saw cannot make curved cuts. For pipes or curves, you use a different tool, an angle grinder with a diamond blade or a tile nipper. Don’t try to maneuver the tile to cut a curve; you’ll shatter it.
For glass tile, everything slows down. Use a specialized glass-cutting diamond blade, feed at half your normal speed, and ensure the tile is fully supported on the table. The glass will want to chip at the exit point, so ease up on the pressure dramatically at the end. I ruined two sheets of expensive mosaic glass by treating it like ceramic. The third sheet, cut with a dedicated blade and glacial pace, was perfect.
How do you troubleshoot common wet saw problems?
You will encounter issues. Here’s how to diagnose them on the spot.
Problem: The blade is wandering or cutting a wide, wavy kerf.
This is almost always a setup issue. Stop cutting.
1. Check that the blade is tightened securely on the arbor. A loose blade will wobble.
2. Verify the fence is square to the blade.
3. Check for play in the sliding table mechanism. If the table rocks side-to-side, the bearings or slides may be worn. On a rental saw, switch it out.
Problem: Excessive chipping, even with tape.
First, check your blade. A dull or glazed blade is a top culprit. Look at the diamond segments. If they look smooth and shiny, not gritty, the blade is glazed. Dress it with a brick.
Second, check your water flow. Is the pump spraying enough water directly onto the blade at the point of cut? Debris can clog the outlet tube.
Third, you might be feeding too fast. Slow down. Let the diamonds abrade, don’t force them to plow.
Problem: The motor bogs down and smells hot.
You are forcing the cut, the blade is dull, or the water is absent. Immediately stop, turn off the saw, and let it cool. Check for water flow. Feel the blade hub (carefully, after it stops!). If it’s very hot, you likely ran it dry even briefly. This can damage the motor bearings. Change the water, check the blade, and proceed at a much slower pace.
What’s the right way to maintain your wet saw and dispose of waste?
The job isn’t done when the last tile is cut. Proper cleanup extends the life of your tool and is responsible.
Saw Maintenance:
- Unplug the saw.
- Drain the water reservoir completely. Tip the saw to get all the water out.
- Use a wet/dry vacuum or a rag to remove the thick slurry from the tray and the underside of the table. This slurry, if left to dry, hardens into a concrete-like paste that seizes up moving parts.
- Wipe down the blade guard, fence, and table with a damp cloth.
- Store the saw indoors. Letting it freeze with water inside can crack the pump housing.
Slurry Disposal:
Do not pour slurry down a household drain or onto the ground. The fine tile dust (silica) will settle and harden in your pipes or storm drain.
* Let the slurry settle in the reservoir or a bucket for several hours.
* Carefully pour off the clearer water from the top.
* Scoop the thick sludge at the bottom into a heavy-duty plastic bag, tie it closed, and dispose of it with your regular solid waste. It’s inert and non-toxic, but it’s a mess.
A sharp blade is a safe blade. A dull blade requires more force, increases kickback risk, and produces poor results. Learn the signs of a dull blade and know when to replace it, just as you would for edger blade replacement.
Frequently Asked Questions
Can you use a wet saw without water?
No. Never. The water cools the diamond blade. Without it, the friction heat will soften the metal bond holding the diamonds in place. The diamonds will fall out, permanently ruining the blade in under a minute. The tile can also overheat and crack.
What type of blade is best for porcelain tile?
Use a continuous-rim diamond blade specifically rated for porcelain. Porcelain is denser and harder than ceramic. A general-purpose blade will cut slowly, chip the edges, and wear out quickly. The label will say “for porcelain” or “porcelain/ceramic.”
Why is my wet saw chipping the back edge of the tile?
This is called exit chipping. It happens when the blade pushes through the last unsupported bit of material. To minimize it, ease up on your forward pressure in the last half-inch of the cut. Also, ensure the tile is fully supported on the table, don’t let it cantilever off the edge.
How often should I change the water in the saw?
Change it whenever it looks like grey milk. For a typical bathroom project, that might be once or twice. For a large floor, change it every 20-30 linear feet of cutting. Clean water cools better and keeps the blade cutting freely. Dirty, gritty water reduces cutting efficiency by up to 40 percent.
Can I cut metal or wood with a wet saw?
Absolutely not. A diamond blade is designed to abrade hard, brittle materials like tile and stone. Cutting metal or wood will clog the diamond segments with soft material, rendering the blade useless for tile. It’s also dangerous, as the blade can grab and kick back pliable materials.
The Bottom Line
A wet saw is the right tool for clean, accurate tile cuts, but it demands respect for its rules. Water is mandatory, not optional. Feed speed is about patience, not power. And the simple act of applying duct tape is the difference between a professional edge and a chipped mess.
Remember to support those cut-off pieces, change the slurry-filled water before it slows you down, and take the ten minutes to square your fence. Those small disciplines add up to a finished project where every tile fits, every grout line is even, and nothing needs to be hidden in a corner. Now go make the cut.