Can You Cut Aluminum With a Miter Saw? The Real Answer
This post contains affiliate links. As an Amazon Associate, we earn from qualifying purchases.
Yes, you can cut aluminum with a standard miter saw, but it requires three specific things: a carbide-tipped blade designed for non-ferrous metals, absolute secure clamping of the workpiece, and a slow, lubricated cutting feed. The miter saw’s high RPM is acceptable only if the blade is explicitly rated for that speed on aluminum.
Most people grab their wood-cutting blade, clamp the aluminum halfway, and push through like it’s pine. The blade loads up with melted aluminum in three cuts, the workpiece chatters and kicks, and you’re left with a ragged edge that looks chewed. The tool isn’t wrong; the setup is.
This guide walks through the exact blade specs that work, the non-negotiable safety steps most articles gloss over, and the realistic limitations of using a woodworking tool for metal. We’ll also cover when you should just use a different saw.
Key Takeaways
- Never, ever use a standard wood-cutting blade. The positive hook angle and tooth geometry will grab the aluminum, causing violent kickback and loading the gullets with melted metal.
- Clamping is not a suggestion. You need two heavy-duty bar clamps minimum. Hand-holding is a direct path to the emergency room because aluminum will grab the blade and spin.
- Lubrication is mandatory for more than one cut. Without cutting fluid or wax, heat builds up rapidly. By the third cut on a 1/8-inch thick angle, the aluminum can start to weld itself to the blade teeth.
- A miter saw is best for angles and repeat cuts on extrusions. For thick plate, sheet stock, or high-volume work, a bandsaw or metal-cutting chop saw is faster and easier on your tool.
- The saw will be fine for occasional use, but the bearings and motor aren’t designed for constant metal dust. Clean the saw thoroughly after an aluminum project to prevent abrasive wear.
Cutting aluminum on a miter saw requires a blade with a Triple Chip Grind (TCG) and a negative or zero hook angle. This tooth design shears the material cleanly instead of grabbing it, and the carbide tips withstand the abrasiveness of aluminum oxide. A 10-inch blade should have 80 to 100 teeth, and it must be explicitly rated for high-RPM (3000-5000) non-ferrous metal cutting.
What Blade Do You Need to Cut Aluminum?
The blade is the only thing standing between a clean cut and a disaster. This is the single most important purchase.
A wood blade has teeth that lean forward (positive hook angle) to aggressively bite and pull the material into the cut. On aluminum, those teeth act like tiny grappling hooks. They dig in, the soft metal deforms around them, and the resulting friction generates heat instantly.
The aluminum gums up in the blade’s gullets, the cut binds, and the saw can kick the workpiece back at you with serious force. I learned this the expensive way, trying to trim a piece of 6061-T6 channel for a shed project. The Freud LU80M wood blade I had on there loaded up on the second cut, screamed, and threw the two-foot chunk of aluminum off the table so hard it dented my garage door. The blade was ruined, coated in a silvery paste.
You need a blade built for non-ferrous metals like aluminum, brass, and copper. Look for these three specs on the package:
- Carbide-Tipped with Triple Chip Grind (TCG): The teeth are a mix of flat-top rakers and angled cutters. This design shears the metal instead of ripping it, reducing heat and producing a cleaner edge. Brands like Diablo (D1080N), Freud (LU83M010), and DeWalt (DW3128P5) make solid options.
- High Tooth Count: More teeth mean a smoother cut. For a 10-inch blade, aim for 80 to 100 teeth. For a 12-inch, 100 to 120. Thinner material needs more teeth per inch.
- Negative or Zero Hook Angle: The teeth are neutral or lean slightly backward. This prevents the grabbing action and provides a controlled, pushing cut.
| Blade Spec | Why It Matters for Aluminum | What Happens If You Ignore It |
|---|---|---|
| Triple Chip Grind (TCG) | Shears metal cleanly; reduces heat and gumming. | Blade loads with melted aluminum, cuts bind, edge is ragged. |
| Negative Hook Angle (0° to -5°) | Prevents the blade from grabbing and pulling the workpiece. | High risk of violent kickback; workpiece can be thrown. |
| 80+ Teeth (10-inch blade) | Produces a smooth, burr-minimized cut on thin to medium stock. | Fewer teeth tear the metal, leaving a rough edge that requires extensive filing. |
| Non-Ferrous Metal Rating | Carbide formulation and brazing are designed for aluminum’s abrasiveness. | Blade dulls extremely quickly; carbide tips can fracture and detach. |
The blade must also be rated for your saw’s RPM. Most miter saws spin at 3,800 to 5,000 RPM. The packaging will state a maximum safe RPM; ensure it’s above your saw’s no-load speed.
Is It Safe to Use a Miter Saw on Aluminum?
With the correct setup, yes. With a typical woodworking mindset, absolutely not. The safety protocol shifts dramatically.
Before you start: Hot, sharp aluminum chips are ejected at high speed and can embed in skin or eyes. The workpiece must be clamped on both sides of the cut; if it spins, it becomes a blunt projectile. The blade and cut area get hot enough to cause burns within seconds.
Your personal protective equipment (PPE) is non-negotiable. Safety glasses aren’t enough. You need a full face shield.
Those tiny, needle-like chips fly everywhere. Hearing protection is also critical—the cutting whine is several decibels higher pitched than cutting wood. Wear a long-sleeve shirt and heavy gloves when handling the cut metal, as the edges can be deceptively sharp.
The clamping strategy is what separates a safe job from a trip to urgent care. One clamp is inadequate.
You need two independent clamps securing the workpiece firmly against the fence and down to the table. The vibration from cutting metal is different, and a seemingly secure piece can walk its way into a bind. For longer extrusions, use a third clamp on the waste side of the cut to keep it from sagging and pinching the blade on the way through.
Step-by-Step: How to Cut Aluminum on a Miter Saw
Follow this sequence exactly. Skipping a step compromises the cut and your safety.
- Power Down and Swap the Blade. Unplug the saw. Remove the wood blade and install your non-ferrous metal blade. Tighten the arbor nut securely. This is also a good time for basic miter saw operation checks, like ensuring the fence is square.
-
Measure, Mark, and Clamp. Mark your cut line with a fine-point marker or scribe. Position the aluminum against the fence. Apply two bar clamps—one on each side of the blade path—tightening until the workpiece cannot be moved by hand. Double-check that the clamps won’t contact the blade at any point in its travel.
-
Apply Lubricant. Spray a light stream of cutting fluid (like Tap Magic) or even WD-40 directly onto the marked cut line. Don’t flood it; a light coat is sufficient. This drastically reduces friction and heat.
- Make the Cut. Put on your face shield and hearing protection. Plug in the saw. Start the motor and let it reach full speed. Lower the blade smoothly and steadily into the material. Do not force it. Let the teeth do the work. You’ll hear a higher-pitched, consistent whine—that’s normal. If the sound labors or changes pitch, you’re feeding too fast.
- Retract, Inspect, and Clean. Once the cut is complete, release the trigger, keep the blade down, and let it come to a complete stop before raising it. Unclamp the workpiece and inspect the edge. It should be relatively clean with minimal burr. Immediately brush or vacuum the aluminum chips from the saw table and blade. Leaving them there accelerates corrosion and can scratch future workpieces.
If you’re doing multiple cuts, reapply lubricant every two to three cuts. Feel the blade hub near the arbor after a cut—if it’s too hot to touch, let the saw cool down. You’re overheating the blade and the saw’s bearings.
What Are the Best Alternatives to a Miter Saw?

A miter saw excels at precise 90-degree and angled cuts on aluminum extrusion. For anything else, a different tool is usually faster, safer, and better for your miter saw’s longevity.
For straight cuts on sheet aluminum or plate, a circular saw with a non-ferrous blade guided by a straightedge is far more manageable. Trying to maneuver a 4×8 sheet on a miter saw table is awkward and dangerous.
For cutting thick aluminum block or large-diameter pipe, a bandsaw is the king. The slower speed and continuous cutting action remove heat efficiently and produce almost no burr. A portable bandsaw (like a Milwaukee M18 Fuel) with a bi-metal blade is perfect for this.
For demolition-style cuts or notching, an angle grinder with a dedicated aluminum-cutting disc works. These are resin-bonded discs filled with abrasive grit, not the standard masonry discs. Never use a standard abrasive disc—it will load up with aluminum and can shatter.
A dedicated metal-cutting chop saw (a “cold saw”) with a toothed blade or an abrasive saw is the professional’s choice for volume work. It’s built for the heat, dust, and rigidity required.
Common Problems and How to Fix Them
Even with the right blade, things can go sideways. Here’s what to watch for.
Problem: The blade gums up and the cut stalls.
Cause: Feed rate is too fast, lack of lubrication, or the blade is dull.
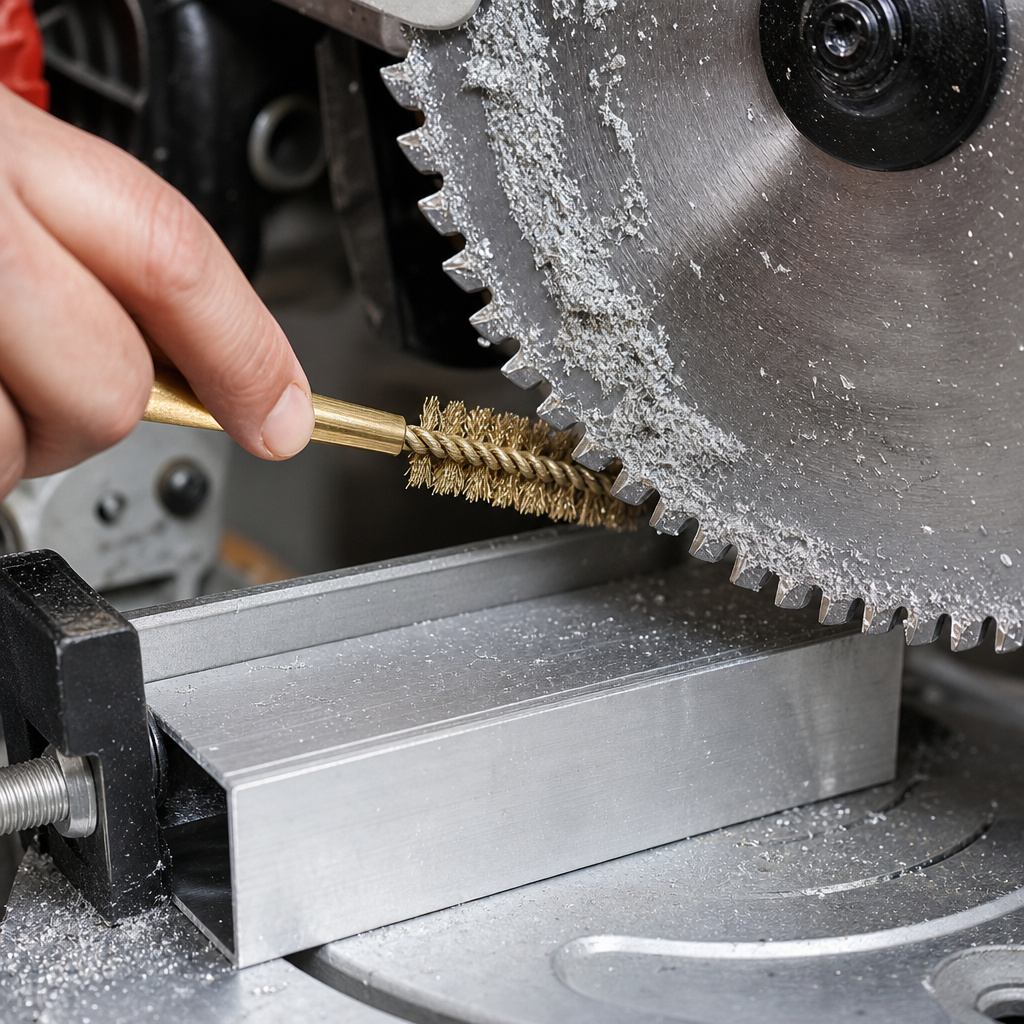
Fix: Stop the saw. Let everything cool. Clean the gummed aluminum from the blade teeth with a brass brush (steel will damage the carbide). Apply more lubricant, and slow your feed rate to a crawl on the next cut. If it persists, the blade is likely dull.
Problem: The cut edge is rough and torn.
Cause: Blade has too few teeth for the material thickness, or teeth are dull.
Fix: For thin sheet aluminum (under 1/16″), you need a blade with a very high tooth count. A 10-inch 80-tooth blade is a minimum. For a smoother finish, step up to a 100-tooth blade. Also, ensure you’re not forcing the cut.
Problem: Excessive burr on the back side of the cut.
Cause: This is common and indicates the blade is tearing the metal slightly as it exits. A zero-clearance insert can help support the material.
Fix: Use a fine file or deburring tool to remove the burr. You can minimize it by placing a sacrificial piece of wood behind the aluminum to support the fibers during the cut’s final millimeter.
Problem: The workpiece vibrates or “sings” during the cut.
Cause: Inadequate clamping or a workpiece with a hollow profile (like tubing) that resonates.
Fix: Add more clamping pressure or a third clamp. For tubing, stuffing the hollow section with scrap wood can dampen the vibration and provide internal support, preventing the walls from collapsing.
Will Cutting Aluminum Ruin My Miter Saw?
For occasional DIY projects, no. Your saw will be fine if you clean it thoroughly afterward. For weekly or daily use, yes, you will accelerate wear.
The aluminum dust is abrasive. It’s not as bad as steel dust, but it’s harder than wood dust. It will get into the saw’s carriage slides, the elevation pivot, and the motor bearings. Over time, this acts like lapping compound, wearing down surfaces and creating slop.
The motor also works harder. Cutting metal creates more resistance than wood. While a well-tuned saw can handle it, you’re adding thermal and mechanical stress that the design didn’t primarily account for.
After an aluminum cutting session, you must clean the saw. Use compressed air or a vacuum to remove all dust from every crevice. This is a critical step in overall saw blade cleaning and tool maintenance. Wipe down the table and fence with a dry rag to prevent the dust from oxidizing and staining or pitting the surface.
Frequently Asked Questions
Can I use the dust bag or my shop vacuum?
Do not use a standard shop vacuum or the saw’s dust bag. The hot, sharp metal chips can melt a plastic dust bag liner and are a serious fire hazard in a vacuum’s paper filter bag. Sweep up chips with a brush or use a vacuum specifically rated for metal dust.
What about cutting aluminum with a wood blade “just once”?
Don’t. Even once. The risk of kickback is immediate and severe. The cost of a proper blade (around $50-80) is far less than an ER visit or a new saw blade after yours gets destroyed. This is the core rule for cutting metal with a miter saw.
How thin of aluminum can I cut?
You can cut very thin sheet, down to 22-gauge, but it requires extra care. The thin material can vibrate and tear. Sandwich it between two pieces of sacrificial plywood (a “sacrificial sandwich”) and cut through the whole stack. This supports the aluminum and yields a perfectly clean edge.
My saw has a variable speed dial. What RPM should I use?
If you have the luxury of variable speed, set it to the lowest setting that still allows the blade to cut without bogging down. Often this is around 2,000-3,000 RPM. Slower speeds generate less heat. If your saw is single-speed (most are), just ensure your blade is rated for that high RPM.
Can I cut other metals with this setup?
The same non-ferrous blade will work on brass and copper. Do not attempt to cut steel, stainless steel, or any ferrous metal. That requires a different, harder blade specifically for ferrous metals and often a much slower saw speed to prevent overheating the blade.
The Bottom Line
A miter saw is a capable tool for cutting aluminum extrusion, angle, and tube when you need precision angles. Its success hinges entirely on using a dedicated non-ferrous metal blade, clamping like the workpiece is trying to escape, and lubricating the cut. It’s a methodical process, not a fast one.
For more than a few cuts, or for materials thicker than 1/4 inch, reach for a bandsaw or a metal-cutting circular saw. You’ll get better results faster and save your miter saw for the woodwork it was born to do. Remember the rule: the right tool for the job is usually the one designed for it, but with the right knowledge, you can safely bend the rules on occasion.