How to Square a Miter Saw in 7 Steps (Stop Wasting Wood)
This post contains affiliate links. As an Amazon Associate, we earn from qualifying purchases.
Squaring a miter saw means making three relationships perfectly perpendicular: the blade to the table, the blade to the fence, and the fence to the table. You’ll need a combination square, a speed square, feeler gauges, and the saw’s hex keys. The process is a sequence of checks and small adjustments, starting with the table and ending with the 45-degree detents.
Most people grab their square and start tweaking the fence bolts immediately. That’s the wrong order. You’re trying to align a three-dimensional system, and if the table isn’t flat or the bevel isn’t at zero, adjusting the fence just masks the real problem. The joint will still be off, just in a different way.
This guide walks through the correct sequence. We’ll cover the five essential checks, the specific adjustment points on common saws like DeWalt and Makita, and a final verification trick that doesn’t lie.
Key Takeaways
- The table flatness is the foundation. A 0.010” dip or hump throws off every other measurement, and you can’t adjust it out with the fence.
- Adjust in this order: 1) Blade to Table (Bevel), 2) Fence to Blade (Miter), 3) Miter/Bevel Angle Indicators. Skipping steps guarantees repeat visits.
- The fence on a DeWalt DWS780 adjusts with four bolts on the back; a Ryobi TSS103 often uses two. Overtightening these bows the aluminum fence inward.
- The “flip test” is the ultimate truth-teller. Cut a board, flip one piece, and butt the cuts together. Any gap is twice your saw’s error on a single cut.
- Calibration isn’t permanent. Check squareness every few months of regular use, or immediately after the saw is bumped or transported.
Before you start: This involves placing your hands near the blade and adjusting components under tension. 1) Unplug the saw or remove the battery. A accidental trigger pull with your finger near the adjustment point is a life-changing event. 2) The blade is sharp even when stationary. Handle it by the body, never the teeth, when checking square. 3) Some adjustment screws are under spring tension. Use the correct size hex key and keep your knuckles clear in case the wrench slips.
The 5 Essential Checks for a Square Miter Saw
You can’t fix what you haven’t measured. These five checks tell you exactly where the misalignment lives. Grab your combination square and a notepad.
A truly square miter saw requires three perpendicular relationships verified with precision tools. Blade-to-table squareness uses the saw’s bevel adjustment and is checked with a machinist square against the blade body, avoiding the teeth. Fence-to-blade squareness uses the miter adjustment at zero degrees and is corrected via fence mounting bolts. Table flatness is assessed with a straightedge and feeler gauges; discrepancies over 0.005 inches compromise all other adjustments.
First, blade to table. Lock the bevel at zero degrees. Raise the blade guard and place your combination square against the side of the blade—press it against the solid steel body, not a tooth.
Hold the square’s base firmly on the table. Look for light passing through. If you see a gap at the top or bottom, your bevel zero is off. That’s your first target.
Second, fence to blade. Lock the miter at zero degrees. Hold your square against the fence and the side of the blade body, again avoiding the teeth. A gap here means the fence is out of alignment. This is the most common adjustment, but it’s not the first one you make.
Third, table flatness. This one gets missed. Place a metal straightedge or the edge of your level across the table, left to right and front to back. Slide a 0.002” feeler gauge underneath.
If it slides freely anywhere, you have a dip or a hump. More than 0.005” of variation is a problem. You can’t adjust a warped table. On a cast aluminum table, it might mean the saw was dropped.
Fourth, fence to table. This sounds redundant, but it’s a separate check. Place the square on the table and against the vertical face of the fence. The fence should be perfectly vertical. If it leans forward or back, your crosscuts will have a slight back-bevel even with the saw set to zero.
Fifth, the 45-degree detents. Use a speed square or a dedicated 45-degree triangle. Check both the miter and bevel 45-degree stops. These are controlled by separate positive stop screws, usually labeled or shown in the manual. They’re often out of spec from the factory.
What Tools You Actually Need (And What’s Marketing)
A $5 plastic square from a big-box store is worse than useless—it’s misleading. The molding seams are often out of square. You need tools that are more accurate than the tolerance you’re trying to achieve.
- A True Square: A 6” or 12” combination square with a hardened steel blade is the minimum. A precision machinist square (like a Starrett) is better. Test it before you trust it: draw a line with it, flip it, and draw another line next to the first. If the lines are parallel, it’s good. If they diverge, the square is out.
- A Speed Square: Not for speed, but for its guaranteed 45-degree angle. The Swanson Big 12 or a similar metal model is reliable. The plastic ones can warp.
- Feeler Gauges: A set that goes down to 0.0015”. You use these for checking table flatness and for quantifying how much something is out of square. A 0.005” gap feels huge when you’re holding a feeler gauge.
- The Right Hex Keys: Use the ones that came with the saw, or a high-quality bondhus set. A worn, rounded-off hex key will strip the soft aluminum adjustment screws, turning a simple calibration into a drill-and-tap operation.
- Dial Indicator (Optional, but Revealing): Mount it on a magnetic base. You can measure blade runout (wobble) at the arbor and fence deflection when you lock the miter. It tells you things your square can’t. I bought a cheap one years ago for aligning a drill press. Now I use it for every saw calibration.
The tool you don’t need? A laser guide. It’s for cut line alignment, not calibration. It can be out of sync with the blade itself, giving you a false sense of security.
Step-by-Step Calibration Sequence
This is the meat of it. Follow the steps in order. Rushing to step four because you’re sure it’s the fence is how you waste an afternoon.
Step 1: Unplug and Clean Everything
Power off. Battery out. Blow out all sawdust from the miter detent track, the bevel pivot, and the fence base. Wipe the table and fence with a dry rag, then a light pass with isopropyl alcohol. Pitch buildup on the blade body can throw off your square measurement. Clean the blade with a dedicated cleaner or simple green. A clean saw is a calibratable saw.
Step 2: Check and Shim the Table (If Possible)
Use your straightedge and feeler gauges. Map the table. Note any high or low spots.
| Table Condition | Possible Cause | Corrective Action |
|---|---|---|
| Dip in the center | Casting stress relief or wear | Place a shim (aluminum tape) under the workpiece for critical cuts. Permanent fix may require milling. |
| High spot near fence | Overtightened fence bolts | Loosen fence, re-tighten in a star pattern to specified torque. |
| Overall warp | Impact or manufacturing defect | Contact manufacturer if under warranty. Otherwise, consider it a known error and shim workpieces. |
If the table is out more than 0.010”, your saw will never cut a perfect joint across its full width. You’re working around a defect.
Step 3: Square the Blade to the Table (0-Degree Bevel)
Lock the bevel. Use your combination square against the blade body. See a gap at the top? The blade tilts away from the fence. Most saws have a “bevel positive stop screw” or an “adjustable detent block” for the zero position.
On a DeWalt, it’s often a hex screw behind the bevel lock handle. On a Makita LS1019L, you loosen a locknut and turn an adjustment bolt near the pivot. Turn it a quarter-turn, re-lock the bevel, and check again. This is a slow, iterative process. Patience is the tool here.
Step 4: Square the Fence to the Blade
Now, with the bevel square, lock the miter at zero. Check with your square against the fence and blade.
If it’s out, find the adjustment bolts. On most saws, they’re on the back of the fence assembly. A DeWalt DWS780 has four.
A Ryobi often has two. Loosen them just enough so you can tap the fence with a rubber mallet. Don’t remove them.
Here’s the critical part: tighten them in a cross pattern, a little at a time. Tighten one bolt 1/8th of a turn, then the one diagonally opposite. Check square after each pass.
Cranking one side down first will twist the fence. This is where most people ruin the calibration they just tried to fix. Once you understand this principle, you can apply it to other tools, like setting up a table saw for precise cuts.
Step 5: Calibrate the Miter and Bevel Angle Indicators
Your saw is now mechanically square. But the pointer on the miter scale might not say “0”. Loosen the screw holding the pointer, align it with the zero mark, and re-tighten. For the bevel scale, there’s usually a separate adjustment screw near the scale itself.
Now check the 45-degree stops. Swing the miter to the 45 detent. Use your speed square between the blade and fence.
If it’s off, find the 45-degree positive stop screw—it’s usually adjacent to the zero-degree stop. Adjust, re-check. Repeat for the 45-degree bevel.
Brand-Specific Adjustment Points
The principles are universal, but the screws are in different places. Here’s a cheat sheet.
| Saw Model | Bevel 0° Adj. | Fence Adj. | Miter Scale Adj. | Notes |
|---|---|---|---|---|
| DeWalt DWS780 | Hex screw behind bevel lock | 4 bolts on fence back | Pointer set screw | Fence bolts are soft. Use correct size key. |
| Makita LS1019L | Locknut & bolt near pivot | 2 bolts under table front | Pointer set screw | Sliding mechanism must be clean for accuracy. |
| Ryobi TSS103 | Screw inside bevel detent plate | 2 bolts on fence back | Pointer set screw | Fence is less rigid. Check square after heavy use. |
| Bosch GCM12SD | Allen screw on bevel arm | 3 bolts on fence back | Dial set screw (under cap) | Glide system requires table be perfectly level left-right. |
I learned the hard way about the DeWalt’s soft bolts. I was rushing a fence adjustment on a DWS780, used a slightly worn hex key, and rounded out the socket. Had to drill it out and re-tap the hole. The job that should have taken 10 minutes consumed three hours and a trip to the hardware store. Now I inspect my hex keys before every calibration.
The Flip Test: Your Final, Unforgiving Judge
All your careful adjustments mean nothing if the saw doesn’t cut square in the real world. The flip test tells you the truth.
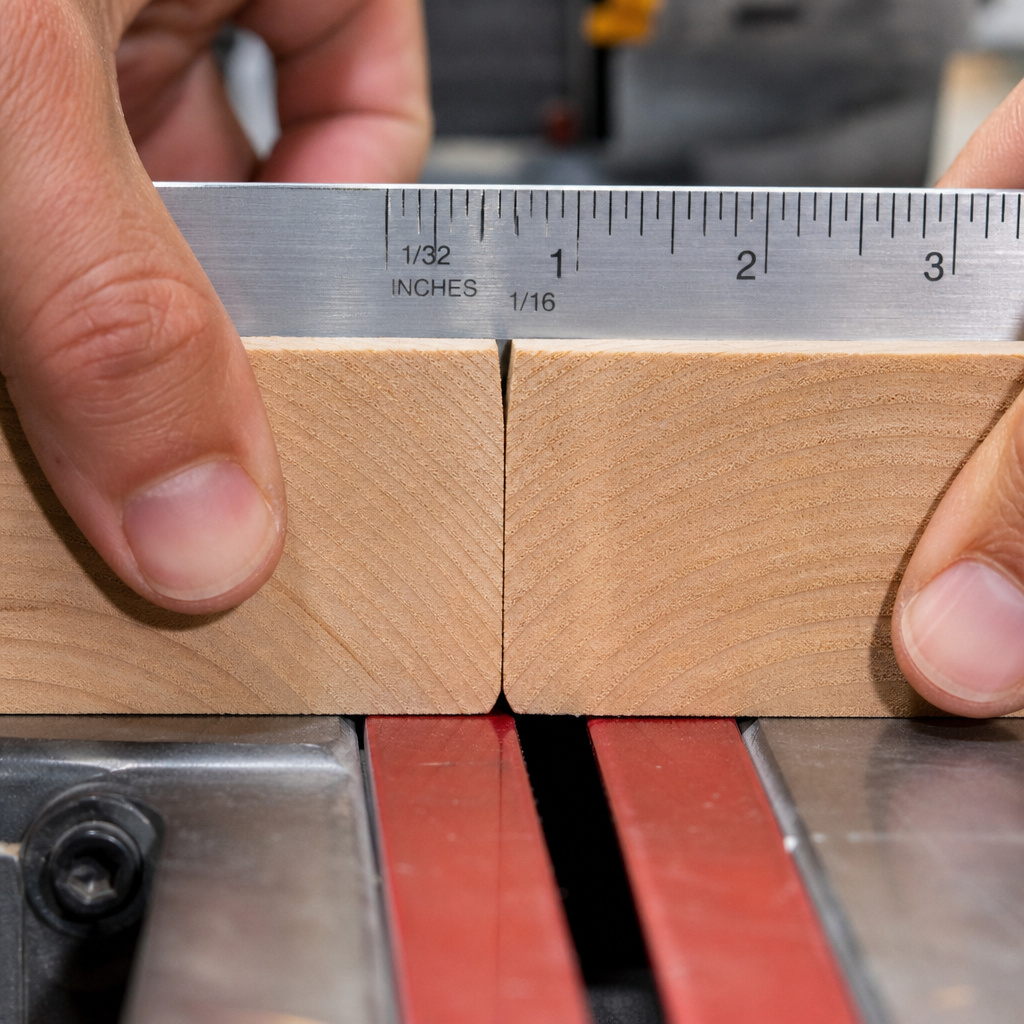
Cut a 12-inch piece of 1×4 or 2×4. Make the cut straight and smooth. Without moving the fence or the miter setting, take the offcut, flip it 180 degrees end-over-end, and push the two freshly cut ends together against a straightedge.
Look at the seam where the two cuts meet. If you see a V-shaped gap, your saw is not square. The width of that gap at the open end is roughly twice the error per cut. A 1/16” gap means each cut is off by about 1/32”. That’s enough to ruin a picture frame.
If the test passes, your saw is square. Do a happy dance. Then write the date on a piece of masking tape and stick it to the saw’s base. That’s your calibration timestamp.
When Squaring Isn’t Enough: Troubleshooting
Sometimes you follow all the steps and the cuts are still bad. The problem might be deeper.
- Blade Wobble: This isn’t about squareness, but parallelism. Raise the blade, spin it by hand, and watch the rim relative to a fixed point. More than 0.010” of runout means a bent arbor, a damaged blade mounting flange, or a warped blade. Test with a different blade first.
- Fence Flex: Push laterally on the fence with moderate hand pressure. If it moves, the structure is inadequate. This is common on lighter-duty saws. The only fix is to support the workpiece differently or upgrade the saw. This is a key reason professionals choose a sliding compound miter saw with a more rigid fence design.
- Detent Wear: After years of slamming into the stops, the detent notches wear. The saw doesn’t lock positively at zero or 45. You’ll feel a “clunk” instead of a crisp “click.” This requires replacing the detent plate or the entire miter index assembly.
If your flip-test gap appears and disappears randomly, check the miter lock. A worn lock mechanism lets the saw head shift slightly under cutting pressure. Tighten the lock adjustment screw or replace the locking cam.
Frequently Asked Questions
How often should I square my miter saw?
Check it before any major project involving joinery. For general use, a quick flip test every month is smart. Full recalibration is needed if the saw is moved, dropped, or if you notice consistently off cuts. Seasonal temperature swings in an unheated garage can also shift things.
Can I use a carpenter’s square instead of a combination square?
You can, but you shouldn’t. A 24-inch carpenter’s square is too long to fit easily between the blade and fence, and its accuracy is often lacking for fine tool calibration. The shorter, stiffer blade of a combination square gives a more reliable reading.
My saw’s manual doesn’t show adjustment points. What do I do?
Search online for “[Your Saw Model] service manual” or “adjustment procedure.” Manufacturers like DeWalt and Makita often have more detailed service manuals available as PDFs that aren’t included in the basic user manual. These are the authoritative source.
The table is warped. Is the saw trash?
Not necessarily, but it’s limited. You can still make accurate cuts by working on a known-flat surface (like a melamine panel) clamped to the saw’s table, effectively creating a new, true reference plane. It’s a workaround, but it works.
Why are my 45-degree miter cuts for a picture frame still not meeting?
This is likely a compounding error. If your saw is off by even half a degree at both 45-degree cuts, the total error in the 90-degree corner is one full degree—a very visible gap. It underscores why checking both 45-degree stops is as important as checking zero. For complex angles like those needed for cutting crown molding, this precision is non-negotiable.
The Bottom Line
A square miter saw isn’t a luxury; it’s the baseline requirement for the tool to function as advertised. The process is systematic, not magical. Start with a dead-flat table and a true square.
Adjust the bevel, then the fence, then the indicators. Verify with the flip test. The whole sequence takes about 30 minutes the first time, and less than 10 once you know your saw’s adjustment points.
That dated piece of tape on the base isn’t just a note. It’s a record that you took control of your tool’s accuracy. Your next picture frame, deck board, or trim piece will prove it.