How to Clean a Table Saw Blade the Right Way (3 Steps)
This post contains affiliate links. As an Amazon Associate, we earn from qualifying purchases.
**
Clean a table saw blade in three steps: soak it in a solvent matched to its coating, scrub with a soft brass brush to avoid damage, and dry it completely before applying a protectant. This removes pitch and sap while preventing rust and preserving the blade’s sharpness and coating.**
Cleaning a table saw blade requires matching three things: the right cleaning solution for your blade type, a safe scrubbing tool that won’t damage the teeth or coating, and a thorough drying and protection step to prevent immediate rust. Get one wrong and you trade gunk for corrosion, or worse, you etch the steel.
Most people grab whatever harsh cleaner is under the sink when the blade starts burning wood and cutting slow. They soak it, see black stuff come off, and call it good. Two weeks later, the blade has a fine red film along the plate and the cuts feel grabby again. That’s because they stripped the protective coating and left moisture in the arbor hole.
This guide walks through the physical process of removing pitch, not just wiping the blade. You’ll learn what actually dissolves resin, why oven cleaner is a one-way ticket to a ruined blade, and how to make a clean blade stay that way through a humid summer.
Key Takeaways
- Use a dedicated blade cleaner or diluted laundry detergent. Oven cleaner and other lye-based products attack the brazing that holds carbide teeth and will strip protective coatings like Teflon.
- Scrub with the right tool: a brass or stainless-steel brush for bare steel, a stiff plastic brush or old toothbrush for coated blades. Scrubbing against the tooth’s cutting edge can dull the micro-bevel.
- Dry the blade completely within minutes of rinsing. Water left in the arbor hole or between the carbide teeth causes surface rust within 24 hours in a typical garage workshop.
- Apply a protectant immediately after drying. A light coat of a water-displacing lubricant like CRC 3-36 prevents rust and reduces friction on the next cut.
- Clean based on performance, not a calendar. A blade cutting clean pine can go months. One cutting pressure-treated lumber or cedar might need cleaning after two projects.
Pitch and resin are thermoplastic, they soften with heat and harden as they cool. During a cut, friction melts the wood sap, which splatters and sticks to the cooler blade steel. As it cools, it forms a hard, insulating layer that increases drag, reduces cutting efficiency, and causes burning. A proper cleaner dissolves this polymerized sap without damaging the underlying metal or carbide.
Before You Start: Safety is Non-Negotiable
Before you start: The blade is sharp enough to sever tendons, and the cleaning chemicals can irritate skin and lungs. Unplug the saw from the wall outlet, not just the switch. Wear heavy-duty, cut-resistant work gloves when handling the blade. Use safety glasses during scrubbing to guard against splashes and dislodged debris. Work in a well-ventilated space, like an open garage door.
I learned the glove lesson the expensive way. I was wiping down a Freud Premier Fusion blade after a cleaning, my hand slipped on the wet plate, and my thumb ran across a carbide tooth. It didn’t feel like a cut, just a hot sting. Ten seconds later, blood was dripping on the floor. A single stitch and a reminder that a sharp blade doesn’t care if you’re being careful.
Why a Clean Blade Cuts Better (The Physics of Pitch)
A dirty blade doesn’t just make messy cuts. It forces the saw motor to work harder, increases the risk of kickback, and overheats the carbide tips, which can microfracture the cutting edges.
The problem is insulation. Pitch buildup on the blade plate and in the gullets acts like a blanket. During a cut, heat generated by friction can’t dissipate efficiently through the steel.
The blade retains that heat, which then transfers back into the wood fibers at the point of contact, literally cooking them before they’re cut. That’s what causes those dark burn marks on oak and maple. A clean blade runs cooler, so the wood cuts instead of chars.
The gullets, the curved spaces between the teeth, have a specific job: to channel sawdust out of the kerf. When they’re packed with hardened resin, sawdust has nowhere to go. It gets compressed between the blade and the wood, creating more friction, more heat, and increasing the chance the workpiece binds and kicks back. Cleaning the gullets restores the blade’s geometry and its safety margin.
The 3-Step Cleaning Process (Soak, Scrub, Shine)
This isn’t a quick wipe. You’re dissolving a hardened plastic-like substance bonded to metal. Rushing it leaves residue that attracts more sawdust, putting you back at square one in a week.
Step 1: Soak to Dissolve
Your goal is full chemical contact. Don’t just spray and scrub. Place the blade flat in a disposable aluminum roasting pan or a shallow plastic tub. Pour or spray your chosen cleaner over the blade until it’s fully submerged or thoroughly coated. The liquid needs to pool in the gullets.
Let it sit. For light buildup, 10 minutes might do it. For the dark, glossy pitch from pine or pressure-treated lumber, give it a full 20. You’ll see the solution start to turn cloudy brown as the resin emulsifies. This soak does 80% of the work, trying to scrub off undissolved pitch is how you scratch coatings and round over delicate carbide edges.
Step 2: Scrub to Remove
Now you dislodge the softened gunk. The tool choice is critical.
| Blade Surface | Recommended Tool | Why It Works |
|---|---|---|
| Bare Steel Blade Plate | Brass or stainless brush | Hard enough to scrub, but softer than steel so it won’t score the surface. |
| Carbide Teeth | Nylon brush or toothbrush | Safe for the ultra-hard carbide; stiff bristles clean the complex tooth geometry. |
| Teflon/Non-Stick Coating | Plastic bristle brush | Preserves the slick coating that prevents pitch adhesion in the first place. |
Scrub in the direction the tooth cuts (usually toward the front of the tooth). Scrubbing back against that leading edge can subtly wear the sharp cutting micro-bevel. Focus on the gullets and the area right behind each tooth. Use a pick or a sliver of scrap laminate to gently pry out any stubborn chunks in the deep gullets.
Rinse the blade under warm running water if you used a water-based cleaner. If you used a solvent-based gel, wipe it off with paper towels according to the product’s instructions.
Step 3: Shine and Protect
This is the step people skip. And it’s the one that ruins blades.
Water is the enemy. You must get the blade completely, bone-dry within minutes. Use a low-lint microfiber cloth to wipe down both sides.
Then, use compressed air to blast water out of the arbor hole and from between the carbide teeth and the steel body. Hold the blade by the arbor hole and spin it, blowing air across all surfaces. Any lingering moisture will cause flash rust.
Immediately after drying, apply a protectant. I use a light spray of CRC 3-36 on a cloth, then wipe the entire blade. It leaves an invisible film that prevents rust and reduces friction. Don’t use a thick grease or sticky oil, it will collect sawdust.
What Cleaner Should You Use?
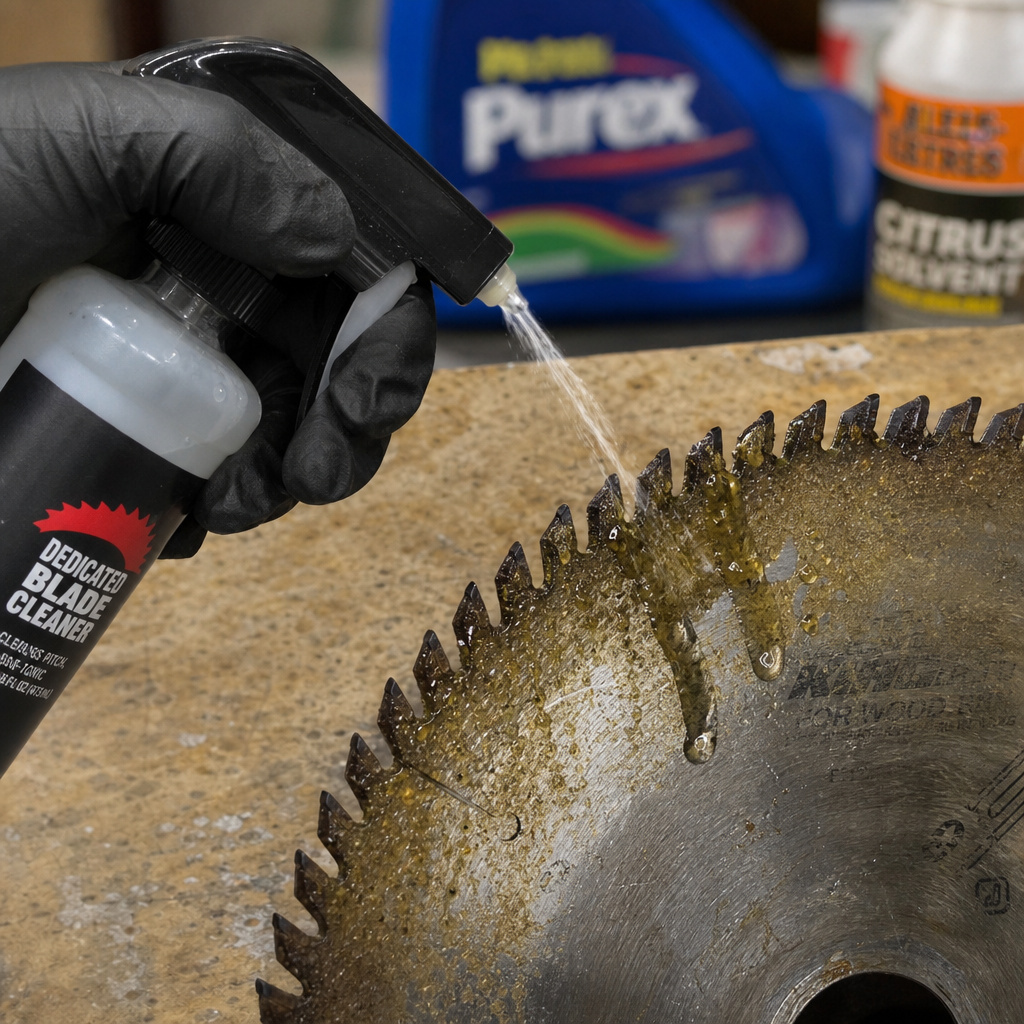
The internet is full of “miracle” solutions. Most are either ineffective or destructive. Your choice depends on what’s on the blade and what the blade is made of.
| Cleaner Type | Best For | Do Not Use On | Disposal |
|---|---|---|---|
| Dedicated Blade Cleaner (Simple Green Pro HD, CMT) | All-purpose, heavy pitch. | None. | Follow local hazardous waste rules. |
| Diluted Liquid Laundry Detergent | Light to moderate pitch, water-safe. | Blades with severe rust (can accelerate). | Dilute and pour down drain with plenty of water. |
| Citrus-Based Solvent (Goo Gone) | Sticky sap, light resin. | Coated blades (can degrade some coatings). | Take to hazardous waste facility. |
| Oven Cleaner (LYE-BASED) | NOT RECOMMENDED | ANY saw blade. | Hazardous waste. |
Oven cleaner is sodium hydroxide, lye. It’s fantastic at carbonizing organic matter. It will also aggressively attack the brass or silver brazing that bonds the carbide teeth to the steel blade body.
This weakens the joint. I’ve seen blades where the carbide tips literally fell off after a few cleanings with oven cleaner. It also strips any anti-stick coating right down to bare metal. The blade might look shiny, but you’ve just drastically shortened its life.
For most workshop situations, a dedicated cleaner or a 50/50 mix of liquid laundry detergent and hot water is the safest, most effective bet. It dissolves the pitch without the collateral damage.
Common Mistakes and How to Avoid Them
You can do the process right but still mess up the details. These are the subtle failures that cost you time and money.
- Mistaking a dirty blade for a dull one. This is the most common error. Before you spend $30 sharpening a blade, clean it. A blade caked in pitch cannot cut efficiently, no matter how sharp the teeth are. Try cleaning first. If clean cuts are still rough or burned, then consider sharpening circular saw blades.
- Leaving the blade wet. You rinse it, shake it off, and set it on the bench to “air dry.” In a 60% humidity garage, that’s an invitation for rust. The thin film of water reacts with the steel, starting oxidation within hours. Dry it like it’s going into surgery, meticulously.
- Over-tightening during reinstallation. When you put the clean blade back on the saw, snug the arbor nut firmly by hand with the wrench, then give it about a quarter-turn more. Cranking it down with all your strength can warp the blade, especially on lighter-duty saws. The nut is reverse-threaded; the blade’s rotation during use will tighten it further.
- Using steel wool or a wire wheel. These are too aggressive. Steel wool can leave behind tiny ferrous particles that embed in the steel and rust, creating speckles. A wire wheel on a bench grinder can heat the carbide tips too quickly, causing thermal cracks.
When to Clean vs. When to Sharpen or Replace
Cleaning is maintenance. Sharpening is restoration. Replacement is renewal. Don’t confuse them.
Clean your blade when:
* You see a glossy black or brown buildup on the plate or teeth.
* Cuts require more pushing force.
* The saw motor sounds labored or the cut line has burn marks.
* You’re switching from cutting resinous wood (pine, cedar) to a hard, clean wood (maple, oak).
Consider sharpening when:
* The blade is clean but cuts are still rough or tear out is excessive.
* You can see flat spots or rounding on the carbide tips with a magnifying glass.
* The blade has been cleaned several times and has a lot of life left (quality blades like Freud Diablo or Forrest can be sharpened 5-10 times).
Replace the blade when:
* Carbide teeth are chipped, missing, or severely worn down.
* The blade plate is visibly warped or has a crack (check by sighting across the plate).
* It’s a cheap, thin-kerf blade that has dulled, sharpening often costs more than a new one.
For any blade removal task, always follow proper table saw safety tips, including locking the arbor and using the correct wrench.
Frequently Asked Questions
Can I use vinegar to clean my table saw blade?
No. While acidic, vinegar is a weak rust remover, not a pitch solvent. It will do little to dissolve resin and, if left on the blade, can promote further corrosion of the bare steel. It’s the wrong tool for this job.
How often should I clean my table saw blade?
There’s no set schedule. Clean it when performance drops or visible buildup appears. A blade used only for milling hardwood might need cleaning once a year. One used for construction with pine and plywood might need it every month. Let the blade’s performance tell you.
Is it safe to clean the blade while it’s still on the saw?
Absolutely not. Never spray or brush cleaner onto a blade mounted in the saw. Liquids can run into the motor or arbor bearings, causing corrosion and failure. It also puts your hands far too close to the cutting edge. Always remove the blade first.
Will cleaning a blade make it cut like new?
It will restore it to its current sharpness. Cleaning removes the insulating barrier, so a blade that is still sharp will cut like it’s sharp. If the teeth are dull, cleaning will just reveal a dull, clean blade. It’s the first step in troubleshooting poor cuts.
What’s the best way to store blades long-term?
After cleaning and protecting, slide the blade into a dedicated blade sleeve or a cardboard blade holder. Store it vertically in a dry place, like a toolbox or cabinet. Never stack blades flat on top of each other, the teeth can chip.
The Bottom Line
Cleaning a table saw blade isn’t about making it look pretty. It’s a functional maintenance task that restores cutting efficiency, improves safety, and extends the life of a tool that costs real money. The process is simple: soak to dissolve, scrub to dislodge, dry and protect to prevent the next mess.
Skip the household chemicals that promise a shortcut. They usually lead to a damaged blade. Spend twenty minutes with the right cleaner and a brass brush. Your next cut through that expensive oak will be smooth, burn-free, and quiet. The saw will thank you, the wood will thank you, and you won’t be buying a replacement blade six months from now.
