What Is a Twist Drill Bit? Understanding Its Design & Use
This post contains affiliate links. As an Amazon Associate, we earn from qualifying purchases.
A twist drill bit is a rotary cutting tool with helical flutes, designed to create cylindrical holes. Its core job is defined by three numbers: the helix angle (typically 30°) for chip removal, the point angle (commonly 118°) for penetration, and the web thickness (20–30% of diameter) for rigidity. These specs, governed by standards like ASME B94.11M, determine what material it can cut and how long it will last.
That 30° helix angle isn’t an accident. It’s the compromise between strength and chip clearance that made the twist drill viable in 1863. Change that number by ten degrees and the bit’s entire purpose shifts, it becomes a specialist for aluminum or hardened steel.
The rest is a map of trade-offs. A thicker web fights deflection but clogs faster in deep holes. A 135° point walks less on curved surfaces but requires more thrust. This guide walks through the anatomy, the standards, and the three numbers that let you read any drill bit’s spec sheet in ten seconds and know exactly what job it was built for.
Key Takeaways
- The web thickness (20–30% of diameter) is the drill’s spine; too thin and it deflects, too thick and it binds.
- Helix angle decides chip evacuation: 30° is standard, 40° is for soft metals, 12° is for hard, stringy materials.
- The point angle controls walking and penetration; 118° is general-purpose, 135° is for harder metals and sheet stock.
- High-speed steel (HSS) is the baseline material; HSS-E (cobalt) grades like M35 add 5–10% cobalt for heat resistance in stainless steel.
- Always match the drill’s shank type, straight for chucks, Morse taper for heavy-duty drill presses, to your tool’s capacity.
The Anatomy of a Twist Drill Bit
Look at any twist drill. The shape hasn’t changed since Stephen Morse’s 1863 patent because it solves a fundamental mechanical problem: moving solid material out of a deepening hole. Every feature on that spiral steel rod has one job.
The body is the portion with the flutes. The flutes are the helical grooves that do three things: they form the cutting edges, provide a path for chips to escape, and let cutting fluid reach the tip. The margin is the narrow strip of full-diameter land left on the body after the flutes are ground. It’s the only part of the drill besides the cutting lips that touches the hole wall, and it stabilizes the bit to prevent wobble. The web is the central metal column that connects the two lands. It’s the backbone. This thickness increases toward the shank (a tapered web) to add rigidity as drill length grows.
The margin stabilizes the drill in the hole. The web is the central column that joins the lands; its thickness, usually 20–30% of the drill’s diameter, determines how much bending force the drill can withstand before it deflects off-course.
The shank is the end held by the machine. Straight shanks are common and fit into chucks. Morse taper shanks, common on bits over 1/2 inch, lock directly into a matching taper in the spindle for heavier work. The shank is often softer than the cutting portion, a deliberate choice from heat treatment that lets you turn it down in a lathe if you need to fit a smaller chuck.
The Three Defining Numbers of a Twist Drill
You can identify any twist drill’s purpose by three specifications. Get these wrong and the bit will either break, burn up, or produce a hopelessly inaccurate hole.
| Specification | Typical Value | Mechanism & Purpose | Consequence If Wrong |
|---|---|---|---|
| Helix Angle | 30° (Standard) | Controls the flute’s twist. A higher angle pulls chips out faster. | Low angle in soft metal: packed flutes, seized bit. High angle in hard steel: weak cutting edge, snapped lip. |
| Point Angle | 118° (General) | The included angle of the cutting lips. Affects point strength and tendency to “walk” on curved surfaces. | Too acute: weak point, chips easily. Too obtuse: high thrust required, walks on rounded stock. |
| Web Thickness | 20–30% of diameter | The core’s cross-section. Governs torsional rigidity and resistance to bending. | Too thin: drill deflects, hole oversize. Too thick: poor chip clearance, binds in deep holes. |
These numbers are not suggestions. They are the outcome of 160 years of empirical testing, now codified in dimensional standards like the ASME B94.11M twist drill standard. That standard defines the tolerances for straight and taper shank drills, ensuring a 1/2-inch bit from one manufacturer fits the same spindle as another’s.
Where this goes sideways: Assuming all 1/4-inch bits are the same. A 1/4-inch bit with a 40° helix and a 135° point is built for aluminum. Use it on stainless steel and the cutting edge will crumble within seconds. The diameter is just the hole size, the angles are the job description.
How a Twist Drill Actually Works (The Why Layer)
A drill bit doesn’t just scrape material away. It’s a wedge that converts rotary motion into a combined shearing and extrusion process. The cutting lips at the point shear the material, forming chips. The helical flutes then lift those chips up and out of the hole via a screw-conveyor action. This is why the helix angle is critical, it’s the pitch of that conveyor.
The chisel edge at the very center of the point doesn’t cut. It extrudes. This flat section, with a thickness of about 1.5% of the drill diameter, pushes material aside under enormous pressure. This is what causes “walking”, the bit skating across a curved surface before it bites. Split-point designs minimize this by grinding away part of the chisel edge, giving the bit a self-centering action that starts the hole exactly where you point it.
Common mistake: Forcing a drill that’s stopped producing chips. The flutes are packed. Forcing it generates heat, work-hardens the material, and almost guarantees a broken bit. Reverse out, clear the chips, and resume.
Lubrication isn’t just about cooling. In metals, cutting fluid reduces the friction between the chip and the rake face of the cutting lip. This lowers the power required and produces a cleaner shear. In wood or plastic, the fluid’s role is primarily to clear packed, gummy chips. A bit designed for metal often fails in wood because the standard 30° helix can’t evacuate long, stringy wood fibers fast enough, they jam in the flutes and create heat by friction.
Twist Drill Bit Materials and Coatings
The material behind the geometry determines the bit’s lifespan and what it can cut. The base metal is almost always a form of high-speed steel (HSS). The “high-speed” label dates to around 1900, when this alloy demonstrated it could retain hardness at the red-hot temperatures generated by fast drilling, unlike the carbon steel tools that came before.
- HSS (M2 grade): The default. It handles wood, plastic, soft steel, and aluminum. It will soften if you push it into stainless steel or hardened steel dry.
- HSS-E (Cobalt grades M35, M42): These alloys add 5–8% cobalt. Cobalt increases hot hardness, the material’s resistance to softening when hot. This is the go-to for stainless steel, cast iron, and other tough alloys. M42, with around 8% cobalt, is the premium choice for production drilling.
- Carbide: Solid carbide or carbide-tipped bits are for masonry, tile, and extremely abrasive composites. They are brittle. Use them only in rigid setups with no side load.
Coatings are a thin, hard surface layer that reduces friction and wear. They don’t make a soft bit hard; they make a hard bit last longer. Titanium Nitride (TiN) is the gold-colored coating that adds lubricity. Titanium Aluminum Nitride (TiAlN) is darker and better for high-temperature applications. A coating can triple tool life in abrasive materials, but it’s a wear layer, not a structural reinforcement. Once it’s worn through, the underlying HSS wears rapidly.
The choice of drill bit materials is a direct function of the material you’re cutting and the heat you’ll generate. For the homeowner drilling occasional holes in mild steel, HSS is fine. For a shop running production holes in stainless, the added cost of HSS-E or a coated bit pays for itself in reduced downtime and consistent hole quality.
Standards, Sizes, and How to Read the Markings
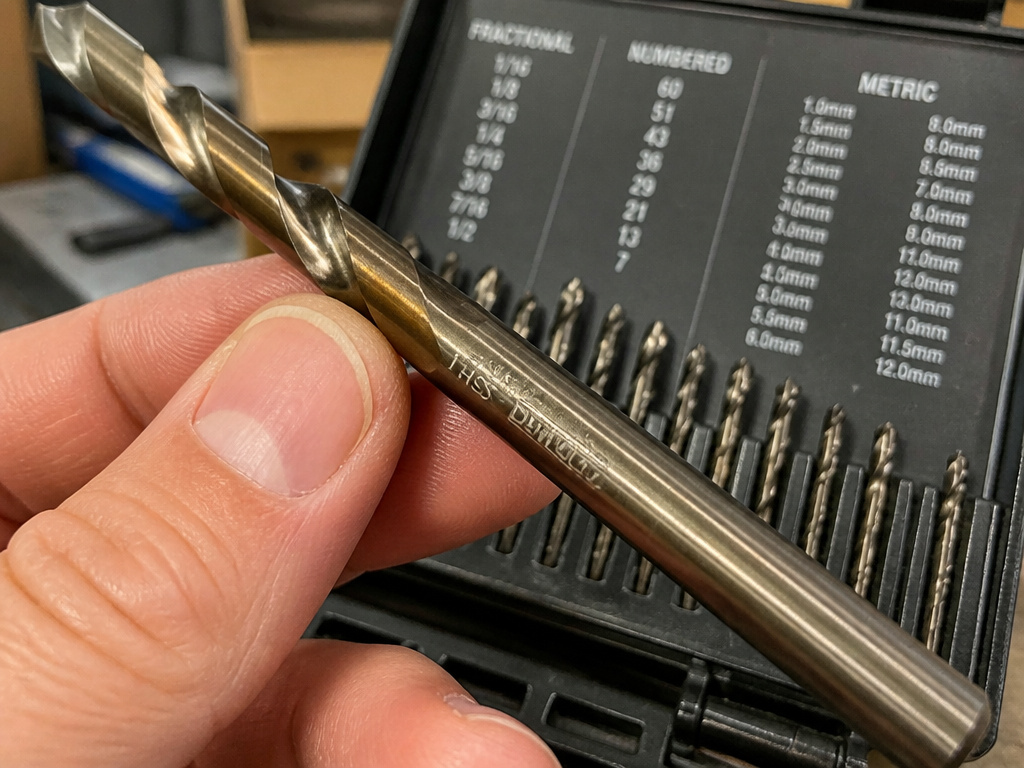
Twist drills are industrial commodities. Their dimensions are not arbitrary. The ISO 5419:1982 twist drill standard provides the international definitions and classifications. The ISO 494:2017 long series twist drills standard specifies dimensions for cylindrical shank drills with longer-than-standard working lengths.
In North America, the ASME B94.11M standard is the reference. It covers everything from nomenclature to tolerances for both inch and metric sizes. This standardization is why you can buy a 3/8″ drill bit from DeWalt, Milwaukee, or a generic brand and expect it to fit your 3/8″ chuck.
Drills with a diameter of 3mm (about 1/8 inch) and up must be marked. The standard marking includes the diameter, the material (e.g., HSS, HSS-Co), and the manufacturer’s mark. A quality bit will be clearly stamped. A bit with faint or no markings is a red flag, you have no guarantee of its material or consistency.
Sizing follows two main systems: fractional inch (1/16″, 1/8″, etc.), numbered (size #1 to #80, where #60 is 0.040 inch), and lettered (A to Z, where A is 0.234 inch). Metric sizes are straightforward (1mm, 2mm, etc.). Knowing how to navigate these sets is part of selecting a drill bit for a specific fastener or precise hole.
| Drill Type | Length-to-Diameter Ratio | Primary Use Case | Rigidity Compared to Jobber |
|---|---|---|---|
| Stub | ~3:1 | Shallow holes, limited clearance | Highest |
| Jobber | ~10:1 | General-purpose drilling | Standard |
| Long Series | ~18:1 (per ISO 494) | Deep hole drilling | Lower—requires careful feed |
The jobber drill bit is the default length for most work. The “long series” drill, defined by standards like ISO 494, has a much higher length-to-diameter ratio for reaching into deep cavities. The trade-off is rigidity, a long 1/4″ bit will flex more than a stubby one, demanding a perfect perpendicular start to avoid walking.
Frequently Asked Questions
What’s the difference between a twist drill and a masonry drill bit?
Twist drill is for cutting metal, wood, and plastic by shearing. A masonry bit is for crushing brittle material like concrete or brick. A masonry bit has a carbide tip brazed onto a steel shaft and uses a hammering action. Using a twist drill on masonry will dull it instantly. Using a masonry bit on metal will shatter the carbide.
Why does my drill bit keep wandering when I try to start a hole?
This is “walking,” caused by the chisel edge. The flat center of a standard point has nothing to bite into on a curved or sloped surface. Use a center punch to create a small dent for the point to seat into, or switch to a split point drill bit design, which has a ground-away chisel edge that acts like a self-centering tip.
Can I sharpen a twist drill bit by hand?
Yes, but consistency is hard. The goal is to grind each cutting lip to the same angle (usually 118°) and the same length. An error of a few degrees will cause only one lip to cut, making the hole oversized and straining the drill. For most DIYers, a dedicated drill bit sharpening jig is a worthwhile investment over freehand grinding on a wheel.
What does the 135-degree point angle do better than 118?
The 135-degree point is flatter and stronger. It requires more downward thrust to start drilling but is far less likely to walk on curved surfaces like pipe. It’s the standard for drilling harder metals and sheet metal, where a 118-degree point might skate and mar the surface before biting. Many modern “premium” bits for metal use a 135-degree split point.
How do I choose the right drill bit speed?
Speed is about surface feet per minute (SFM). Softer materials like aluminum can handle higher SFM; harder materials like steel require slower SFM to avoid overheating the bit. A general rule: smaller diameters need higher RPMs to achieve the correct SFM. For a 1/4″ HSS bit in mild steel, start around 3000 RPM. In aluminum, you can go to 5000 RPM or higher. The key is feed pressure, if the bit isn’t producing a steady curl of chip, you’re either too fast (rubbing) or too slow (polishing).
The Bottom Line
A twist drill is a deceptively simple tool defined by a handful of precise geometries. Its job comes down to the helix angle, the point angle, and the web thickness. Get those three numbers right for your material, and the bit will work. Get them wrong, and you’ll fight breakage, wandering, and burned-up tools.
For 90% of home shop work, a set of HSS jobber-length bits with a 118° point covers wood, plastic, and mild steel. Step up to HSS-E cobalt bits for stainless or hardened steel. Remember that using a drill bit correctly means matching its speed to the material and clearing chips before they pack. The bit is just the cutter, you are the one controlling the heat, pressure, and feed that determine whether it succeeds or fails.
