
The Best Method for How to Twist Wire with a Drill Easily
This post contains affiliate links. As an Amazon Associate, we earn from qualifying purchases.
To twist wire with a drill, you need a variable-speed drill, a bench vise or a helper, and a specific sequence that prevents unraveling and wire damage. The core process involves securing one end, inserting the other into the drill chuck, applying gentle tension, and twisting at low speed until the bundle begins to buckle. The Eraser WT200 manual specifies a maximum twist length of 20 feet, and professional sources warn that skipping the post-twist stress relief step leaves a bundle prone to springing apart.
That 20-foot spec is a ceiling, not a target. Most DIY jobs run 6 to surveyed participants to get the wire out of the drill. The problem isn’t the twist itself. It’s the internal stress locked into each conductor strand when the drill stops. That stress is what causes the finished bundle to writhe on the floor or, worse, to unravel the moment you snip the taped ends.
What follows is the workaround that trades absolute perfection for speed. We’ll walk through the exact tools, the seven-step sequence that includes the one step nobody mentions, and the three types of wire you should never put in a drill chuck. We’ll also look at the professional-grade machines, like the Eraser WT200 and WT300, that exist because this method, while fast, has documented limits.
Key Takeaways
- Cut your wires at least 10% longer than your final needed length; the twisting process consumes length and you’ll lose more to end damage.
- The goal is one twist every 20mm to 30mm. Over-twisting stretches and weakens the conductors; under-twisting produces a loose bundle that won’t feed through conduit.
- Always perform the post-twist “kinking” step: use your fingers to create a gentle bend and run it the length of the wire to redistribute internal stress.
- Never use this method on wires under voltage, for high-voltage applications, or for heater wires. The BGS 1482 manual and other authorities explicitly forbid it.
- For small, slippery, or magnet wire, the technique often fails without doubling over the wire ends for grip, and some marking of the insulation is inevitable.
The Drill vs. The Machine: Understanding the Trade-Off
Professional wiring techs follow a golden rule: never use a drill to twist wires. A forum user named Tim on EEVblog put it bluntly, drill-twisted wire “always un-twists as soon as you remove the tension.” The proper method, he noted, is more like braiding, where ends are free to move so they don’t get strained.
The technical snippet: Wire twisting machines like the Eraser WT200 and WT300 use guided entry tubes or steel jaws to align wires without metal-on-metal contact, enabling consistent twists up to 20 feet at speeds from 0 to 2,500 RPM. The WT200 handles a maximum bundle diameter of 1/4″ (6.3 mm), while the WT300 is limited to 1/8″ (3.2 mm) for applications with fine or slippery wires.
That’s the standard. A drill is the exception. You trade the machine’s controlled, repeatable output for the drill’s speed and accessibility. The trade-off is real: a drill-twisted bundle has locked-in torsional stress. It wants to spring back. That’s why the wire crimping tools you use afterward need to clamp onto a stable cable; a writhing bundle makes consistent terminations difficult.
The decision point is volume and tolerance. If you’re making one cable for a garage light, the drill wins. If you’re producing fifty identical harnesses, the inconsistency will waste more time than the machine costs.
Tools You’ll Need (And One You Definitely Don’t)
Your tool list is short, but each item has a non-negotiable job. Substituting here is how projects stall.
A Variable-Speed Drill. Cordless is fine, but it must have a trigger or dial that lets you start slowly. A drill that jumps to 500 RPM will whip the wires instantly. A keyless chuck is superior for speed, but a keyed chuck holds small-diameter wires more securely if you double them over.
A Bench Vise or a Patient Helper. The vise is the better choice. It provides a fixed, immovable anchor point. A helper’s grip will vary, and if the wire snags, it can jerk violently from their hands.
Kapton Tape. This is not optional. Electrical tape stretches and slips under tension. Kapton tape (polyimide tape) bonds to itself under pressure and leaves no residue. You’ll use it to create the handles at each end of your wire bundle that go into the vise and the drill chuck.
Wire Cutters & Strippers. You’ll need to trim the ends after twisting. A good pair of crimping tools often includes clean-cutting jaws.
Safety Glasses & Gloves. This isn’t decorative advice. A wire under tension can snap, and the cut ends are sharp. Gloves also improve your grip on slippery insulation.
What you don’t need is a hammer drill, an impact driver, or any tool with a percussive action. You also don’t need a twist drill bit, this process has nothing to do with drilling holes.
The 7-Step Drill Twisting Process (and Why It Works)
This sequence is distilled from professional workshop notes. Each step has a mechanical reason; skipping one introduces a specific failure mode.
Step 1: Cut Wires 10% Longer
Measure the final length you need, then add at least 10%. The twisting process physically consumes wire length as the strands spiral around each other. You’ll also lose another inch or two at each end to the clamping damage inside the chuck and vise. Starting short guarantees a useless bundle.
Step 2: Align & Tape Ends into Handles
Lay all wires perfectly parallel. At one end, twist the first two inches by hand just enough to marry the strands. Bend this twisted section into a hook. Wrap the hook tightly with Kapton tape to form a solid, non-slip “handle.” Repeat at the other end. This handle is what your vise and drill chuck will grip. Without it, individual wires slip and pull out unevenly.
Step 3: Secure One End Absolutely
Clamp the taped handle of one end firmly in your bench vise. The vise jaws should clamp on the tape, not the bare wire. Pull the bundle taut to take out any slack. This fixed end becomes your stationary anchor. If you’re using a helper, they must hold the taped handle with a firm, gloved grip and brace themselves.
Step 4: Chuck the Other End with Care
Insert the opposite taped handle into your drill chuck. Tighten it securely. For very thin or slippery wires (like PTFE-jacketed strands), double the wire back on itself before taping to create more surface area for the chuck to grip. The Eraser manual notes that for such wires, even specialized machines may cause “some marking or deformation.”
Step 5: Apply Tension & Start Slow
With the drill in one hand, use your other hand to pull lightly on the drill body to apply axial tension to the wire bundle. This tension is critical, it keeps the wires straight during the initial twist. Start the drill at its lowest possible speed. You should see the twist begin to propagate down the bundle from the chuck toward the vise.
Step 6: Twist Until Buckling, Then Stop
Increase speed slightly as the twist stabilizes. Watch the bundle closely. You are done the moment the smooth spiral begins to deform and the wires show a slight “buckling” or corkscrew pattern. This is the point of optimal tightness. Continuing past this point over-twists the wires, stretching the metal conductors and compromising their integrity. Professional guidance aims for one twist every 20mm to 30mm.
Step 7: The Critical Stress-Relief “Kink”
Do not remove the wire from the drill yet. This is the step most guides omit. While the bundle is still under slight tension from the drill, use your free hand to pinch the wire about a foot from the chuck. Create a gentle kink or bend, then slide your pinched fingers down the entire length of the twisted bundle. This action mechanically redistributes the internal torsional stress, persuading the wires to relax into their new shape. It’s the difference between a springy mess and a lay-flat cable.
After this, you can release the drill trigger, loosen the chuck, and unclamp the vise. Snip off the taped handle ends with your cutters.
Wire Types: What You Can and Cannot Twist
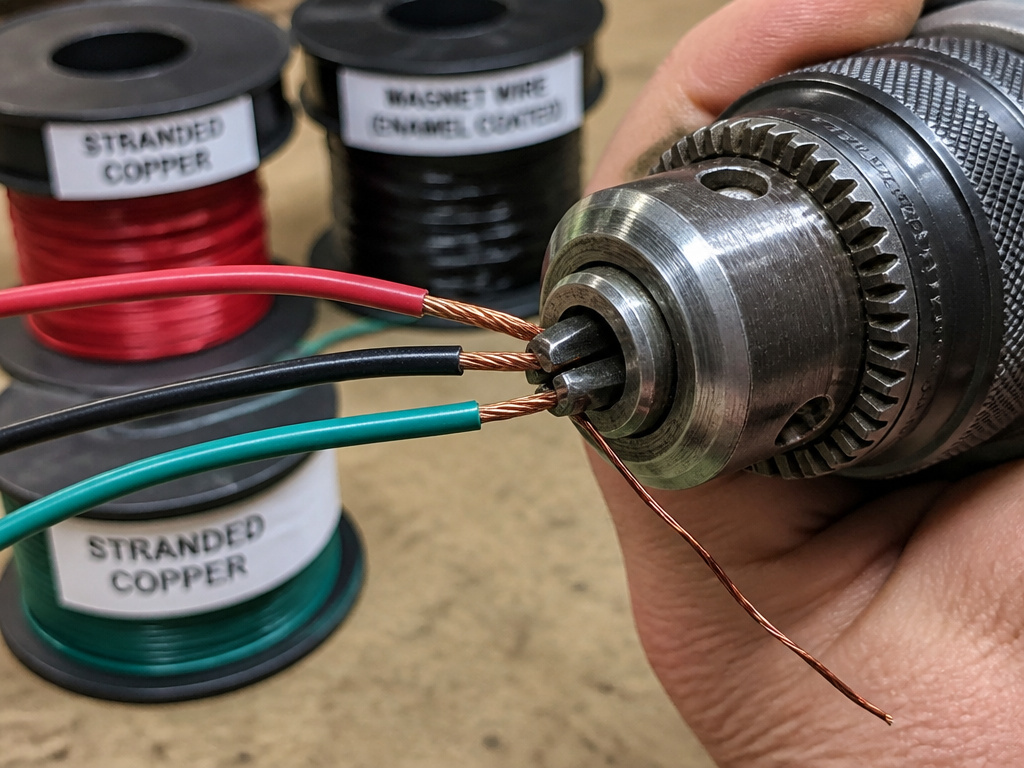 Not all wire is created equal for this method. Your results depend entirely on the conductor and insulation.
| Wire Type | Suitability for Drill Twisting | Key Risk & Mitigation |
|---|---|---|
| Stranded Copper (Common Hook-up Wire) | Excellent | Minimal risk. Use Kapton tape handles for grip. |
| Solid Core Copper | Good | Can work-harden and snap if over-twisted. Stay within the 20-30mm twist pitch. |
| Slippery Insulation (PTFE, Teflon) | Poor | Wires slip within the bundle. Double over ends and chuck tightly. Expect some insulation marking. |
| Magnet Wire (Enameled) | Not Recommended | The thin enamel coating scrapes off in the chuck, causing shorts. The Eraser WT300 exists for this. |
| High-Voltage or Heater Wire | Never | Insulation not rated for torsional stress. Can lead to failure under load. |
Where this goes sideways: Using this technique on live wires. The manual for the BGS 1482 wire twister, a dedicated tool, states clearly: “Never twist electrical wires that are under voltage.” The drill method offers no electrical isolation. If the wire is part of an existing circuit, you are gambling with a dead short.
For most solid-core house wiring (12/2 NM-B cable, for instance), the drill method is unnecessarily harsh. It’s better suited to low-voltage DC wiring, speaker cable, or custom-length extension cord builds where the wires are new and de-energized.
Why Your Twisted Wires Spring Apart (And How to Fix It)
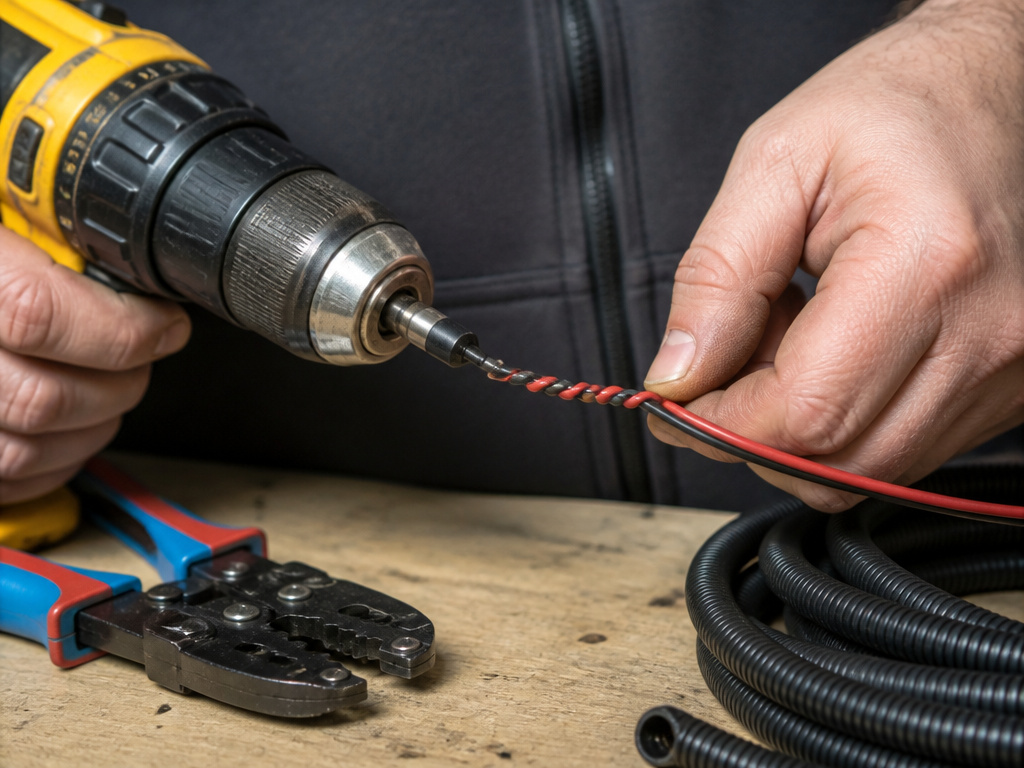 If you follow the steps but your finished bundle still writhes like a snake on the floor, you missed the stress-relief step (Step 7). The internal energy has nowhere to go. The bundle will also resist being fed through a drill bit hole or conduit.
The second cause is under-twisting. A loose, barely-spiraled bundle has no mechanical integrity. It will unravel because the wires aren’t wound tightly enough to create friction between each other. Go back and add a few more twists, watching for the first sign of buckling.
The final cause is using the wrong wire type. Slippery wires refuse to hold the twist. Your only fix is to start over, using a proper wire crimping tool to attach a connector that physically clamps the bundle together, or to use a continuous wrap of helical cable sleeving.
When to Use a Real Wire Twisting Machine
The drill technique is a hack. It works, but it has a boundary. You should start thinking about a dedicated machine when you encounter any of the following three conditions:
- Volume. You need to make more than a few identical cables. The setup time for the drill method kills efficiency.
- Precision. Your application demands a exact, consistent twist pitch (e.g., twisted-pair data cables). A drill’s output varies with hand pressure and trigger control.
- Delicate Wires. You are working with magnet wire, fine gauge wires (smaller than 24 AWG), or insulation that must remain unmarked.
The PMC surgical wire twisting study highlights a professional context where precision and reliability are non-negotiable. For a biomedical application, a drill’s variability is unacceptable.
Machines like the Eraser WT200 bring that control. They have guides that align wires without scraping, adjustable speed and torque, and foot-pedal operation. They are the difference between a makeshift solution and a repeatable process.
Frequently Asked Questions
Can you twist two wires together with a drill?
Yes, twisting two wires together is the most common application. The process is identical to twisting a larger bundle. Ensure both wires are the same length before you start, and pay close attention to tension. A pair of wires is more likely to over-twist and snap than a larger bundle.
What is the best drill for twisting wire?
Any variable-speed drill will work. A corded drill provides consistent torque, but a modern cordless drill combos from a quality drill and driver set offers plenty of power and better maneuverability. The critical feature is a smooth, controllable trigger that lets you start at a very low RPM.
How tight should the twist be?
The professional benchmark is one complete spiral every 20 to 30 millimeters (about 3/4 to 1 inch). Visually, stop twisting the moment the smooth spiral begins to buckle or look slightly corkscrewed. If the wires are visibly stretching or becoming stiff, you’ve gone too far.
Can you twist Romex with a drill?
Technically yes, but you shouldn’t. Romex (NM-B) cable has a paper wrap and a ground wire, and its thick, non-cylindrical shape doesn’t take well to torsional stress. Twisting it can damage the internal insulation on the individual conductors. For running multiple Romex cables together, use cable ties or stacker staples, not a drill twist.
Why do you twist wires?
Twisting wires serves two main purposes. First, it bundles them neatly for easier routing and a more professional appearance. Second, for signal-carrying pairs (like in Ethernet or audio), twisting reduces electromagnetic interference (EMI) by canceling out induced noise. The drill method is primarily for the first purpose, mechanical bundling.
The Bottom Line
Twisting wire with a drill is a valuable skill that sits squarely in the “quick and dirty” category. It gets the job done fast for one-off projects where absolute perfection isn’t the goal. Master the seven steps, especially the stress-relief kink, and you’ll produce bundles that hold together.
But know the limit. When your project involves high voltage, delicate wires, or more than a few cables, the drill’s inconsistency becomes a liability. That’s when the pros reach for a dedicated machine or choose a different bundling method altogether. Your drill bit selection matters for making holes; your technique selection matters just as much for making cables.
