
Mastering How to Drill Through Marble Without Cracking It
This post contains affiliate links. As an Amazon Associate, we earn from qualifying purchases.
To drill through marble, you need a diamond-tipped core bit, a steady stream of water for cooling, and a drill running at low RPM with gentle, consistent pressure. Standard masonry or twist bits will shatter the stone. The goal is abrasion, not cutting, let the diamonds grind the material away while water manages heat and removes debris.
That “gentle pressure” clause is the whole game. Push too hard and the bit glazes over, the marble dust compacts, and the remaining thin layer at the bottom blows out in a crater. A 2019 study put numbers on it: ultrasonic vibration during drilling cut the average thrust force by 45% and torque by 54%. The mechanism is simple, vibration keeps the dust from jamming in the bit’s core, so the diamonds keep cutting instead of just rubbing.
What follows: the two bit types that actually work, the one cooling method that prevents thermal shock, and the step-by-step pressure technique that stops exit chipping. By the end, you’ll know why a “marble-specific” bit isn’t a marketing gimmick and how to drill a faucet hole in an installed slab without calling a fabricator for a repair.
Key Takeaways
- Use a diamond core bit with a sintered bond for durability or an electroplated bit for a one-off job in soft marble; a masonry bit will destroy the stone and likely crack your workpiece.
- Continuous water cooling is non-negotiable, it prevents the diamond bond from glazing and stops thermal shock, which can fracture marble instantly. For installed tops, build a water dam with plumber’s putty.
- Drill at 300-500 RPM with very light pressure. Let the diamonds abrade; forcing the bit creates heat, compacts dust, and guarantees a blown-out exit hole.
- Reduce pressure by 80% in the final 1/8 inch of material to prevent exit chipping. The alternative is two-sided drilling: go 60% through from the top, flip, and complete from the bottom.
- If your bit stops cutting and starts smoking, it’s glazed. Dress it on a concrete block or abrasive brick for 10-15 seconds to expose fresh diamonds.
The Right Drill Bit for Marble (It’s Not Masonry)
Forget everything you know about drilling wood or metal. Marble drills through abrasion, not shearing. A standard twist bit or even a carbide-tipped masonry bit will skate, chatter, and then crack the stone along its crystalline veins. The required tool is a diamond core bit, a hollow cylinder with diamond grit embedded in its cutting edge.
Diamond core bits work by grinding, not cutting. Thousands of diamond particles bonded into the bit’s matrix abrade a circular kerf into the stone, leaving a solid cylindrical plug (the core) in the center. Water cools the interface and flushes the abrasive slurry away.
You have two functional choices, and the difference is in the bond holding the diamonds.
Sintered diamond core bits are the professional standard. Diamond particles are mixed throughout a metal matrix, usually bronze or cobalt, and fused under heat and pressure. As the outer layer wears during drilling, fresh diamonds are continuously exposed. This gives them a long life, ideal for multiple holes or harder stone types. They come in different bond hardness ratings. A softer bond is used for harder stones like granite, allowing diamonds to release as they dull. A harder bond is for softer marble, preventing the segment from wearing out too fast. Using a granite bit on marble will cut painfully slow and may chatter.
Electroplated diamond core bits have a single layer of diamonds bonded to the steel barrel via an electrochemical process. They cut extremely aggressively when new but are essentially disposable once that layer wears through. They work for a few holes in soft marble or limestone, where their initial speed is an advantage.
The Diamax Cyclone Marble Drill Bit is a sintered bit formulated specifically for soft stone. Its harder bond matrix matches marble’s abrasion rate, preventing the rapid wear you’d get using a soft-bond granite bit. For a one-time faucet installation, an electroplated bit from a brand like Bosch or Milwaukee will work, but expect to replace it after the job.
| Bit Type | Best For | Lifespan | Risk If Mismatched |
|---|---|---|---|
| Sintered Diamond Core | Multiple holes, any marble thickness, professional use | Long (100+ holes in soft stone) | Hard bond on hard stone glazes; soft bond on soft stone wears out in minutes. |
| Electroplated Diamond Core | One or two holes in soft marble, budget DIY | Short (1-5 holes) | Wears out mid-hole on hard or thick stone; may overheat and lose diamonds. |
| Carbide Masonry Bit | Concrete, brick | N/A | Will not cut; will skate and crack the marble surface immediately. |
Choosing the correct diameter matters, but the material specification matters more. A 1-3/8″ bit meant for granite will labor in marble. The right bit feels like it’s pulling itself through with minimal pressure.
Why Water Cooling Isn’t Optional
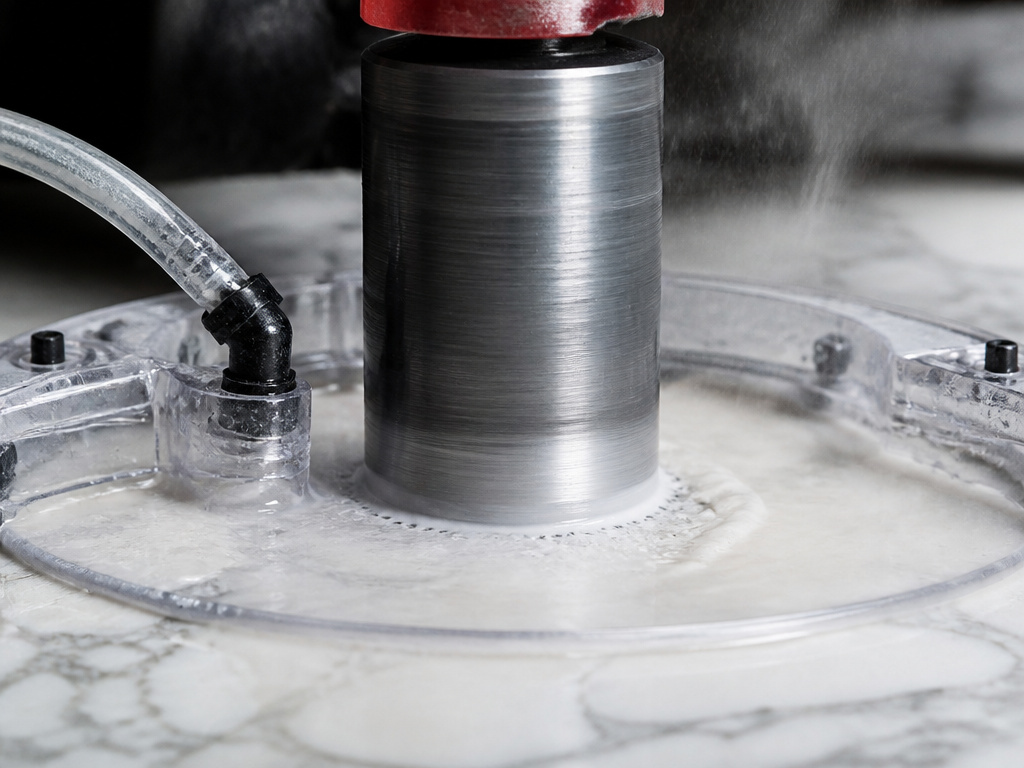
Dry drilling marble is a gamble with stacked odds. At the cutting interface, friction between the diamond grit and stone generates intense localized heat. This heat has two destructive effects.
First, it can thermally shock the marble. Marble is a poor conductor of heat. A sudden temperature spike at the drill point creates expansion stresses that can microfracture the stone, leading to a visible crack radiating from the hole. Second, and more immediately, the heat glazes the bit. The metal bond around the diamonds softens and flows, burying the sharp cutting edges. A glazed bit spins and smokes but doesn’t cut.
Where this goes sideways: Drilling dry for even 10-15 seconds. The bit reaches temperatures high enough to degrade the bond, and the marble dust melts into a hard, glassy paste inside the kerf. Cutting stops completely, and the bit often needs dressing before it will work again.
Continuous water flow solves both problems. It cools the cutting face, preventing thermal shock and bond glazing. It also flushes the abrasive marble slurry out of the narrow kerf. If that slurry packs in, it increases friction exponentially, which increases heat, which packs it in tighter, a failure cycle that ends with a stalled bit and a damaged workpiece.
For shop work, a drill press with a pumped water line is ideal. For drilling an installed countertop or a wall tile, you use a water dam. Tape a sponge around the hole site or mold a ring of plumber’s putty on the surface. Fill this reservoir with water and keep it topped off. This simple setup provides enough coolant for a typical faucet hole. It’s the standard field technique for a how to drill a hole in quartz or marble installation.
The manufacturer of Master Marble states it explicitly in their warranty guide: dry cutting or drilling voids the coverage because the heat “undermines its physical properties.” The risk isn’t theoretical, it’s a documented failure mode they won’t cover.
The Two Critical Settings: Speed and Pressure
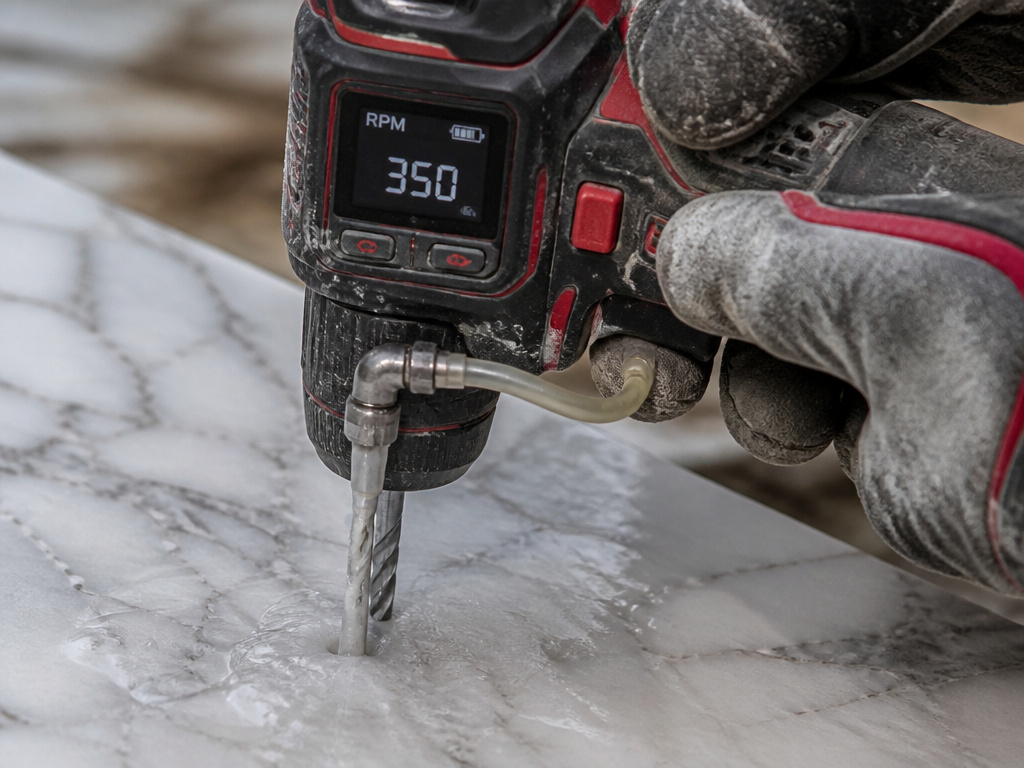
With the right bit and coolant, you can still ruin the hole with the wrong machine settings. Marble requires low rotational speed and consistently light feed pressure.
Speed (RPM): Target 300-500 RPM for holes up to 1/2 inch in diameter. For larger holes (like 1-3/8″ for a faucet), drop to 200-350 RPM. These speeds are far slower than those for wood or metal. High RPM generates excess heat and centrifugal force, which can throw water away from the cutting face. It also increases the chance of the bit grabbing or “walking” on the polished surface at the start. If your drill only has a high-speed setting, use a variable speed trigger and barely squeeze it. Better yet, use a rotary tool or a dedicated low-speed drill motor.
Pressure: This is the skill part. You must apply firm, steady, but minimal pressure. Let the diamonds do the grinding. A good rule is to press just enough to hear a consistent grinding sound and see a steady stream of slurry. If you’re leaning into the drill, the motor is bogging down, or the bit is deflecting sideways, you’re pressing too hard.
Excessive force compacts the marble dust in the kerf and at the bit’s core, increasing friction and heat. It also increases the thrust force on the thin remaining web of material at the bottom of the hole, making a blow-out crater inevitable. That 2019 Ultrasonically assisted drilling study quantified it: conventional drilling at high feed rates produced exit craters 80% larger than when vibration was used to reduce force.
Step-by-Step: Drilling a Clean Hole from Start to Finish
Follow this sequence. Missing the setup or rushing the breakthrough is how $400 slabs become scrap.
- Mark and Mask. Use painter’s tape over the drill point. This gives the bit a slight grip to prevent “walking” and helps protect the polished surface from minor scratches. Mark your center punch through the tape.
- Secure the Workpiece. The marble must not move. On a countertop, this means stabilizing the section you’re drilling. In a shop, use clamps on a stable workbench. Any vibration or shift can snap a core bit or chip the hole’s edge.
- Create a Water Dam (for installed work). For a faucet hole, mold a ring of plumber’s putty around the mark, about 2 inches in diameter. Press it firmly to create a seal. Fill the dam with water.
- Start the Hole. Hold the drill perfectly perpendicular. Start at your lowest speed, with the bit just touching the surface. Use a gentle, rocking motion to begin the cut until a small groove is established. This initial pilot prevents the bit from skating.
- Drill with Steady Coolant. Maintain your slow RPM. Apply consistent, light pressure. Keep the water flowing. For a drill press, the water line should drip directly into the bit’s core. For a hand drill, pause frequently to add water to your dam.
- Clear the Core. Every 10-15 seconds, lift the bit slightly while it’s still spinning to allow fresh water and slurry to flow into the kerf. This prevents dust compaction, which is the primary cause of bit binding and overheating.
- Manage the Breakthrough. This is the most critical phase. When you see the pilot point of the bit just begin to break through the underside, reduce your pressure by about 80%. Let the bit grind through the final 1/8 inch of material with almost its own weight. You’ll feel a slight drop when the core plug releases. This gentle exit prevents 95% of edge chipping.
- Withdraw Carefully. Keep the drill running and slowly back the bit out of the hole. Turning it off while the bit is still engaged can cause it to lock in place.
For through-holes where the exit side must be pristine, use the two-sided method. Drill 60% of the depth from the top. Flip the slab and use the existing hole to guide the bit, drilling the remaining 40% from the back. Each side breaks through into an open space, so there’s no thin, unsupported layer to blow out.
Solving Common Problems: Glazing, Chipping, and Breaking Bits
You’ll know the problem within seconds. Here’s how to diagnose and fix it.
The bit spins but doesn’t cut, and maybe smokes.
This is a glazed bit. The diamonds are buried in overheated bond metal. Fix: Immediately stop drilling. Run the bit for 10-15 seconds against a concrete block or a dedicated abrasive dressing stick at normal drilling speed. This grinds away the surface layer of metal, exposing fresh diamonds. If glazing happens repeatedly, your bit’s bond is too hard for the marble, you’re using insufficient coolant, or you’re applying too much pressure.
The hole edge is chipped or starred, especially on the exit side.
You used too much speed or pressure at breakthrough. The unsupported material fractured instead of being abraded. Fix: For minor chips, you can sometimes polish them out with a marble polishing cone or sandpaper. For severe chips, the piece may need filling with an epoxy matched to the stone, or replacement. Next time, use the two-sided drilling method.
The bit binds and the drill motor stalls.
Marble dust has compacted solidly inside the bit’s core or kerf, creating immense friction. This often follows a lack of water or failing to lift the bit to clear debris. Fix: Stop immediately. Do not force it. Try to back the bit out while it’s running. If it’s truly stuck, you may need to carefully break the core plug with a chisel from the backside to relieve pressure. This risks damaging the hole.
The marble cracks radially from the hole.
Thermal shock or excessive localized pressure. You drilled dry, or you used a hammer drill setting (never do this), or the workpiece was improperly supported and flexed. Fix: The crack is permanent. Prevention is the only cure: use water, disable hammer action, and ensure rigid support.
| Symptom | Most Likely Cause | Immediate Fix | How to Prevent It Next Time |
|---|---|---|---|
| Bit smokes, won’t cut | Glazed bond from overheating | Dress bit on concrete block | Use continuous water cooling; reduce pressure. |
| Chipped exit hole | High force at breakthrough | Polish or fill chips | Reduce pressure by 80% for final 1/8″; use two-sided drilling. |
| Bit binds/stalls | Compacted marble dust in kerf | Stop, try to back out while running | Lift bit every 10-15 sec to clear slurry; ensure ample water flow. |
| Radial crack in slab | Thermal shock or hammer action | None (crack is permanent) | Always use water coolant; ensure hammer function is OFF. |
| Bit walks on surface | High RPM on polished stone | Start with a rocking motion | Apply painter’s tape; start at lowest speed to create a pilot. |
Tools and Gear: What You Actually Need
You can manage with a bare minimum, but the right tools make the difference between a nervous job and a routine one.
- Drill: A variable speed rotary drill or a hammer drill with the hammer function turned off. A drill press is superior for control and perpendicular holes.
- Bits: Diamond core bits in the required size. For a one-off, an electroplated bit is fine. For more work, invest in a sintered bit like the Diamax Cyclone for marble. Understand the different types of drill bits to see why diamond is mandatory here.
- Cooling: A pump spray bottle, a helper with a cup, or a drill press water kit. For installed work, plumber’s putty for the dam.
- Safety: Safety glasses are mandatory, stone slurry is abrasive. A dust mask is wise if drilling dry (though you shouldn’t be). Gloves improve grip on a wet drill.
- Support: Clamps, a stable workbench, or sandbags to immobilize the slab.
Skip the temptation to use a standard cobalt drill bits or even tungsten carbide bits. Their geometry is wrong, and their hardness is insufficient. They’re designed for metal, not crystalline stone. This is a different category of work, similar to drilling through tile but with a greater heat sensitivity.
Frequently Asked Questions
Can I use a regular masonry bit on marble?
No. A carbide-tipped masonry bit is designed for the crushing action of a hammer drill on porous materials like concrete and brick. On dense, brittle marble, it will skate, chatter, and almost certainly crack the surface. It will not create a clean hole. You must use a diamond core bit.
How do I keep the drill bit from slipping on the polished surface?
Apply a large “X” of painter’s tape over your marked drill point. The tape provides grip for the bit to start its groove. You can also use a specialized drill guide or a block of wood with a pre-drilled hole clamped to the surface to ensure a perpendicular start.
Is it possible to drill marble without water?
Technically, yes, but it is strongly discouraged and will void warranties on products like Master Marble. Dry drilling generates extreme heat, which glazes the bit and risks thermal shock cracking in the marble. It also creates hazardous silica dust. If you must drill dry, use a bit rated for dry drilling, keep drilling intervals very short (2-3 seconds), and allow full cooling between attempts. Expect dramatically reduced bit life.
Why did my diamond bit stop cutting halfway through?
The bit is almost certainly glazed from overheating. Stop drilling and dress the bit by running it against a concrete block or abrasive brick for 10-15 seconds with light pressure. This removes the glazed surface layer and exposes fresh diamond grit. If the problem recurs immediately, you are either using insufficient coolant, excessive pressure, or a bit with a bond hardness unsuitable for marble.
What’s the best way to drill a large hole (over 1″) in marble?
The principles are the same, but scale matters. Use an even lower RPM (200-350). A core bit with a pilot drill or an anchor bolt is essential for stability. For a hole saw-style diamond bit, continuous water cooling is even more critical due to the larger cutting surface. Consider renting a low-speed, high-torque drill designed for stone if your standard drill struggles.
Can I use the same bit for marble and granite?
You can, but with a major caveat. A sintered diamond bit formulated for hard granite (soft bond) will wear out extremely quickly in soft marble. A bit for marble (harder bond) will glaze and cut very slowly in granite. For best results and bit longevity, use a bit specified for the primary material you are working with. A “general purpose” stone bit is a compromise that rarely excels at either.
The Bottom Line
Drilling marble cleanly comes down to respecting the material’s physics. It’s a brittle, heat-sensitive stone that fails under force and shock. Your job is to remove material through controlled abrasion, not brute force. That means a diamond core bit, a flood of water, and the patience to run the drill slow and easy.
The data backs the method, reducing thrust force prevents cratering. The manufacturer warnings are clear, heat voids warranties. When you match the tool to the task and let it work, a perfect hole is the predictable outcome, not luck. Keep the water flowing, the RPMs low, and your hand light. The marble will come apart one tiny crystal at a time, leaving a clean, professional hole behind.
