
How to Drill Into Brick: The Complete Step-by-Step Method
This post contains affiliate links. As an Amazon Associate, we earn from qualifying purchases.
To drill into brick, you need a hammer drill or rotary hammer, a tungsten carbide masonry bit sized to match your wall anchor, not the screw, and a method to keep the hole clean. Drill into the brick face for anything over 10 lbs, stay at least 1 inch from any brick edge, and always clear all dust from the hole before inserting the anchor. A plastic plug in a 6 mm hole can hold a curtain rod; a 3/8-inch lag shield in a 5/8-inch hole is rated for 240 pounds.
That sequence, tool, bit, anchor, clean hole, is what separates a mount that holds for decades from one that pulls out the first time you lean on it. The brick isn’t the problem. Using a wood bit, guessing the size, or leaving dust in the hole is.
What follows is the nine-step field method, the tool choice that actually works, and the specs that keep the brick from cracking under the drill.
Key Takeaways
- Match the bit to the anchor, not the screw. A 6 mm anchor needs a 6 mm bit. Using a bit sized for the screw creates a hole too small for the anchor to expand, or too large for it to grip.
- Brick beats mortar for load-bearing. Mortar is easier to drill but often hides voids and is structurally weaker. Drill into the solid brick face for shelves, TVs, or anything over roughly 10 pounds.
- Clear every speck of dust from the hole. Loose brick dust acts like ball bearings, drastically reducing the anchor’s pull-out strength. Vacuum or blow out the hole before inserting anything.
- Start without the hammer. Engage the hammer function only after the bit has bitten 3-4 mm into the brick. Starting with hammer mode on a smooth surface is the fastest way to spall the brick face.
- Respect the 1-inch edge rule. Never drill closer than 25 mm (1 inch) to the edge of a brick. For 10 mm anchors, increase that buffer to 50 mm. Closer than that, and the expansion force can pop off a corner.
The Right Drill for Brick: Hammer, Rotary, or Neither?
You cannot use a standard cordless drill for brick. A regular drill only spins; brick is a kiln-fired ceramic that must be pulverized. You need a tool that combines rotation with a pounding action. The choice hinges on hole size, brick hardness, and how many holes you’re drilling.
A modern hammer drill is the right pick for 90% of DIY jobs. It uses two ridged metal discs that ride over each other to deliver about 20,000–30,000 light blows per minute while the chuck spins. This is perfect for standard fired clay brick and holes up to about 12 mm (1/2 inch) in diameter. Any 18V or 20V cordless model with a dedicated masonry mode will do.
A hammer drill produces percussion through a ratcheting mechanism, many small, rapid impacts. It’s sufficient for most household brick but will struggle with dense engineering brick or volume work.
For bigger jobs, you need a rotary hammer (SDS-Plus). This tool uses a piston mechanism, so each blow is far more powerful (1.5 to 5 joules of impact energy). Choose this if you’re drilling dense brick, holes larger than 12 mm, or more than ten holes in one session. The SDS shank also locks in without a chuck key and won’t slip.
| Tool Type | Best For | Impact Mechanism | When to Choose |
|---|---|---|---|
| Hammer Drill | Holes ≤ 12 mm in standard brick | Ratchet plate (20k–30k BPM) | TV mounts, shelves, occasional use |
| Rotary Hammer (SDS-Plus) | Holes > 12 mm, hard brick, volume work | Piston (1.5–5 J per blow) | Deck ledgers, large anchors, many holes |
| Standard Drill | Not recommended for brick | Rotation only | Will overheat the bit and polish the hole |
An impact driver is for driving fasteners, not drilling. Its rotational impact mechanism is poorly suited to bit retention in masonry. Use it only after the hole is drilled, to drive the screw home.
Choosing Masonry Drill Bits and Sizing Them Correctly
The bit is what meets the brick. Get this wrong and even the best drill won’t save you. You need the right type and, critically, the right diameter.
For a hammer drill, use a tungsten carbide tipped (TCT) masonry bit with a smooth round shank. The carbide tip is brazed onto a wide, arrowhead-shaped profile designed to crush material. For a rotary hammer, you must use SDS-Plus shank bits, which have notches that lock into the tool.
Common mistake: Using a wood or metal (HSS) bit on brick. The softer steel will dull instantly, overheat, and polish the inside of the hole instead of cutting it. The hole becomes glazed and oversized.
The diameter rule is simple but almost universally misunderstood: the bit diameter must match the wall plug (anchor) size printed on the anchor packet, not the screw size. The screw is sized to bite the inside of the anchor; the anchor is sized to bite the brick.
| Anchor Size (Plug Color) | Drill Bit Diameter | Typical Screw Size | Use Case |
|---|---|---|---|
| 5 mm anchor | 5 mm bit | #6–#8 (3.5–4 mm) | Picture frames, sensors |
| 6 mm anchor (Red plug) | 6 mm bit | #8–#10 (4–5 mm) | Small shelves, curtain rods |
| 8 mm anchor (Brown plug) | 8 mm bit | 5–6 mm screw | TV mounts (~50 lbs), hose reels |
| 10 mm anchor (Blue plug) | 10 mm bit | 6–8 mm screw | Heavy mirrors, ledger boards |
Using the wrong bit means the anchor will either spin uselessly or refuse to seat. If you’re unsure how to use a masonry drill bit correctly, the technique matters as much as the size.
Brick vs. Mortar: Where to Drill?
The old debate has a clear answer: it depends on the load. Mortar is softer and easier to drill, and patch. But it’s also weaker and often hides voids you can’t see.
Drill into the mortar joint only for very lightweight items (under 10 lbs), like a picture frame, mailbox, or alarm sensor. Use a plastic expansion anchor. If the mortar is old lime mortar (pre-1930 homes), it’s especially unpredictable.
Drill into the brick face for anything with real weight: shelves, cabinets, TV mounts, deck ledger boards, or exterior fixtures like hose reels. Solid brick provides consistent, high compressive strength (3,000–10,000 psi) for an expansion anchor to grip.
There’s one exception. If the brick face is spalling (flaking), cracked, or shows efflorescence (white salt deposits), it’s no longer trustworthy. In that case, either find a sound brick nearby or switch to drilling into the mortar with a chemical anchor, which bonds along the full hole rather than wedging outward.
Safety Gear You Cannot Skip
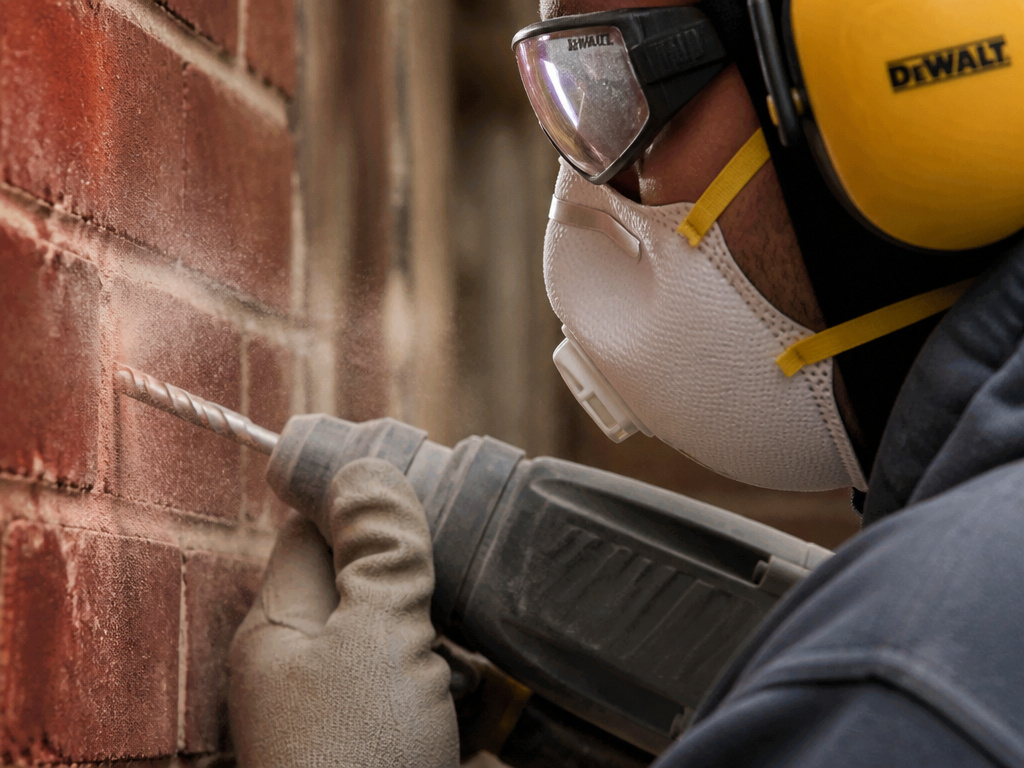
Brick drilling is louder, dustier, and more hazardous than drilling drywall. The dust is a health hazard, not just a mess.
- N95 (or FFP3) Respirator: Brick and mortar dust contains respirable crystalline silica, a known carcinogen that can cause silicosis. A bandana or dust mask is not sufficient.
- ANSI Z87.1-rated Safety Glasses: Carbide tips fling sharp brick chips at high velocity. Standard glasses often aren’t rated for this kind of impact.
- Hearing Protection: A hammer drill operates at 100–105 dB. Exposure over 15 minutes exceeds safe daily limits. Use foam earplugs or earmuffs.
- Work Gloves: Carbide bits get extremely hot, and broken brick edges are sharp.
- Shop Vac with HEPA Filter: For cleanup. Never sweep dry dust, it aerosolizes the silica.
How to Drill Into Brick: 9‑Step Walkthrough
Follow these steps in order. Skipping the divot or the dust clearing is what separates a hole that holds for ten years from one that fails on first load.
Step 1. Scan for Hidden Hazards
Before marking anything, run a multi-mode stud detector across the area. Check for live AC wiring (often vertical above/below outlets) and copper pipes. Drilling through a wire ruins your bit, your afternoon, and potentially your life.
Step 2. Measure, Mark, and Level
Hold your bracket or template against the wall and mark each hole with a pencil. For multiple holes, draw a level horizontal line first and align your marks to it. Double-check the measurements, a mistake in brick is hard to fix.
Step 3. Punch a Starting Divot
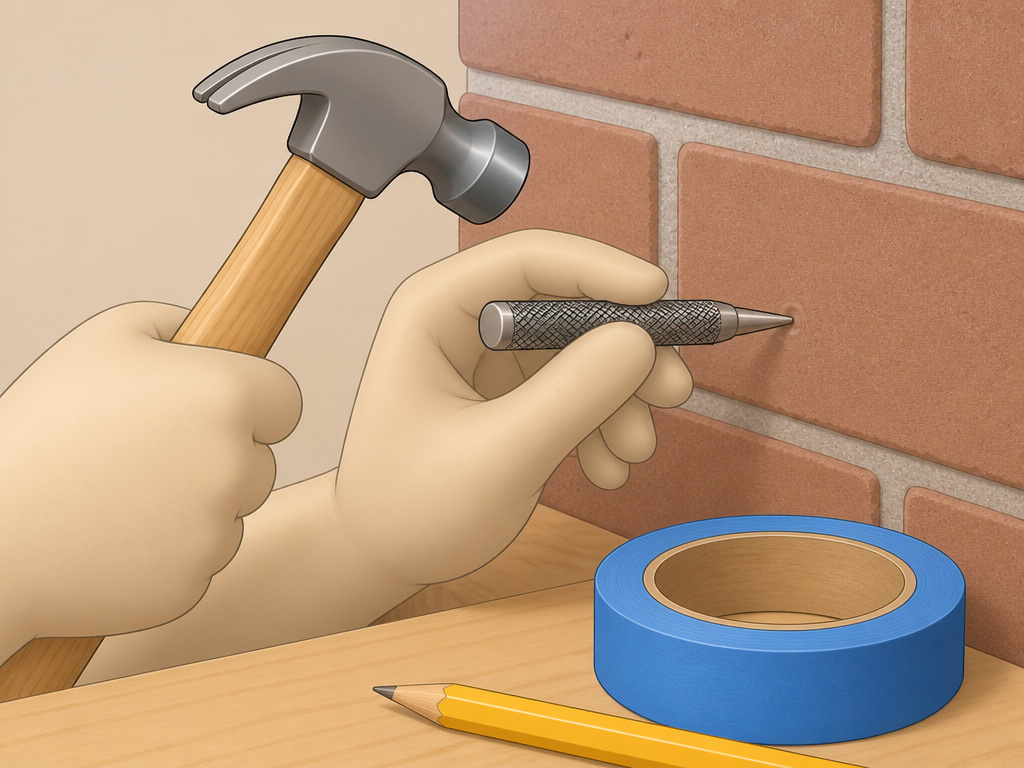
This is the step everyone wants to skip. Don’t. Hold a center punch or a large nail on your mark and tap it firmly with a hammer to create a small dimple. This 1 mm crater stops the bit from “walking” across the smooth brick surface when you start the drill. If you don’t have a punch, a square of painter’s tape over the mark adds grip.
Step 4. Set Your Drilling Depth
Hold the anchor next to your bit. Wrap a strip of bright painter’s tape around the bit at a point 3–5 mm deeper than the anchor length. This tape is your visual depth stop. If your drill has a depth rod, set it to the same measurement.
Step 5. Drill the Pilot Hole
Fit a 5 mm or 6 mm carbide pilot bit. With the drill perpendicular to the wall, start with the hammer mode OFF and at low speed. Let the bit cut a 3–4 mm starter pocket. This prevents surface spalling on hard bricks. Then engage hammer mode, increase speed, and drill to your tape mark with steady, moderate pressure.
Step 6. Open to Final Diameter
Switch to the bit that matches your anchor. Insert it into the pilot hole, confirm it’s square, and drill at medium speed in hammer mode. Let the tool do the work, excessive pressure slows progress and can crack the brick. If drilling for more than 30 seconds, withdraw the bit fully every few seconds to let it cool and clear chips.
Step 7. Clear All Dust from the Hole
This is non-negotiable. Loose brick dust destroys holding power. Use compressed air, a turkey baster, or your shop vac’s crevice tool pressed against the hole. Vacuum, then run the dry bit in and out once, and vacuum again. The hole walls should look matte, not dusty.
Step 8. Insert the Anchor
Tap the anchor in with a rubber mallet until it’s flush with the brick. If it stops short, the hole is too shallow or still has packed dust. If it slides in with no resistance, the hole is oversized. For sleeve anchors or Tapcons, you drive the anchor directly into the clean hole.
Step 9. Mount the Bracket and Drive the Screw
Position your bracket and drive the screw with a regular drill/driver on a low torque setting. Stop as soon as the bracket pulls firmly against the wall. Overtightening can strip a plastic anchor or crack the brick. Check for level, hang your fixture, and give it a gentle load test.
Choosing the Right Anchor for Brick
The anchor is the final link. Match its mechanism to your load and brick condition.
- Plastic Expansion Plugs (Rawl Plugs): The classic choice for light to medium loads (up to ~25 lbs per plug). Ideal for curtain rods, small shelves, and picture rails. They require a correctly sized hole.
- Self-Tapping Concrete Screws (Tapcons): Cut threads directly into the brick, no plug needed. Good for medium loads (TV brackets up to 50 lbs). You must use the exact pilot bit specified by the manufacturer.
- Sleeve Anchors: A bolt inside a metal sleeve that splays outward. Excellent for heavier, structural attachments like deck ledger boards. Choose the longest sleeve that will fit.
- Wedge Anchors: The heavy-duty cousin of the sleeve anchor, with a wedge clip at the tip. Best for very hard concrete brick. Overtightening on softer clay brick can crack it.
- Chemical / Resin Anchors: The strongest option and the only right choice for old, cracked, or hollow brick. You inject epoxy into the hole and insert a threaded rod; it bonds along the full length. A chemical anchor in mortar can outperform a mechanical anchor in solid brick.
For very heavy or wide items like a large cabinet or a big TV, don’t rely on two anchors. Use a French cleat anchored across several bricks or a steel backer plate to spread the load.
How to Drill Into Brick Without Cracking It
Cracked brick usually results from one of five errors. Avoid them all.
- Starting with hammer mode engaged. The first 3 mm are the most fragile. Start in rotary-only mode.
- Drilling too close to an edge. Keep at least 25 mm (1 inch) from any brick edge.
- Using excessive forward pressure. You need only 5–8 lbs of pressure. Let the percussion do the work.
- Using a blunt bit. A worn carbide tip can’t bite, so all the impact energy shocks the brick. Sharpen or replace dull bits.
- Drilling old brick at full speed. Reduce speed by half on weathered masonry and consider chemical anchors.
Troubleshooting Common Problems
The bit spins but won’t bite.
Check, in order: Is hammer mode on? Is the bit dull? Is the battery charge below 30%? Is the chuck in reverse? A low battery on a cordless hammer drill is a frequent culprit.
The bit goes in way too easily.
You’ve hit a void in the mortar or a hollow cavity. Back out, plug the hole with a dowel and glue, let it set, and re-drill 50 mm away. For a load-bearing fix, use a resin anchor.
The anchor spins when I tighten the screw.
The hole is oversized or full of dust. Remove the anchor, vacuum thoroughly, wrap one turn of brass wire around the anchor, and re-seat it. If it still spins, use a larger anchor or a chemical fix.
The bit is smoking.
Withdraw it immediately. Let it air-cool completely, never quench a hot carbide bit in water. You’ve been drilling too fast or without clearing chips. Use shorter pulses.
A chunk of brick face popped off.
You drilled too close to the edge or used too much pressure. For aesthetics, patch with a brick-colored compound. For structure, move to the next sound brick and use a chemical anchor.
Before You Go
Drilling into brick requires a sequence of small, correct choices. The right tool (hammer drill), the right bit (matched to the anchor), a clean hole, and an anchor suited to the load are all essential.Get those four things right and the fixture will outlast the wall. The most common failure point is dust in the hole or a bit that was one size off, not the brick giving way. Slow down, measure twice, and clear that hole.Your future self, staring at a securely mounted TV, will thank you.
Frequently Asked Questions
Can you drill into brick with a regular drill?
Only for one or two very shallow holes (under 6 mm wide, 25 mm deep) in soft mortar or very old, soft brick. For any real job, you need the percussion of a hammer drill or rotary hammer. A regular drill will overheat the bit, polish the hole walls, and likely fail before reaching the proper depth.
Should I drill into brick or mortar?
Drill into mortar only for lightweight items under 10 lbs, like picture frames. It’s easier to drill and patch. Drill into the brick face for anything with weight, shelves, TVs, cabinets, because solid brick provides a consistent, strong grip for expansion anchors.
How deep should I drill for an anchor?
Drill 3–5 mm deeper than the anchor’s length. This gives any residual dust a place to settle so it doesn’t prevent the anchor from seating fully. If your wall is plastered over brick, add the plaster thickness to this depth so the anchor sits in the brick.
Why is my drill bit smoking?
The tungsten carbide tip is overheating, which can ruin its hardness. Withdraw the bit and let it air-cool. Never dip it in water. You’re likely drilling too fast or not clearing chips from the flutes. Use shorter drilling pulses and withdraw the bit periodically to clear debris.
Is brick dust dangerous?
Yes. It contains respirable crystalline silica, a known carcinogen that can cause silicosis. Always wear an N95 respirator while drilling and during cleanup. Vacuum dust with a HEPA-filtered shop vac, never sweep it dry, and wipe surfaces with a damp cloth.
