
How to Drill in a Tight Space: Essential Tools & Techniques
This post contains affiliate links. As an Amazon Associate, we earn from qualifying purchases.
To drill in a tight space, you need the right tool stack: a compact drill or right-angle adapter, short-length drill bits and driver bits, and often a dedicated jig or guide. The combined length of a standard drill and bit won’t fit, so you substitute shorter, lower-profile components. A Kreg 90° Pocket-Hole Driver or a 12V compact drill gets the head in; 3-inch driver bits and a stepped drill bit create the hole; a jig like the Kreg 700-Series holds everything square.
That length problem is mechanical, not just inconvenient. A standard drill is about 7 inches from chuck to back. Add a 6-inch bit, and you need 13 inches of clearance just to approach the work surface. In a cabinet corner or between studs, you might have 6 inches.
What follows: the four tools that replace a standard drill kit, the step-by-step swap for the most common tight-space task (pocket holes), and how to know when you need a flexible shaft instead of just a right-angle head.
Key Takeaways
- A right-angle drill adapter like the Kreg 90° Pocket-Hole Driver changes the game for corners; it turns a 13-inch clearance need into about 4 inches.
- Short bits are mandatory. A 3-inch driver bit and a stepped pocket-hole drill bit are the only way a right-angle adapter can work.
- Compact drills (12V models) aren’t just smaller; their lower weight and better balance prevent the tool from torquing out of your grip when you can’t brace your body.
- If you can’t fit the drill and the adapter, a flexible shaft extension paired with the adapter reaches into cavities, but it adds wobble—use two hands.
What “Tight Space” Actually Means for a Drill
Forget “hard to reach.” For a drill, a tight space is any gap where the combined length of the tool and its bit exceeds the physical clearance. This is a measurement, not a feeling. You have two critical dimensions: headroom (the distance from the work surface to the nearest obstruction above the drill) and side clearance (the space to the left and right of the chuck to turn the handle).
A kitchen sink base cabinet, for example, often has about 8 inches of headroom below the countertop. A standard drill and bit combo needs 13 inches. You lose before you start. Side clearance matters when you’re between studs in a wall or inside a framed furniture box—your elbow might not have room to push.
The Technical Snapshot: A right-angle drill attachment reduces the required headroom by reorienting the drill motor parallel to the work surface. The Kreg 90° Pocket-Hole Driver, when paired with a 3-inch driver bit, needs approximately 4 inches of headroom to drive a screw, compared to the 13 inches required by a standard drill and 6-inch bit.
The fix is always about swapping a long component for a short one, or changing the drill’s orientation. You can’t make the space bigger, so you make your tool stack smaller.
The 4-Tool Tight-Space Drill Kit
You don’t need one magic tool. You need a system of compatible, shorter-profile items. This kit replaces every part of a standard drilling setup.
| Tool | Replaces | Why It Works | Risk If You Skip It |
|---|---|---|---|
| Compact Drill (12V) | Standard 18V/20V Drill | Shorter body (5-6″), less weight, balanced grip. Fits where a full-size drill won’t pivot. | A heavy drill torques in your hand when you can’t brace your shoulder, stripping screw heads or wandering off the pilot hole. |
| Right-Angle Adapter | Drill’s Forward Orientation | Turns 90 degrees, turning a headroom problem into a side-clearance one. The Kreg 90° Driver is made for square-drive screws. | Trying to use a standard drill in a corner often means the chuck jams against the obstruction, stopping the bit an inch short of the surface. |
| Short Driver & Drill Bits (3″) | Standard 6″ Bits | Reduces total tool length. A stepped pocket-hole drill bit is inherently short. | A long bit in a right-angle adapter creates a massive lever arm; the slightest wobble becomes a 1/4-inch arc at the tip, breaking bits. |
| Pocket-Hole Jig (e.g., Kreg 700-Series) | Freehand Drilling | Holds the drill bit at the exact compound angle required, locked in place. You only worry about pushing forward, not steering. | Drilling a pocket hole freehand in a tight space almost guarantees the bit will skate off the edge of the workpiece, ruining it. |
The compact drill is the foundation. A 12V drill like those in the DeWalt or Milwaukee compact series is the starting point. Their shorter battery pack and motor housing change the center of gravity. You can guide them with your wrist and fingers instead of your whole arm. For corded options, a 3/8-inch drill with a slim body often beats a bulkier half-inch model.
The right-angle adapter is the problem-solver. The Kreg 90° Pocket-Hole Driver is the purpose-built version, but universal right-angle chuck adapters exist. Both attach to your drill’s chuck. The Kreg model is pre-set for the square-drive screws used in pocket-hole joinery, which is the most common tight-space drilling task.
Step-by-Step: Drilling a Pocket Hole in a Corner
This is the most frequent “tight space” drill job: reinforcing a cabinet or building a frame where two boards meet in a corner. Here’s how the tool kit comes together.
- Mount the Jig. If using a Kreg 700-Series Jig, remove the material thickness stop. Position the jig where the pocket hole needs to go and clamp it directly to the workpiece, or secure it with a spare Kreg screw driven into your workbench. This is the only way to keep it still when you can’t apply body weight.
- Set the Drill Bit. Insert the stepped pocket-hole drill bit into your drill’s chuck. Slide the easy-set stop collar onto the bit to the mark matching your material thickness (e.g., 3/4 for 3/4-inch wood). Tighten the collar screw.
- Attach the Right-Angle Driver. Chuck the Kreg 90° Pocket-Hole Driver onto your drill. Insert a 3-inch square-drive driver bit into the adapter. The total length from the back of your drill to the screw tip should now be under 6 inches.
- Drill the Pocket Hole. Place the drill bit into the jig’s guide bushing. Hold the drill body parallel to the workpiece (it will be pointing sideways, not forward). Drill slowly until the stop collar hits the jig. The hole is now at the perfect angle.
- Drive the Screw. Place a 1-1/4 inch Kreg screw onto the driver bit in the adapter. Position the screw into the pocket hole. Drive it until the head seats fully, but stop before it strips or over-tightens. You’ll feel a distinct increase in resistance.
Where this goes sideways: Using a 1-inch screw in 3/4-inch material when the joint is at the low end of the thickness range. The screw tip can protrude through the other side. If your material is just under 3/4-inch, drop down to a 3/4-inch screw.
The short bit is non-negotiable. A 6-inch driver bit in a right-angle adapter puts the screw tip a foot away from your drill’s chuck. The torque and flex make precise driving impossible. The 3-inch bit shortens the lever arm, giving you direct control.
When Your Drill Still Won’t Fit: Flexible Shafts and Guides
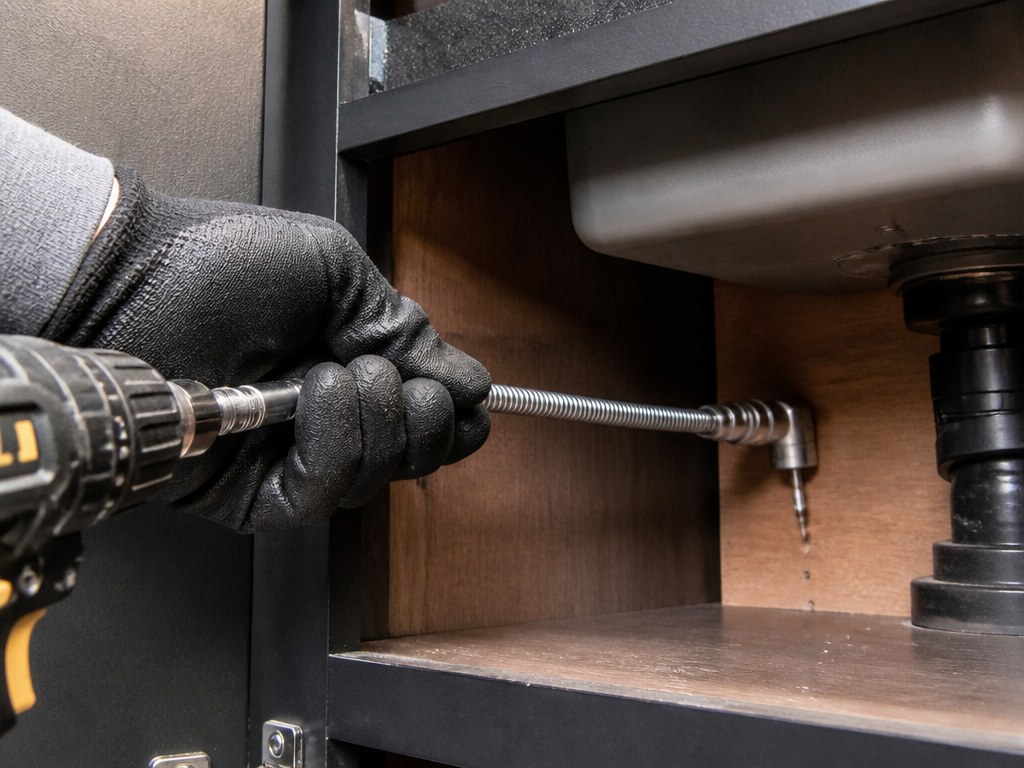
Sometimes, even a compact drill with a right-angle head can’t access the spot. The obstruction is deeper, like the back of an installed sink cabinet or a spot behind a fixed appliance. Now you add reach.
A flexible shaft extension is a coiled steel cable that transfers rotation from your drill to a chuck on the other end. You pair it with your right-angle adapter and a short bit. This lets you snake the working end into a cavity while the drill stays outside.
The trade-off is control. The shaft introduces torsional flex, which shows up as wobble at the bit. The fix is to use your off-hand to grip the shaft close to the adapter, creating a stable pivot point. Drill at slow speeds and let the bit do the work.
For drilling straight holes (not pocket holes) in confined edges, a drill guide is the answer. The Kreg Drill Guide Pro (KDG6500) clamps to the edge of a board. You then attach your drill to its input shaft. The guide ensures a perfect 90-degree or adjustable-angle hole, even if you can only see the work surface from an awkward angle. It’s designed for bits up to 2-3/4 inches in diameter, but the shank must be 3/8 inch or less.
Common mistake: Using a spade bit or Forstner bit in a drill guide without clamping the workpiece. The guide is stable, but the torque from a large-diameter bit can spin the entire board out of your hand. Always clamp the wood down.
Choosing Bits for Confined Drilling
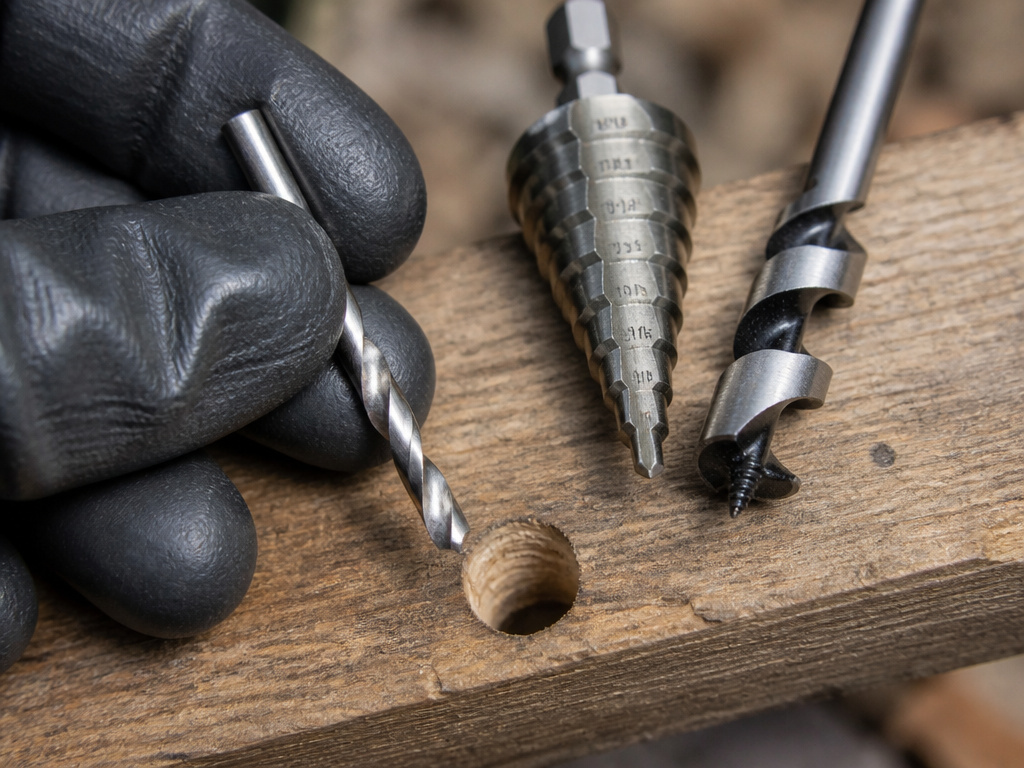
The bit itself can be the obstacle. Long, spiral-flute bits need room for chips to evacuate. In a deep, narrow cavity, they clog and overheat.
Bosch HSS drill bits are designed with a flute geometry that promotes swift swarf removal, which is critical when you can’t repeatedly pull the bit out to clear it. For wood, a short-length auger bit or a Forstner bit with a short pilot point gives cleaner results in one pass than a long spade bit that bends.
The stepped drill bit that comes with pocket-hole jigs is the ideal tight-space bit by design. It combines drilling and countersinking in one short tool, and its diameter is fixed by the jig’s bushing, so it can’t wander.
Your default pick for general tight-space drilling: a set of short-length HSS twist bits. They’re the workhorse. Keep a 3-inch square-drive bit on hand for driving. For joinery, the Kreg 90° Pocket-Hole Driver and stepped bit system is the dedicated solution.
Frequently Asked Questions
Can I use a cordless screwdriver instead of a drill?
Yes, for driving screws only. Cordless screwdrivers are smaller and fit anywhere. They lack the power and speed for drilling holes, especially in hardwoods. They’re perfect for final assembly in a tight box after you’ve pre-drilled the holes with a more powerful tool.
What’s the difference between a right-angle drill and an adapter?
Right-angle drill is a dedicated tool (like the Ironton ½ Inch Compact Right Angle Drill) with a fixed head. It’s more powerful and rigid. An adapter attaches to your existing drill, making it versatile. The adapter is cheaper and stores easily, but it adds another joint that can flex under high torque.
How do I prevent the bit from wandering when starting a hole in a tight spot?
Use a center punch or an awl to make a definitive dimple in the material first. In a confined area, you often can’t get your eye directly over the bit to align it perfectly. The dimple gives the bit tip a physical place to settle. A drill guide eliminates this problem entirely by physically constraining the bit.
Is a brushless drill better for tight spaces?
It can be. A brushless drill motor is more efficient, generating less heat and offering longer runtime on a single battery charge. When you’re working in an awkward position and can’t easily swap batteries, that extra runtime matters. The efficiency also often translates to a more compact motor design.
Can I use my impact driver with a right-angle adapter?
Proceed with caution. Impact drivers deliver high rotational force (torque) in short bursts. This can overwhelm a right-angle adapter’s gears, especially if it’s a universal model not rated for impact use. The Kreg 90° Driver is designed for standard drill/drivers. Check the adapter’s specifications before using it with an impact tool.
The Bottom Line
Drilling in a tight space is a puzzle of swapped components. You trade your standard drill for a compact 12V model or a right-angle adapter. You swap six-inch bits for three-inch bits. You give up freehand drilling for a jig or guide.
The goal isn’t to force your regular kit to work. It’s to assemble the right short-profile stack for the specific gap in front of you. Keep a Kreg 90° Pocket-Hole Driver and a set of short HSS bits in your kit. When you see a corner that looks impossible, you’ll know the drill—literally.
