
How to Drill Holes in Rocks for Jewelry: A Complete Guide
This post contains affiliate links. As an Amazon Associate, we earn from qualifying purchases.
Drilling a hole in a rock for jewelry requires three non-negotiable things: a diamond-coated bit, a high-speed rotary tool, and constant water cooling. The process is abrasive grinding, not cutting. Match the bit type to your stone’s hardness, a 2mm diamond core drill for general work, and drill from both sides to prevent ugly chip-out on the back.
That water requirement sits directly against every power tool manufacturer’s safety manual. They explicitly warn against using their products near water due to electrocution risk. This isn’t a theoretical concern; it’s the reason professional setups use a separate, grounded drill press or a flex-shaft attachment that keeps the motor away from the splash zone. Your choice to submerge the stone means accepting that risk and mitigating it with a GFCI outlet.
What follows is the full breakdown: why diamond is the only option, how to set up a safe water bath, the seven-step process that lines up holes from both sides, and the numbers on bit lifespan and breakage rates that change how you buy supplies.
Key Takeaways
- Diamond is mandatory. A standard steel bit scores 6.5 on the Mohs scale; quartz is a 7. Nothing but diamond abrasive will grind through it.
- Water cools and clears debris. Drilling dry generates instant, stone-cracking heat. Submerge the work in 1cm of water, but plug your tool into a GFCI outlet as manufacturers warn against this practice.
- Drill from both sides to the middle. Drilling straight through causes “chip-out,” where flakes break off the exit side. Meeting in the center gives two clean holes.
- Bit lifespan is measured in holes, not years. A single bit might drill 5–10 holes in soft amazonite but only 2 holes in ¼-inch thick agate before it stops cutting effectively.
- Breakage rates drop with technique. A beginner might crack one in three stones. With a few hundred holes of practice, that failure rate can drop to roughly one in eight.
Why a Wood Drill Bit Will Only Scratch the Surface
A drill bit for wood works by shearing away material with a sharp cutting edge. A rock doesn’t cut; it abrades. The Mohs hardness scale explains the mismatch. Your average high-speed steel drill bit maxes out around 6.5. Quartz, agate, and amethyst sit at 7. The bit is literally softer than the material it’s trying to cut.
Diamond-coated drill bits have a layer of industrial diamond particles (Mohs 10) bonded to a steel shaft. These particles grind the stone away microscopically, which is why the process feels and sounds like sanding, not drilling.
You need a rotary tool, not a standard drill. A cordless drill spins at 500–1500 RPM, too slow for effective abrasive grinding. A tool like a Dremel 3000 runs from 5,000 to 35,000 RPM. At that speed, each diamond particle makes thousands of tiny cuts per second, which is the only way to make progress without excessive pressure that cracks the stone.
The Diamond Bit Lifespan That Changes Your Budget
You don’t buy diamond bits for a lifetime. You buy them by the job. Their lifespan is directly tied to the stone’s hardness on the Mohs scale.
| Stone Type (Mohs Hardness) | Approximate Holes per Bit (¼-inch thick) | What Wears the Bit Down |
|---|---|---|
| Soft (e.g., Amazonite ~6) | 5–10 | Gradual abrasive wear |
| Medium (e.g., Quartz ~7) | 10–30 (with a 1mm bit) | Steady diamond coating loss |
| Hard (e.g., Agate ~7) | 2 | Rapid coating erosion |
The “two holes per bit” figure for agate isn’t an exaggeration. It’s the documented result from a jeweler who drilled hundreds of stones. The diamond coating wears thin, and cutting speed plummets. A worn bit will still spin, but it will just polish the bottom of a shallow dimple instead of grinding deeper.
The short version: Budget more bits for hard stones. For a single pendant, a cheap set of assorted diamond bits is fine. For production work, buy individual replacements of the sizes you use most.
The Safety Debate: Water Cooling vs. Manufacturer Warnings
Every guide tells you to keep the stone wet. Friction heat is the enemy. It can microfracture the crystal, burn the diamond coating off the bit, or cause a sudden thermal shock crack. Submerging the stone in a water bath is the most effective coolant.
Where this goes sideways: “To our knowledge, using rotary tools near water has never been endorsed by any of the rotary tool manufacturers. If you do choose to drill near water… You do so at your own risk. Mixing electricity and water can be very dangerous.”
That’s a direct quote from a tool supplier. It’s the line you won’t find in most DIY tutorials. Your Dremel manual says the same thing. There is no safe way to fully submerge a powered electrical tool.
So you have a direct conflict: the technique requires water; the tool’s safety rules forbid it. Your mitigation is a GFCI (Ground Fault Circuit Interrupter) outlet. It’s the kind with the “Test” and “Reset” buttons, and it will cut power in milliseconds if current leaks into the water. It’s not a guarantee, but it’s the bare minimum. The professional alternative is a flex-shaft attachment or a dedicated, grounded drill press kept well away from the water bath.
The 4 Tools You Actually Need (Beyond the Rotary Tool)
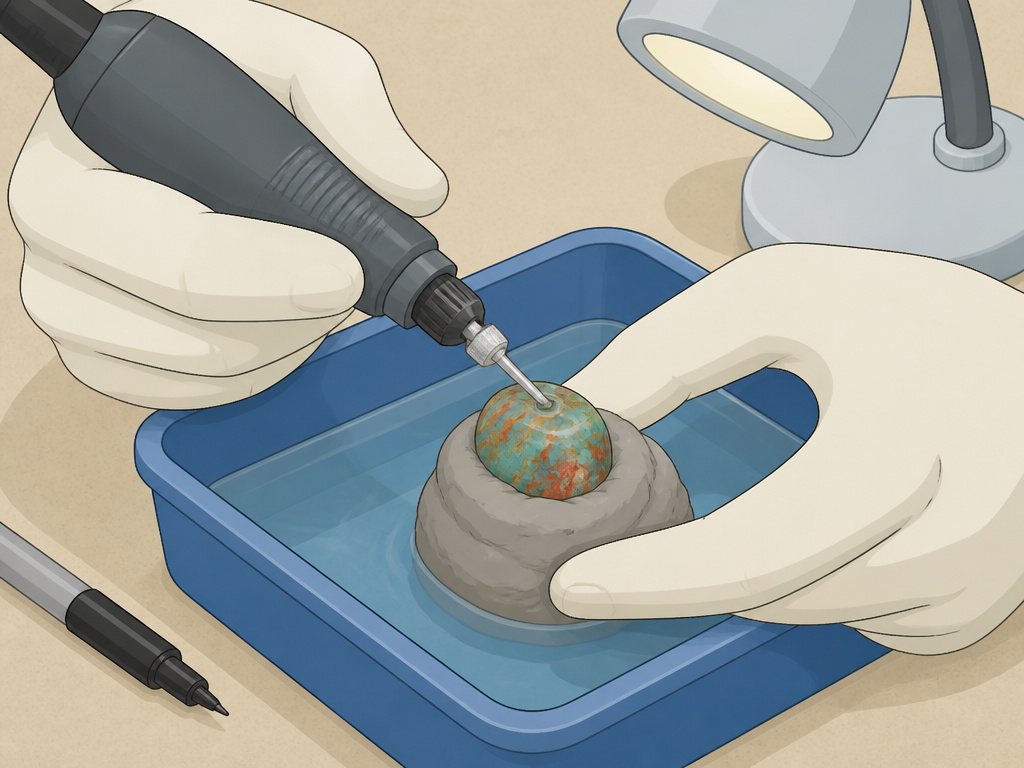
- Diamond Drill Bits. Get both types. Diamond core drills (hollow) start easier and last slightly longer. Diamond burr bits (solid) are better for harder stones with flint or quartz veins. Start with a set containing 0.75mm, 1.5mm, 2mm, and 2.5mm sizes.
- A Containment Vessel. A shallow plastic tub or tray. Line the bottom with a scrap of wood or a rubber pad so you don’t drill through the plastic.
- A Holding Method. Modeling clay is the simplest. Press the stone into a lump to keep it from spinning. For a more secure hold, use a leather pad submerged in the water, it grips the stone and provides a soft backing.
- A Marker & Light Source. A fine-point permanent marker for dotting both sides of the stone. A bright light or lamp to backlight the stone and find your breakthrough point.
Skip the fancy jigs. The goal is a simple, stable setup where you can clearly see the work and keep it flooded with water.
The 7-Step Process for a Clean Hole
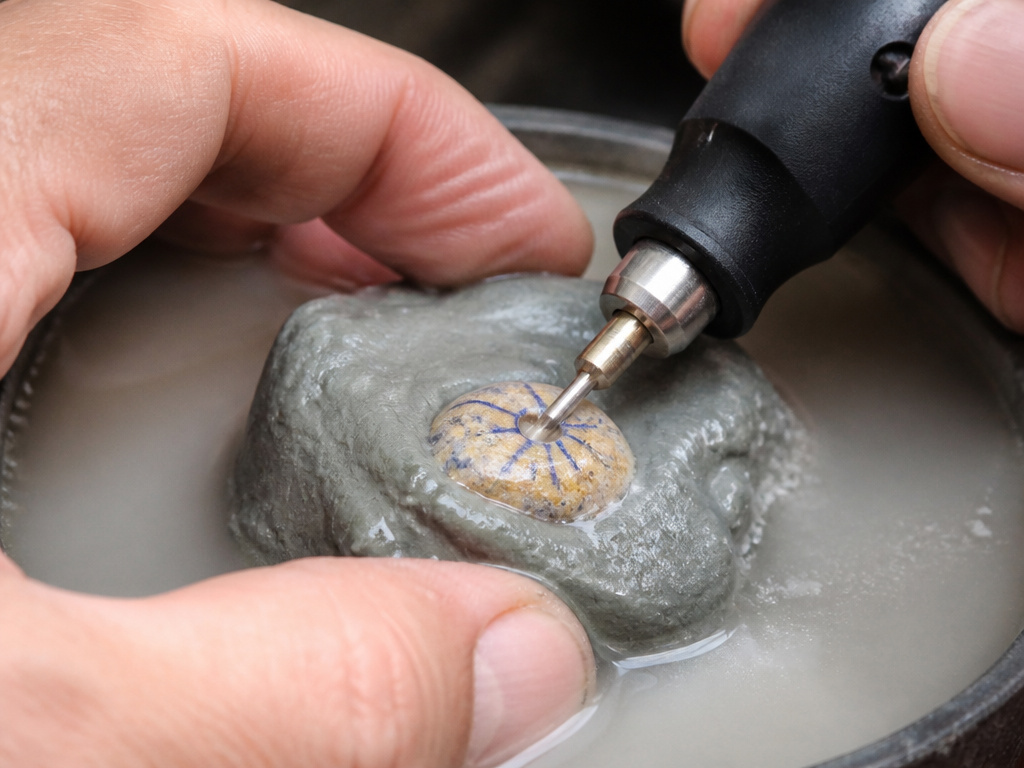
This method is designed to prevent the two most common failures: the bit “skating” off the starting point and the stone chipping as the bit exits.
Step 1: Mark Both Sides.
Use your marker to place a precise dot where you want the hole on the front and the back of the stone. Drilling from both sides toward the middle only works if you have a target on each side.
Step 2: Secure the Stone.
Press the stone into a lump of modeling clay at the bottom of your dry tray. Orient it so your first marked dot is facing up. The clay should hold it firmly without obscuring your view.
Step 3: Set Up the Water Bath.
Pour water into the tray until the stone is covered by about 1cm of water. This depth is enough for cooling and debris clearing without creating excessive splash.
Step 4: Start the Dimple.
Fit a small round (ball) diamond burr into your rotary tool. Set the speed to a medium range (15,000-20,000 RPM is a good start). Lower the spinning bit onto your mark at a 90-degree angle. Use a gentle, pecking motion, touch, lift, touch, to grind a small starter dimple. This prevents the bit from skating away.
Step 5: Switch and Drill to the Midpoint.
Once the dimple is established, switch to your chosen cylindrical diamond core drill (e.g., 2mm). Continue the pecking motion, letting the bit’s weight provide most of the pressure. Do not force it. Drill until the bit is about halfway through the stone. Stop, lift the stone, dry it, and hold it up to your light source. Look for a bright spot on the back, that’s your breakthrough point getting close. Mark its center with your marker.
Step 6: Flip and Drill from the Back.
Flip the stone over in the clay, aligning the new back mark with the bit. Secure it. Drill from this side using the same technique. You’ll feel a slight drop in resistance when the two holes connect in the middle.
Step 7: Clean the Hole.
Run the cylindrical bit back through the completed hole from both directions a few times to smooth the interior walls. Rinse the stone thoroughly to remove all abrasive grit.
How Long Does It Actually Take? (And Why Rushing Breaks Stones)
Patience isn’t a virtue here; it’s a requirement. The timeline depends on stone hardness, thickness, and bit size.
Drilling through a 1-inch thick piece of quartz with a 1mm bit takes 3 to 8 minutes. The variation comes from the specific piece’s internal hardness, which you can’t know until you start.
If you push harder to speed things up, you increase sideways pressure on the bit. That’s how you snap a delicate 0.75mm drill shaft. You also generate more heat faster than the water can dissipate it, inviting a thermal crack. The pecking motion exists to manage heat and clear compacted stone dust from the bit’s cutting face.
The part nobody mentions: A worn-out bit will turn an 8-minute job into a 40-minute slog. If you’re making no progress after several minutes of steady pecking, the bit is likely done. Switch to a new one.
What to Do When a Stone Breaks (It’s Not Always Your Fault)
Even with perfect technique, some stones will break. A beginner’s breakage rate can be as high as one in three. With practice, it can fall to roughly one in eight.
Internal, invisible fractures are the usual culprit, especially in quartz. The pressure of drilling finds the weak plane, and the stone splits along a fault line you never saw. Stones like amazonite are prone to “chip-out,” where flakes shear off the exit side if you drill straight through instead of from both sides.
When a stone cracks, stop. Assess if the pieces are still usable as smaller beads or accents. Then, examine the break. A clean, internal fracture means it was flawed from the start. A jagged exit blowout means your technique or speed was off. Learn from the fragment, then move on to the next stone.
Frequently Asked Questions
Can I use a regular drill press for stones?
Standard woodworking drill press typically lacks the high RPM (20,000+) needed for effective diamond grinding. Its chuck is also too large for tiny diamond bits. You need a rotary tool or a specialized lapidary drill press designed for high-speed, low-pressure abrasive work.
What’s the best speed setting on my Dremel?
Start in the medium range, between 15,000 and 20,000 RPM. This is fast enough for efficient cutting but slow enough to maintain control. For very small bits (under 1mm) or hard stones, you may need to go faster. For larger bits or to reduce grabbing, you can go slower. Let the sound guide you, a high-pitched whine means it’s cutting; a labored groan means you’re pressing too hard.
How do I drill a hole in sea glass or a seashell?
The principles are the same, diamond bit, water, gentle pressure, but the material is more fragile. You must use even lighter pressure and secure the piece completely to prevent vibration. We have detailed guides on drilling sea glass and seashells that cover the specific holding techniques.
My bit keeps getting stuck. What am I doing wrong?
Sticking usually means one of three things: you’re applying too much downward pressure, the bit is clogged with stone dust, or you’re not lifting the bit frequently enough to clear debris. Use a more aggressive pecking rhythm, lift the bit completely out of the hole every few seconds, and ensure the water level is high enough to flood the work area.
Can I enlarge an existing hole?
Yes, but do it carefully. Use a diamond-coated reamer or a larger cylindrical diamond bit. Keep the stone and bit flooded with water, and use the same pecking motion. Do not try to force a larger bit through; let the abrasive action do the work to avoid cracking the stone from the inside out.
The Bottom Line
Drilling rock for jewelry is a test of patience, not strength. Your most important tool is a light touch. The Dremel 3000 with a set of diamond core bits is the default starting point for a reason, it’s accessible and has the right speed. Remember the trade-off: the water that saves your stone is a electrical hazard your tool’s manual explicitly warns against. Mitigate that with a GFCI outlet.
Your first few stones might crack. Your first few bits will wear out faster than you expect. That’s the cost of the learning curve. But when you pull a smooth, cleanly drilled agate pendant from the water, strung on a cord you made, the frustration evaporates. You’ve turned a found stone into a piece of wearables. That’s the whole point.
