
How to Drill a Perfect Faucet Hole in Any Sink Material Safely
This post contains affiliate links. As an Amazon Associate, we earn from qualifying purchases.
Drill a faucet hole in a sink with a 35mm (1 3/8”) diamond-grit hole saw for granite or a bi-metal hole saw for stainless steel. The critical step is stopping 3mm before breakthrough on stone sinks to weaken the hole for a clean punch-out, preventing a catastrophic crack. The standard faucet tailpiece is 1 1/4” in diameter, but the 1/8” clearance of a 1 3/8” hole is mandatory for alignment and installation.
That 1/8-inch gap is the tolerance that lets you thread the faucet shank through a hole that isn’t perfectly aligned. A quarter-inch of misalignment is a nightmare; an eighth-inch is just Tuesday. The gap swallows it.
What follows is the difference between a clean, one-afternoon install and a $400 sink in the trash. We’ll cover the three sink types that behave differently, the one measurement that matters more than the hole size, and the factory sticker you should never trust.
Key Takeaways
- The universal standard faucet hole size is 35mm (1 3/8 inches), which provides 1/8-inch clearance for the standard 1 1/4-inch faucet tailpiece.
- For granite or ceramic sinks, use a diamond-grit hole saw and stop drilling 3mm before breaking through, then punch out the remaining core to prevent cracking the glaze.
- Always verify the faucet’s available shank length against your combined countertop and sink rim thickness before drilling; a too-short shank is a dead stop.
- An existing hole that’s too small must be drilled larger with a diamond hole saw; a hole that’s too large requires an oversized escutcheon (deck plate) to seal.
- Drilling into an older porcelain or cast iron sink is not a DIY job, it requires a specialized tool like a Relton Sink Cutter.
The Standard Faucet Hole Size (and Why It’s Not 1 1/4″)
Most faucet tailpieces are 1 1/4 inches in diameter. So why isn’t the standard hole size 1 1/4 inches? The answer is alignment and error. A 1 3/8-inch hole gives you that crucial 1/8-inch of wiggle room. Threading a faucet shank through a perfectly sized hole is nearly impossible unless your sink and countertop are laser-level. The clearance lets you start the threads even if the hole is a hair off-center.
The industry-standard faucet hole diameter is 1 3/8 inches (35mm), a dimension adopted by nearly all major manufacturers to ensure cross-brand compatibility. This provides the necessary clearance for the standard 1 1/4-inch faucet tailpiece.
You can check your sink’s existing hole with a digital caliper. If you don’t have one, a U.S. Half-dollar coin is about 1.20 inches wide. If it fits through the hole with a little room, you’re likely at the 1 3/8-inch standard. If it won’t fit at all, you have a smaller, likely older, vintage cutout.
Sink Material Dictates the Tool
Not all sinks are created equal, and the wrong bit turns a simple job into a ruined basin. The tool choice is non-negotiable.
| Sink Material | Correct Tool | Critical Note |
|---|---|---|
| Stainless Steel | Bi-metal hole saw, Unibit (step bit) | Use cutting oil or lubricant. Go slow to avoid work-hardening the metal. |
| Granite/Composite | Diamond-grit hole saw | Must use water to cool and lubricate. Stop 3mm before breakthrough. |
| Ceramic/Fireclay | Diamond-grit hole saw | Same as granite. The glaze is harder than the clay body beneath. |
| Porcelain-enameled Cast Iron | Relton Sink Cutter or professional | Do not attempt with a standard drill. The enamel will chip catastrophically. |
For stainless steel, a sharp bi-metal hole saw is your best bet for holes over 1 inch. For smaller accessory holes, a Unibit is fantastic because it drills a pilot and steps up to size in one go, leaving a clean edge. The key is lubrication, a few drops of cutting oil or even dish soap and water keeps the metal from overheating and ruining the saw’s teeth.
For stone and ceramic, only a diamond-grit hole saw will work. You cannot use a standard twist bit or a bi-metal saw; they will glaze over and burn in seconds. The diamond abrasive grinds through the material. This is where your drilling a hole in acrylic technique fails completely, acrylic melts, stone abrades.
The 3mm Rule That Prevents a Crack
This is the step every DIY guide glosses over and the one that saves your sink. When drilling granite, ceramic, or composite sinks with a diamond hole saw, you do not drill all the way through.
You drill until the pilot bit just barely pokes out the other side, and the hole saw has cut a groove to within about 3mm of breaking through. Then you stop. The remaining thin core of material is now weakened. You place the sink on a fully supported, flat surface (never on an unsupported edge) and tap out the core with a hammer and punch or the back of a screwdriver.
Where this goes sideways: Drilling a granite sink all the way through with the hole saw. The exiting teeth can catch the edge of the breakthrough point and chip out a dinner-plate-sized chunk from the underside, ruining the sink instantly.
The manufacturer sticker on the sink’s underside marks the center punch location. Do not trust it blindly. Hold your faucet base or a template up to the sink deck and visually confirm the marked spot is centered where you want it. That sticker can be off by a quarter-inch at the factory.
What You Need Before You Start
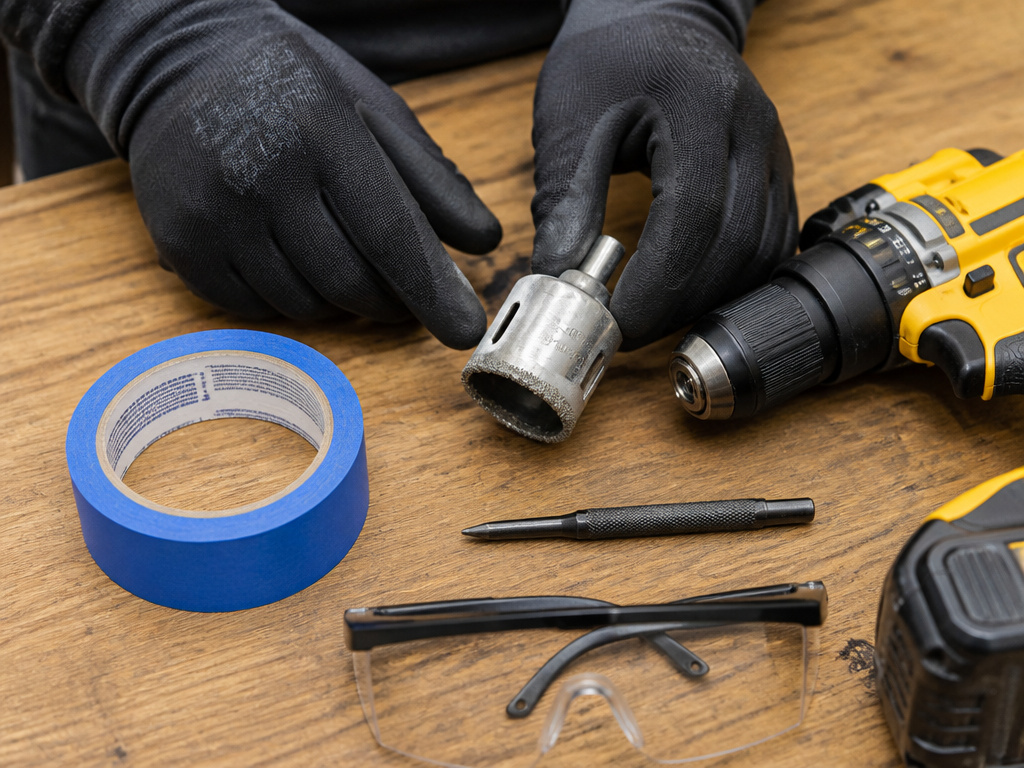 Gather your tools. Rushing to the hardware store mid-job guarantees a mistake.
- Drill: A variable-speed drill. Corded is better for sustained power on stone.
- Hole Saw: Diamond-grit for stone/ceramic (35mm / 1 3/8″), bi-metal for stainless steel.
- Arbor & Pilot Bit: The mandrel that holds the hole saw. For attaching a hole saw, ensure the arbor is tight and the pilot bit is sharp and correct for the material (masonry bit for stone, standard bit for metal).
- Measuring & Marking: Tape measure, center punch, painter’s tape.
- Safety: Safety glasses, hearing protection, gloves.
- Lubrication/Coolant: Spray bottle with water (for stone), cutting oil (for metal).
- Support: Wood blocks or a sacrificial board to place under the sink while drilling.
- Finishing: File or deburring tool to smooth sharp edges.
Before you mark a single spot, check the underside of the sink. Look for braces, ribs, or mounting hardware directly behind your planned hole location. Drilling into a structural brace makes faucet installation impossible.
Step-by-Step: Drilling a Stainless Steel Sink
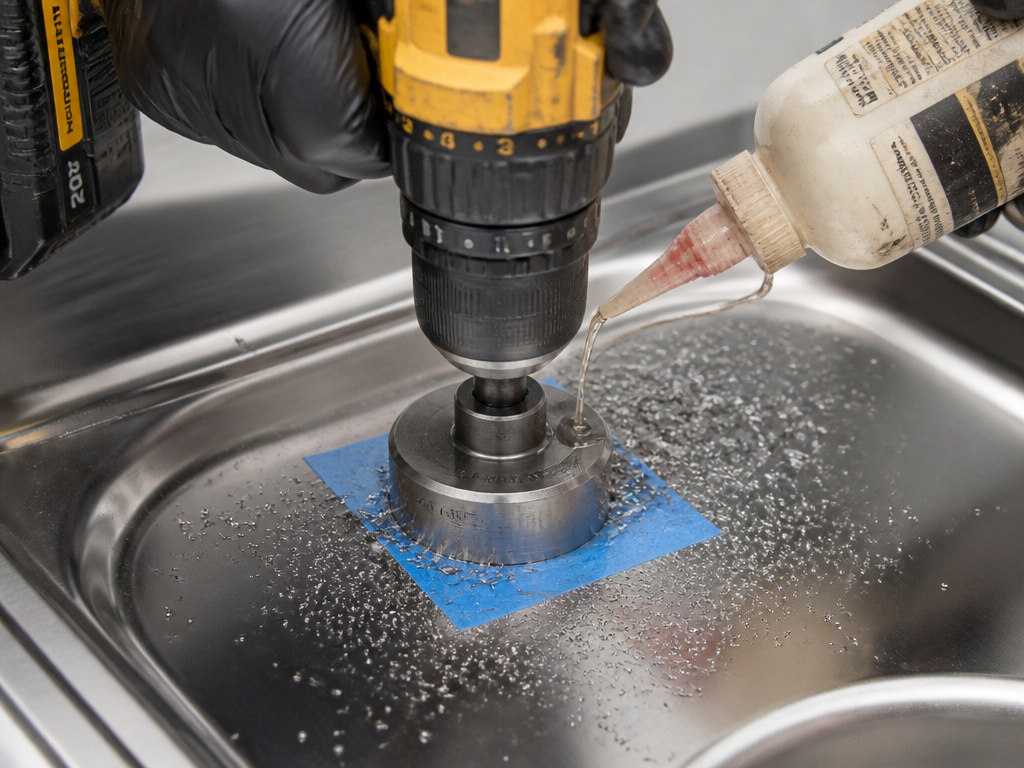 Stainless steel is forgiving if you keep it cool. The enemy is heat, which work-hardens the steel and makes it impossible to cut.
- Tape & Mark: Apply painter’s tape over the drilling area. This helps prevent the drill bit from “walking” and gives you a clear surface to mark. Measure and mark the exact center of your hole. Use a center punch to make a solid dimple for your pilot bit.
- Start the Pilot Hole: Using a small, sharp drill bit (1/8″ or 3mm), drill a pilot hole straight through the tape and metal. This guides your hole saw’s pilot bit and prevents skidding. For a clean straight hole, use a drill guide or press firmly and squarely.
- Mount the Hole Saw: Secure your 1 3/8″ bi-metal hole saw to the arbor. Ensure the pilot bit extends beyond the saw’s teeth.
- Lubricate and Drill: Apply a steady stream of cutting oil to the cutting edge. Start the drill at a slow speed, applying firm, steady pressure. Let the saw’s teeth do the work, don’t force it. Keep the oil flowing to clear chips and dissipate heat.
- Clear Chips & Finish: Every 10-15 seconds, pull the saw out to clear the metal shavings from the gullets. This keeps the cut efficient. When the pilot bit breaks through the underside, slow down. Finish the cut with light pressure until the plug falls free.
- Deburr: The hole will have a sharp, ragged edge. Use a round file or a deburring tool to smooth the inside and outside edges. This protects the faucet’s rubber gasket and your hands.
Step-by-Step: Drilling a Granite or Ceramic Sink
This is a wet, messy job. Do it outside or in a garage with plenty of drop cloths.
Before you start: Wear safety glasses, flying stone grit is no joke. Have a helper spray water continuously. The diamond saw must stay cool, or it will glaze over and stop cutting. The water also suppresses the silica dust, which is a serious health hazard.
- Support the Sink: Place the sink on a stable, flat surface. Put a sacrificial piece of wood underneath the drilling area. This supports the material during the final punch-out and protects your work surface.
- Mark and Tape: Apply painter’s tape. Mark the center. Use a masonry nail and hammer to create a small starter pit if you don’t have a center punch for stone.
- Start Drilling with Water: Have your helper start spraying water at the cutting point. Begin drilling at a low speed (300-500 RPM) with moderate pressure. Let the diamond abrasive grind; do not push hard.
- Stop at 3mm: Drill until the pilot bit just protrudes through the bottom and you can see the continuous cut groove from the hole saw around the entire circle. The center will still be attached. This is the 3mm-thick plug.
- Punch Out the Core: Turn the sink over onto a flat, fully supported surface. Place a small block of wood over the plug area. Tap the block firmly with a hammer. The weakened core should pop out cleanly. If it doesn’t, carefully drill a millimeter deeper and try again.
- Clean and Smooth: Rinse the sink thoroughly. Use a stone file or sandpaper to smooth any rough edges around the new hole.
The Measurement Everyone Forgets: Shank Length
You have a perfect 1 3/8-inch hole. Your new faucet is gorgeous. You go to install it and the threaded shank doesn’t protrude far enough below the sink to get the mounting nut started. Game over.
This happens with under-mount or solid-surface installations. You must measure the total thickness the faucet must pass through: the countertop plus the sink rim. Compare this to the faucet’s “shank length” or “thread length” listed in its specs. Kohler’s installation guide explicitly warns to verify this “Y” dimension for handle clearance, the same principle applies underneath.
If the shank is too short, your only options are a different faucet or a thinner countertop spacer. Check this before you drill.
Fixing Existing Holes
Mistakes happen. Old sinks exist. Here’s how to deal with what you find.
- Hole is Too Small: The only fix is to enlarge it. Use the correct diamond or bi-metal hole saw to carefully widen the hole to 1 3/8″. Center the new cut as best you can over the old one. A drill guide is essential here for drilling a straight hole.
- Hole is Too Large: If the hole is up to about 1 3/4 inches, an oversized escutcheon or deck plate will cover the gap. These are available from plumbing suppliers. If the hole is larger, you may need a faucet baseplate specifically designed for widespread setups.
- Hole is in the Wrong Place: This is the toughest fix. For stainless steel, you can sometimes have a welding shop fill the old hole and grind it smooth, then drill a new one elsewhere. For stone, it’s often more cost-effective to replace the sink. This is why measuring three times before drilling isn’t just a cliché.
The part nobody mentions: Forcing a 1 1/4-inch faucet tailpiece through a 1 1/4-inch hole. It might thread, but the constant stress from tightening and the vibration of use can create a hairline crack in the sink material. That crack will spread with thermal cycles, leading to a leak you can’t fix.
Frequently Asked Questions
Can you drill a hole in any sink?
No. Older porcelain-enameled cast iron sinks are notoriously difficult and should only be drilled by a professional with a specialized tool like a Relton Sink Cutter. Attempting it with a standard drill almost always results in the enamel shattering.
What if my sink already has a hole but it’s not standard?
Measure it. If it’s slightly larger than 1 3/8″, buy an oversized escutcheon plate to cover the gap. If it’s smaller, you must carefully enlarge it with the correct hole saw. There is no “hole stretcher” tool.
Is a diamond hole saw necessary for a granite sink?
Yes. A standard metal or wood hole saw will be destroyed in seconds and will not cut the stone. A diamond-grit hole saw is the only tool for the job. The same goes for drilling a hole in ceramic or fireclay.
Can I use my regular drill, or do I need a hammer drill?
Use a regular drill in standard rotary mode. Do not use hammer action. The hammering function is for masonry drilling into brick or concrete and will shatter the delicate structure of a granite or ceramic sink.
Will drilling a hole void my sink’s warranty?
Almost certainly yes. Most sink manufacturers explicitly state that drilling voids the warranty. The warranty covers manufacturing defects, not user modifications. Be confident in your measurements before you start.
Before You Go
The right hole is 35mm, drilled with the right saw, and stopped 3mm short on stone. Check the underside for obstructions, measure the faucet shank length, and never trust a factory sticker over your own eyes. For stainless, keep it cool with oil. For granite, keep it wet with water. And for cast iron, call a pro. Your sink is one of the most permanent fixtures in your kitchen, a half-hour of patient setup beats a lifetime of looking at a mistake.
