
How to Determine Drill Bit Size for Wall Anchors Correctly
This post contains affiliate links. As an Amazon Associate, we earn from qualifying purchases.
To determine drill bit size for a wall anchor, match the bit diameter to the anchor diameter for expansion anchors (wedge, sleeve) and use a smaller pilot bit for concrete screws (Tapcon-style). For a 1/4″ wedge anchor, use a 1/4″ bit. For a 1/4″ Tapcon screw, use a 3/16″ bit. The hole must be drilled at least 1/4″ deeper than the anchor’s embedment depth to allow for debris.
That split, same size for some, smaller for others, is where most DIY guides stop. They leave you with a rule but no mechanism, so when you’re staring at a box of mixed anchors from the hardware store, the rule feels like a guess. The real difference isn’t in the names; it’s in how each anchor type generates its holding power inside the hole.
What follows: the two mechanical rules, the manufacturer specs that back them up, and the one measurement (embedment) that decides whether your shelf holds books or becomes a projectile.
Key Takeaways
- Expansion anchors (wedge, sleeve) need a hole the same diameter as the anchor. The bit must match the shank size exactly so the expansion mechanism can press outward against the concrete.
- Concrete screw anchors (Tapcon-style) need a pilot hole slightly smaller than the screw diameter. The screw cuts its own threads into the concrete, so the hole must be undersized to give the threads material to bite.
- Drill the hole at least 1/4″ deeper than the anchor will sit. This extra space is non-negotiable, it gives displaced concrete dust and the anchor’s tip a place to go.
- Minimum embedment depth is 1 inch for most light-duty anchors. Going shallower turns a 500-pound holding anchor into a 50-pound liability.
- Always use a carbide-tipped masonry bit in a hammer drill. A standard twist bit will dull, overheat, and produce an oversized, rough hole that cripples holding strength.
The Golden Rule: Anchor Diameter Dictates Bit Size
Head design changes the entire process. Look at the business end of your anchor.
For wedge, sleeve, and drop-in anchors, the drill bit diameter must equal the anchor’s nominal diameter. A 1/4″ anchor gets a 1/4″ bit. A 3/8″ anchor gets a 3/8″ bit. This is specified in ANSI B212.15 standards for mechanical anchors.
The mechanism is simple physics. A wedge anchor works by pulling a conical plug up into an expansion sleeve, forcing the sleeve outward against the walls of the hole. If the hole is even 1/16″ too big, the sleeve expands into empty space before it contacts the concrete. The anchor spins, pulls out with light pressure, and your mounted TV hits the floor. The same logic applies to sleeve anchors and drop-in anchors, they all need a tight, precise hole to expand against.
For concrete screws, the rule flips. A Tapcon anchor doesn’t expand. It cuts threads.
A 3/16″ diameter Tapcon anchor requires a 5/32″ diameter Tapcon bit. A 1/4″ diameter Tapcon anchor requires a 3/16″ diameter Tapcon bit. Using the wrong size drill bit will affect performance values and may cause failure. (Source: ITW Red Head Tapcon Product Data)
The screw’s threads need intact concrete to grip. An oversized pilot hole leaves no material for the threads to engage, so the screw turns freely and never sets. The undersized pilot hole ensures the threads have to cut their way in, creating a tight, load-bearing connection. This is why you can’t use a standard masonry bit for Tapcons, they’re sized slightly larger.
The part nobody mentions: mixing up these two rules is the single most common cause of anchor failure in DIY projects. It’s not that the anchor was weak; you drilled the wrong-sized hole for its mechanism.
Why Hole Depth Is More Critical Than Diameter
Diameter gets the anchor in. Depth decides if it stays.
Every anchor has a minimum embedment depth, how far its business end must sit inside the concrete to develop its rated strength. For a 1/4″ wedge anchor, that’s typically 1-1/8 inches. For a Tapcon, it’s 1 inch. Drill short of that, and you’re relying on the weak, crumbly surface layer of the concrete.
The rule printed on every manufacturer guide: drill the hole at least 1/4 inch deeper than the anchor’s embedment.
This isn’t a suggestion for neatness. When you drive a wedge anchor or cut threads with a concrete screw, you displace material. Concrete dust, chips, and the anchor’s own tip need somewhere to go. If the hole is too shallow, that debris packs under the anchor’s tip. It prevents the anchor from seating fully, leaving it proud of the surface and reducing its effective embedment. Your fixture won’t sit flush, and the anchor’s holding power can drop by half.
Easy to miss: The embedment depth is measured from the concrete surface to the bottom of the anchor after it’s set. Your hole depth must be deeper. Mark your drill bit with tape at the correct depth before you start. One shallow hole in a set of four is all it takes to make a bench rack.
Common Anchor Sizes & Drill Bit Chart
This chart covers the three most common anchor types you’ll find at any hardware store. Keep it bookmarked.
| Anchor Type | Anchor Diameter | Drill Bit Diameter | Min. Embedment | Min. Hole Depth |
|---|---|---|---|---|
| Wedge Anchor | 1/4″ | 1/4″ | 1-1/8″ | 1-3/8″ |
| Wedge Anchor | 3/8″ | 3/8″ | 1-1/2″ | (Embedment + 1/4″) |
| Wedge Anchor | 1/2″ | 1/2″ | 2-1/4″ | 2-3/4″ |
| Tapcon Screw | 3/16″ | 5/32″ | 1″ | 1-1/4″ |
| Tapcon Screw | our guide to choosing the correct drill bit starts with the material you’re drilling into. |
For hollow walls like drywall or plasterboard, the rules change completely. You’re not drilling for an anchor; you’re drilling for a plastic sleeve. The bit size should match the anchor’s body diameter so it fits snugly without bending.
Common mistake: Using a wood or masonry bit on drywall. A standard twist bit will tear the paper face and create a ragged, oversized hole. Use a drywall drill bit, often sold as a “plasterboard bit”, with a sharp, spur-less tip designed to cut cleanly without snagging.
If you’re mounting something light on drywall, you can sometimes install a plastic wall anchor without a drill at all. A Phillips screwdriver can often poke a starter hole, and the anchor can be tapped in with a hammer. This works for small anchors in soft drywall, but for anything heavier than a picture frame, drill the proper pilot hole.
The Tools That Actually Work (And One That Doesn’t)
Your drill bit choice is useless if your tool can’t drive it.
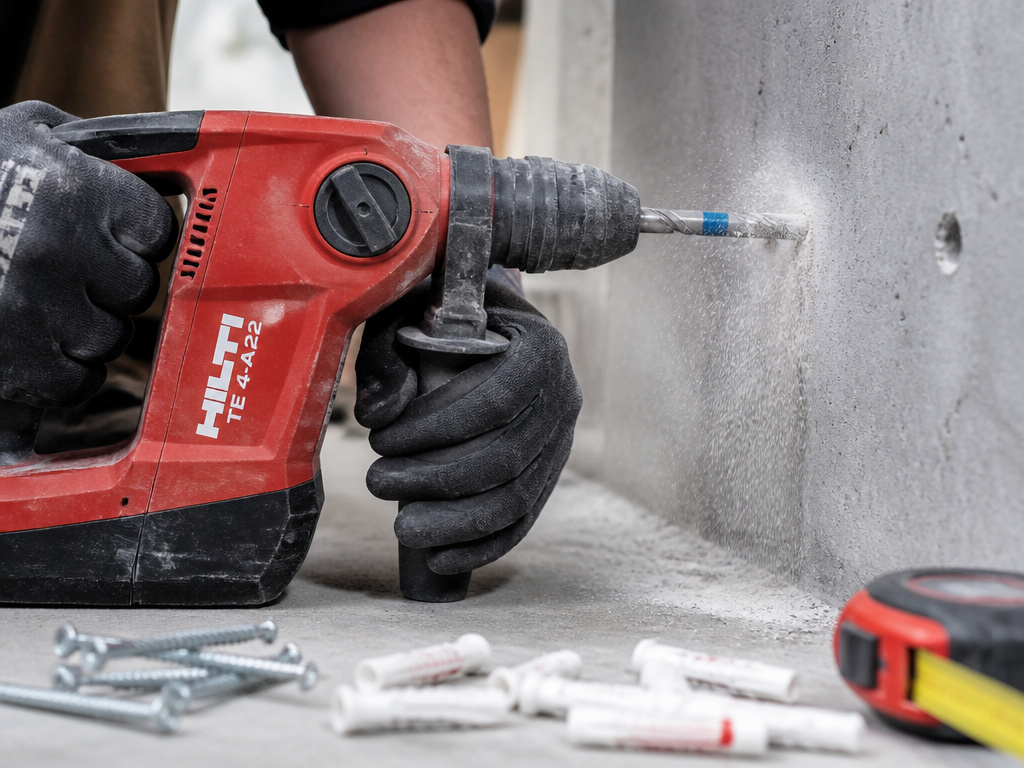
For concrete, brick, or block, you need a hammer drill (also called a rotary hammer). The hammering action pulverizes the masonry, while the rotation clears the dust. A standard drill will overheat, burn out its motor, and take ten times as long. It will also produce a rough, conical hole that’s wider at the top, exactly what you don’t want.
The bit must be carbide-tipped and rated for masonry. Look for “SDS-Plus” or “carbide masonry” on the shank. A standard masonry bit will dull after a few inches in concrete, and a dull bit drills an oversized hole. The difference between a $5 bit and a $15 bit is whether your anchor holds or spins.
For the drill itself, a mid-range corded hammer drill like the Bosch Bulldog or a cordless model from the DeWalt 20V MAX or Milwaukee M18 FUEL lines will handle 99% of anchor jobs. Don’t rent a demolition hammer for a dozen shelf anchors; don’t use a pocket driver for a 1/2″ hole in a foundation wall.
Skip the impact driver for drilling. Its hammering action is for turning screws, not for drilling into masonry. You’ll destroy the bit and the tool.
Step-by-Step: Measuring, Marking, and Drilling the Right Hole
 1. Identify your anchor type and diameter. Check the box or the anchor itself. It’s usually stamped on the head or printed on the plastic strip. No label? Measure the shaft diameter with calipers or compare it to drill bits.
2. Select the correct drill bit using the rules above. For a wedge anchor, match diameters. For a Tapcon, go one size down. Have the differences between masonry and regular drill bits clear in your mind before you start.
3. Calculate the minimum hole depth. Find the anchor’s minimum embedment (often on the box). Add at least 1/4 inch. Example: 1-1/8″ embedment + 1/4″ = 1-3/8″ hole depth minimum.
4. Mark the drill bit with tape. Wrap a piece of painter’s tape around the bit at your calculated depth. This is your visual stop guide. Do not eyeball it.
5. Drill straight and steady. Hold the hammer drill firmly, apply moderate pressure, and let the tool do the work. Keep the bit perpendicular to the wall. Blow out the dust from the hole when finished, a few sharp breaths or a dedicated vacuum attachment works.
1. Identify your anchor type and diameter. Check the box or the anchor itself. It’s usually stamped on the head or printed on the plastic strip. No label? Measure the shaft diameter with calipers or compare it to drill bits.
2. Select the correct drill bit using the rules above. For a wedge anchor, match diameters. For a Tapcon, go one size down. Have the differences between masonry and regular drill bits clear in your mind before you start.
3. Calculate the minimum hole depth. Find the anchor’s minimum embedment (often on the box). Add at least 1/4 inch. Example: 1-1/8″ embedment + 1/4″ = 1-3/8″ hole depth minimum.
4. Mark the drill bit with tape. Wrap a piece of painter’s tape around the bit at your calculated depth. This is your visual stop guide. Do not eyeball it.
5. Drill straight and steady. Hold the hammer drill firmly, apply moderate pressure, and let the tool do the work. Keep the bit perpendicular to the wall. Blow out the dust from the hole when finished, a few sharp breaths or a dedicated vacuum attachment works.
Where this goes sideways: Stopping the drill while the bit is still in the hole. This lets debris settle and pack around the bit, jamming it. Always withdraw the bit while it’s still spinning.
If you hit rebar or a stone aggregate, stop. Do not force it. Switch your drill to rotary-only mode (no hammer) and use a dedicated Rebar Eater bit to cut through the metal, then switch back to hammer mode to finish in concrete. Moving the hole is your other option, but that means re-spacing all your anchors.
Diagnosing a Bad Hole Before It Fails
 A bad hole often looks fine until you try to set the anchor. Check these signs before you commit.
| Symptom | Likely Cause | Fix |
|---|---|---|
| Anchor slides in easily | Hole is oversized | Use a larger diameter anchor that matches the hole, or fill with epoxy. |
| Anchor won’t start | Hole is undersized | Drill again with the correct size bit. |
| Anchor won’t seat fully | Debris at bottom of hole | Drill the hole deeper and clean it thoroughly. |
| Hole is ragged/cone-shaped | Dull bit or no hammer action | Use a new carbide bit and a hammer drill. |
| Concrete cracks around hole | Drilling too close to edge (<5x diameter) | Move the hole inward or use a specialty edge anchor. |
If you’ve already drilled an oversized hole, all is not lost. For light duty, you can switch to a toggle bolt. For heavier loads, an epoxy anchoring system like DeWalt UltraCon or Hilti HIT fills the void and creates a bond stronger than the concrete itself. It’s a more involved process, but it’s the professional repair.
Frequently Asked Questions
Can I use the same drill bit for all wall anchors?
No. You must follow the two different rules: same-diameter bits for expansion anchors (wedge, sleeve), smaller pilot bits for concrete screws (Tapcon). Using a standard bit for a Tapcon will create an oversized hole and the screw will not hold.
How do I know if my hole is deep enough?
The anchor should seat fully with its nut or head flush against your fixture, and you should still see the bottom of the hole when looking in. If the anchor stops before it’s fully seated, or if you can’t see the bottom of the hole, it’s too shallow. Drill deeper.
What if I don’t have a hammer drill?
For concrete or brick, you realistically need one. A standard drill will not work effectively and will damage itself. For drywall, a standard drill is fine, just use a sharp drywall drill bit to avoid tearing.
Is a 1/4″ anchor strong enough for a TV mount?
It depends on the embedment depth and the concrete quality. A properly installed 1/4″ wedge anchor in solid concrete with over 1 inch of embedment can hold several hundred pounds in shear (side load). For a TV mount, which creates a pulling (tensile) load, consult the anchor’s rated capacity and consider using multiple anchors or stepping up to a 3/8″ size.
The Bottom Line
Determining drill bit size for a wall anchor isn’t a single answer. It’s a choice between two mechanical worlds: expansion or thread-cutting. Match the bit to the anchor’s diameter for the first, undersize it for the second. Then drill deeper than you think, with a sharp carbide bit in a hammer drill.
The one anchor I keep in my shop for concrete is the 1/4″ x 2-3/4″ wedge anchor. It covers most fixture thicknesses, meets the embedment depth in one pass, and its holding power surprises people. For drywall, a simple plastic wall anchor drilled with a DEWALT DW1361 Titanium Pilot Point bit gets the job done cleanly every time.
Skip the guessing. Follow the two rules, respect the depth, and the wall will hold what you put on it.
