How to Remove Your Trimmer Head Without Using an Allen Key
This post contains affiliate links. As an Amazon Associate, we earn from qualifying purchases.
To remove a trimmer head without the dedicated Allen key, you must first immobilize the driveshaft. Locate the small locking hole on the gearhead near the shaft. Insert a long, thin flathead screwdriver, a sturdy nail, or a 3mm or 4mm Allen key that fits snugly into this hole. With the shaft locked, turn the head clockwise, this is reverse-threaded and loosens to the right on most models. If there’s no hole, use a strap wrench on the smooth shaft section above the head.
Most people assume they’re stuck without the exact tool the manual shows. They either force the head and strip the threads or give up entirely. The real barrier isn’t the missing key, it’s not knowing where to jam something to stop the shaft from spinning.
This guide covers three field-proven methods to get the head off, explains how to tell which way the threads turn, and shows you how to handle the stubborn ones that won’t budge.
Key Takeaways
- The locking hole on the gearhead is the universal access point. A 3mm Allen key, a 2.5mm key, or a thin screwdriver blade will almost always fit.
- Most trimmer heads are reverse-threaded, they loosen by turning clockwise (righty-loosey). Ryobi and a few others use standard threads (lefty-loosey).
- If there’s no locking hole, a strap wrench on the smooth shaft above the head is the safest way to immobilize it without damaging components.
- Penetrating oil like WD-40 needs 15-20 minutes to creep into the threads. Applying heat for 30 seconds with a heat gun can break the bond of old grass sap and corrosion.
- You rarely need to remove the entire head just to replace the line. Modern bump-feed heads are designed for spool changes with the head still attached.
Before You Start: The Non-Negotiables
Before you start: Disconnect all power. For battery trimmers, remove the battery. For corded, unplug it. For gas trimmers, disconnect the spark plug wire. The shaft can engage with a slight turn, and a trimmer head spinning at 8,000 RPM will remove flesh faster than grass. Also, wear gloves, the edges on old heads are often sharp enough to slice a thumb.
Clean the area around the head with a brush or rag. You need to see what you’re working with. Grass packed around the base hides the locking hole and makes everything slippery.
Gather your substitutes. You’ll want a long, sturdy flathead screwdriver. The thin electronics kind will bend.
A 3mm or 4mm Allen key from a multi-bit set is perfect. A pair of channel-lock pliers or an adjustable wrench might be needed for the head itself. Have a strap wrench handy if you suspect there’s no hole.
How to Identify Your Trimmer’s Thread Direction
You can’t guess this. Turning the wrong way tightens the head further, and the increased torque can strip the aluminum threads on the shaft or crack the plastic head. That’s a repair that costs more than a new trimmer.
Most residential string trimmers use a reverse thread. This is a safety feature, the torque from cutting tends to tighten a standard thread, but it works to loosen a reverse thread, theoretically preventing over-tightening. You loosen it by turning clockwise, as if you’re tightening a normal bolt.
Here’s the quick test before you apply any real force. With the shaft locked (we’ll get to that), try to turn the head clockwise just a fraction. Feel for any movement or a soft click.
If it gives even a little, it’s reverse-threaded. If it feels completely stuck, try turning it counter-clockwise. One direction will have a tiny bit of play before the lock engages; that’s your loosening direction.
Some brands are consistent. Most Stihl models, like the FS 56 RC-E, are reverse-threaded. Many Ryobi cordless models, such as the RY40270, use standard right-hand threads.
Your manual is the final authority. If you don’t have it, search “[Your Trimmer Model] thread direction” online. The five minutes it takes is cheaper than a new gearbox.
| Common Brand | Typical Thread Direction | Loosening Direction | Visual Cue (if present) |
|---|---|---|---|
| Stihl (Gas) | Reverse (Left-Hand) | Clockwise | “L” or arrow on head |
| Echo | Reverse (Left-Hand) | Clockwise | Often none |
| Ryobi (Cordless) | Standard (Right-Hand) | Counter-Clockwise | “R” or no marking |
| DeWalt | Reverse (Left-Hand) | Clockwise | Sometimes arrow on spool |
| Husqvarna | Reverse (Left-Hand) | Clockwise | Varies by model |
Method 1: The Screwdriver Locking Pin (Most Common)
This works for probably 80% of trimmers out there. The manufacturer includes a specific pin or 2.5mm Allen key because it fits the hole perfectly. Any stiff, cylindrical object of similar size will do the same job.
Step 1: Locate the locking hole.
Look at the metal gearhead where the shaft enters. There’s often a round or slightly oblong hole within an inch of the head. It might be filled with dirt. Clean it out. On some models, the hole is on the underside. You might need to rotate the head to bring it into view.
Step 2: Insert your substitute pin.
Take your long flathead screwdriver. The blade should be just narrow enough to fit into the hole. You’re not prying; you’re inserting. Push it in until it seats against the inner mechanism. You’ll feel it stop. If you’re using a 3mm Allen key, insert the short end. The goal is to jam the internal clutch or plate so the shaft cannot rotate.
Step 3: Apply turning force.
With your other hand, grip the trimmer head. Use your channel-lock pliers if the head is knurled, but pad the jaws with a rag to prevent chewing up the plastic. Now, turn the head firmly in the loosening direction you identified. The shaft is locked, so all the force goes into breaking the head loose. It should turn with a solid crack.
If it doesn’t budge, don’t jump on the wrench. You might have the thread direction wrong. Switch direction. If it still won’t move, the head is seized. Skip to the troubleshooting section below.
Method 2: The Shaft-Grip Method (No Locking Hole)

Some trimmers, particularly older models or certain low-end brands, don’t have a locking hole. The shaft is smooth and round. Trying to grip it with regular pliers will mar the metal and make future removals harder. You need a friction-based tool.
A strap wrench is the right answer. It’s a rubber or nylon strap that tightens around the shaft without scratching it. Wrap the strap around the smooth part of the driveshaft, just above the trimmer head. Tighten the wrench’s handle until it has a firm, non-slip grip.
Now, hold the strap wrench steady to prevent the shaft from spinning. With your other hand, turn the head with a wrench or pliers. The strap wrench provides the counter-force you’d normally get from the locking pin.
I tried using a pipe wrench on a smooth shaft once, thinking the teeth would bite. They did. They also gouged four deep grooves into the steel. The next time I needed to remove the head, the strap wrench just slid over those grooves. I had to file the shaft smooth again, which took longer than the original job. A $15 strap wrench saves that headache.
If you don’t have a strap wrench, a last-resort trick is to use a thick, rubberized work glove for maximum grip. Hold the shaft as tightly as possible right above the head while you turn it. This only works if the head is barely tight and your grip strength is exceptional. It’s not reliable.
Method 3: The Wooden Block & Bolt Method (For “Screw” Heads)
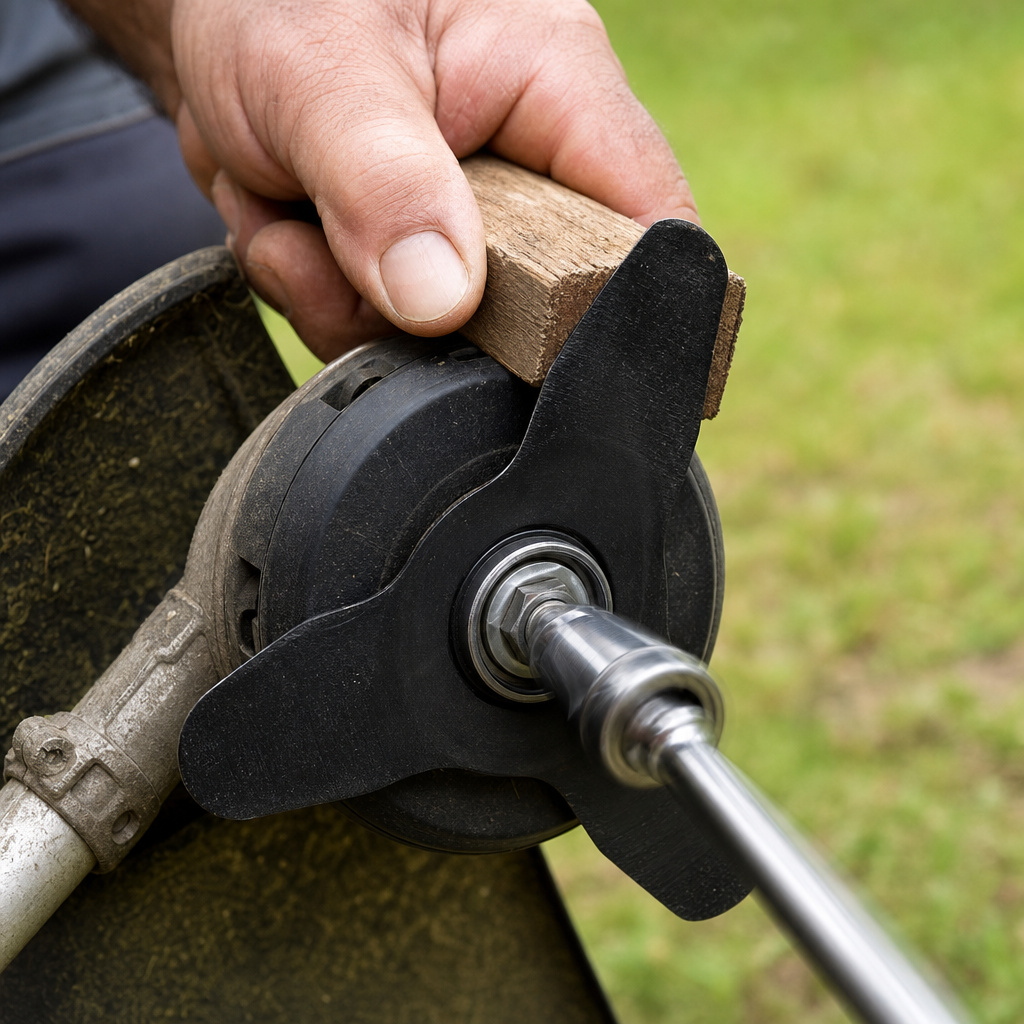
This is for trimmers where the head is held on by a central bolt that goes up the middle of the shaft. You’ll see a large hex or nut in the center of the head instead of a knurled plastic knob. This is common on some commercial units and older “fixed-line” heads.
The principle is different. You’re not locking the shaft; you’re preventing the head itself from spinning while you turn the central bolt.
Find a piece of scrap wood, a 2×4 chunk works. Hold it firmly against one of the cutting blades or the guard mounted to the gearhead. This jams the head from rotating.
Now, using the correct size socket or wrench, turn the central bolt. Important: This bolt is almost always standard threaded. Turn it counter-clockwise to loosen. Once the bolt is out, the whole head assembly slides off the shaft.
What if My Trimmer Head is Stuck?
Corrosion, dried grass sap, and over-tightening can weld the head to the shaft. Force alone will break something. You need chemistry and physics.
First, apply a quality penetrating oil like Liquid Wrench or PB Blaster. WD-40 is a water displacer, not a great penetrant, but it’s better than nothing. Spray it liberally where the head meets the shaft. Let it sit for 15-20 minutes. It needs time to wick into the microscopic gaps in the threads.
Penetrating oil works by capillary action, creeping into spaces thinner than a human hair. If you spray and immediately crank on the wrench, you’re just turning the oil slick. The waiting period is non-negotiable.
If oil doesn’t work, apply gentle heat. Use a heat gun on a low setting (not a torch) and wave it around the base of the head for 30-45 seconds. The goal is to expand the metal head slightly, breaking the bond of corrosion and sap.
The aluminum head expands faster than the steel shaft. Put your glove back on, try the removal method again. It should crack loose.
As a final measure, after applying heat and oil, use a rubber mallet to tap the side of the head (not the top) while applying turning pressure. The vibration can shock the threads free. Don’t hammer it.
What Not to Do: Common Mistakes That Cause Damage
Avoid these pitfalls. I’ve seen each one result in a trip to the repair shop or the trash can.
- Don’t use an impact wrench or driver. The sudden, extreme torque can snap the shaft or strip the gearbox gears. This is a hand-tool job.
- Don’t clamp the shaft in a bench vise. The vise can crush the thin-walled shaft, making it impossible to reinstall any head. If you must use a vise, pad it heavily with wooden blocks and clamp on a non-critical section.
- Don’t ignore the thread direction check. This is the number one cause of stripped threads. If you’re fighting it, stop and verify.
- Don’t overtighten the new head. Hand-tight plus a quarter-turn with a wrench is plenty. Overtightening stretches the threads and guarantees the next removal will be a seized nightmare. The vibration of use will not loosen a properly tightened head.
Frequently Asked Questions
Do I need to remove the head to replace the string?
Almost never. Modern bump-feed heads are designed so you can remove just the spool. Tap the head on the ground to advance line, or follow a specific trimmer line replacement process. Removing the entire head is typically for replacement, cleaning, or switching to a blade attachment.
What size Allen key is usually needed?
2.5mm or 3mm Allen key is the most common for the locking hole. A 4mm is less common but used on some heavier-duty models. If you’re buying a multi-bit set for your toolbox, make sure it includes these sizes.
My head spins freely but won’t come off. Why?
You likely have a “quick-load” or “speed-feed” style head. These have a two-piece mechanism. You must depress a button, pull a sleeve, or unscrew a collar to release the spool chamber. Refer to your manual, forcing it will break the plastic tabs.
Can I use a universal replacement head?
Yes, but compatibility is key. Universal heads come with a kit of plastic adapters. You must match the adapter to your shaft’s diameter and thread direction. An incorrect adapter will wobble, vibrate excessively, and wear out the shaft threads quickly. Follow a careful trimmer head installation process.
The Bottom Line
Removing a trimmer head without the factory tool is a straightforward mechanical problem. Find the locking hole and jam a screwdriver in it. If there’s no hole, a strap wrench is your best friend. The real expertise is in the details: knowing the thread direction, letting penetrants work, and avoiding the brute force that breaks things.
Once the old head is off, clean the shaft threads with a wire brush and a drop of oil. That simple step ensures the next removal, or the installation of your new universal head, will be a five-minute job, not another battle. Keep a 3mm Allen key and a strap wrench in your trimmer maintenance kit. You’ll use them more than you think.