
Creating Holes in Wood Without a Drill: Simple Techniques
This post contains affiliate links. As an Amazon Associate, we earn from qualifying purchases.
To make holes in wood without a drill, you have three paths: carving, sawing, or punching. For small holes, use a sharp chisel and mallet. For large or square holes, use a jigsaw or coping saw. For thin material, a nail and hammer can puncture a pilot hole. The hidden constraint is the International Residential Code (IRC), notches in structural lumber cannot exceed one-sixth of the member’s depth, and a top plate cut more than 50% of its width needs a galvanized metal tie.
The code defines the line between a safe modification and a structural compromise that shows up as a sagging floor or a cracked wall two years later. Most weekend projects never touch a load-bearing stud or joist, but when yours does, those numbers decide whether your fix holds.
What follows: the tools that actually work, the one common tool you should avoid, and the specific IRC clauses that keep your project legal and solid.
Key Takeaways
- The International Residential Code (IRC) limits notches in solid lumber to one-sixth of the member’s depth and bans them in the middle third of the span. Ignoring this weakens floors and walls.
- Standard bi-metal hole saws are not particularly suited to wood, they gum up and burn. For clean round holes without a drill, use a coping saw or a sharp chisel instead.
- Cutting or notching a top plate (the horizontal framing piece at the top of a wall) by more than 50% of its width requires a 1.5-inch wide galvanized metal tie fastened with eight 10d nails, extending 6 inches past the opening.
- A sharp chisel and mallet can carve a clean square hole faster than a dull power tool. The key is scoring the outline with a knife first to prevent tear-out.
- Engineered wood products like I-joists have completely different rules. Never notch them unless the manufacturer’s instructions explicitly allow it.
The Hidden Structural Rule You Can’t Ignore
This process is about avoiding a mistake that costs thousands to fix later, which is why the International Residential Code (IRC) exists with its sections on cutting and notching.R502.8 and R602.6, are non-negotiable for any work on framing members.
If you’re just drilling a shelf pin hole in a piece of furniture, skip ahead. If you’re running wire through a floor joist or plumbing through a wall stud, this stops you before you start.
IRC Section R502.8.1 (Sawn Lumber) Notching Limitations: Notches in solid lumber joists, rafters, and beams shall not exceed one-sixth of the depth of the member. Notches shall not be longer than one-third of the depth of the member. Notches shall not be located in the middle one-third of the span.
The math is simple. A 2×10 floor joist has an actual depth of 9.25 inches. One-sixth of that is about 1.54 inches. That’s the maximum depth of any notch you can cut into its top or bottom edge. Go deeper, and you’ve turned a structural member into a hinge point. The sag might not appear for months, but it will appear.
For wall studs, the rules are slightly different but just as strict. Drilling and notching are generally allowed, but within strict zones to preserve strength.
| Framing Member | Max Notch Depth | Max Notch Length | Prohibited Zone |
|---|---|---|---|
| Floor Joist / Rafter | 1/6 of member depth | 1/3 of member depth | Middle 1/3 of span |
| Wall Stud | See Fig. 3 & 4 (IRC) | See Fig. 3 & 4 (IRC) | Varies by load |
| End of Member | 1/4 of member depth | Not specified | N/A |
Where this gets real is the top plate. That double layer of 2×4 or 2×6 at the top of your wall holds your roof and ceiling. The code is brutally specific about compromising it.
IRC Section R602.6.1 Reinforcement Required: When cutting, drilling or notching the top plate by more than 50 percent of its width, a galvanized metal tie not less than 0.054 inches thick (1.37 mm) and 1-1/2 inches (38 mm) wide shall be fastened across and to the plate at each side of the opening. The tie requires not less than eight 10d nails at each side and must extend not less than 6 inches past the opening.
Translation: if you need to cut a 2-inch wide channel in a 3.5-inch wide 2×4 top plate, you must strap it back together with steel. This is the predictable outcome of a compromised load path.
The bottom line: Know what you’re cutting into. If it’s part of your house’s structure, look up the IRC diagrams or consult an engineer. The five minutes it takes beats a call to your home insurance adjuster.
Carving Holes with Hand Tools
When your project is a one-off and precision matters more than speed, your hands are the best tools you have. This is where you feel the wood, understand its grain, and make a cut that fits perfectly.
The Chisel and Mallet Method
For holes up to about 2 inches square or round, a sharp chisel is king. A dull chisel is a danger, it requires more force, slips easier, and tears the wood instead of slicing it.
Start by marking your hole clearly with a pencil. Then, take a utility knife and score deeply along the outline on all sides. This severs the surface fibers and gives you a clean break line, preventing the dreaded tear-out where the wood splinters beyond your mark.
- Relieve the center. Don’t attack the outline first. Use the chisel bevel-down to hog out the waste material from the middle of the hole. Take thin, controlled slices.
- Define the walls. Once the center is clear, work from the edges inward. Place the chisel vertically, bevel facing the waste area, and use the mallet to drive it straight down. This shears the wood cleanly at your scored line.
- Clean up. Pare away any remaining high spots with gentle hand pressure. For a smooth finish, you can sand using the back of the chisel as a flat sanding block.
Skip the knife score, and you’ll spend twice as long cleaning up splintered edges. The chisel will follow the path of least resistance, which is rarely your pencil line.
The Coping Saw for Curves and Internal Cuts
Need a hole in the middle of a panel, not the edge? The coping saw is your answer. Its thin, flexible blade can be threaded through a small starter hole, letting you cut any shape from the inside out.
Where this goes sideways: Using a blade with the teeth pointing the wrong way. The teeth should point away from the handle, so they cut on the pull stroke. A push-cut blade vibrates, wanders, and snaps.
First, you need that starter hole. If you’re truly drill-free, this is where a nail and hammer come in. Drive a finish nail through your marked center point, then pull it out with pliers. That small puncture is enough to thread the coping saw blade.
The technique is all in the frame tension. A loose blade will buckle and break. Tighten it until it pings when you pluck it. Cut slowly, letting the blade do the work. For a round hole, rotate the workpiece, not the saw.
Cutting Larger Holes with Alternative “Power” Tools
Maybe you have power, just not a drill. Or you need a hole bigger than a chisel can reasonably manage. Several common workshop tools can step in, but they each have a learning curve.
The Jigsaw is Your Best Friend
For any hole larger than a few inches, especially in thinner stock like plywood or 1x lumber, a jigsaw is the most versatile choice. It can handle curves, straight lines, and internal cutouts.
The process is straightforward: – Mark your hole. – Plunge-cut at an angle just inside your line. If the saw doesn’t have a plunge feature, drill a starter hole (contradictory, I know) or use the nail-and-hammer method described above. – Follow your line, letting the saw’s base plate ride flat on the workpiece.
The risk is blade drift. Jigsaw blades flex, especially on thick material. The cut on the bottom of the board will rarely match the top perfectly. The fix is to use a sharp, coarse-tooth blade designed for fast wood cutting and to not force the saw. For a cleaner cut on both sides, making large holes in wood with a jigsaw often works better if you score the line deeply on both faces of the board first.
The Oscillating Multi-Tool for Notches and Openings
When you need to cut a hole or notch in a tight spot, like an existing wall or a cramped corner, the oscillating multi-tool shines. Its flush-cutting blade can plunge directly into the surface, making it ideal for creating openings for electrical boxes or plumbing without needing an edge to start from.
It’s slow. It sounds like an angry bee. But its control is unmatched. Use a wood-cutting blade with large teeth for speed. Let the tool’s vibration do the cutting; pressing too hard overheats the motor and glazes the blade.
The Wrong Tool for the Job
Here’s the non-commodity insight you won’t find in most lists: a standard hole saw is a terrible choice for wood if you don’t have a drill. Even if you could turn it by hand, you’d fail.
From the TAToolsOnline.com safety guide: “Both high speed and bi-metal hole saws are suitable for a wide range of materials though they are not particularly suited to wood and highly abrasive materials.”
Why? Wood fibers clog the teeth almost instantly. Without the high RPM of a drill to clear the chips, the saw binds, overheats, and burns the wood. The pilot drill might bite, but the saw body will just spin in a charred, gummed-up groove. For a clean round hole by hand, a coping saw or a drilling without a drill technique with a hand-operated bit is vastly more effective.
Punching, Burning, and Other Extreme Methods
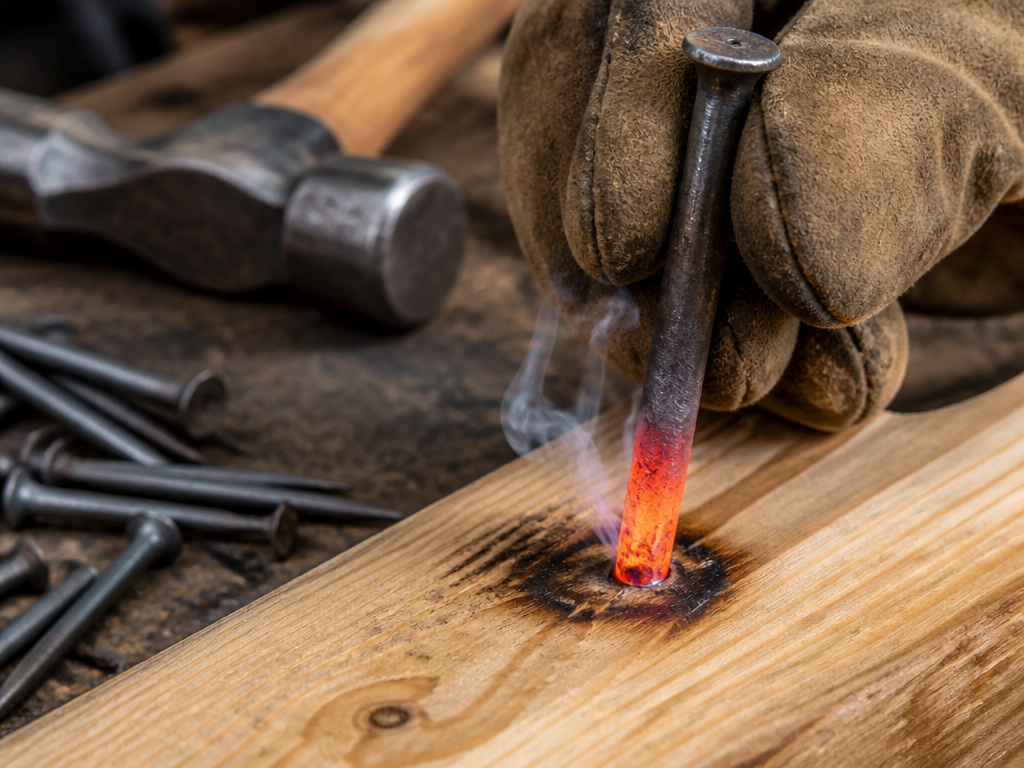
These are methods of last resort, for when you have literally nothing else. They work only in very specific, forgiving scenarios and leave a mess you’ll need to clean up.
The Nail and Hammer Punch: For a small pilot hole in thin, soft wood like pine or plywood, you can drive a nail through and then pull it out. The hole will be rough and the wood will likely splinter on the back side. To minimize this, place the workpiece on a soft backing like a scrap piece of wood, not a hard surface.
The Burn-Through Method: This is exactly what it sounds like. Using a heated metal rod (a large nail heated in a flame works), you can burn a hole through the wood. It’s smoky, smelly, and produces a ring of charred, weakened material. The hole is never clean or precise. It’s a survival skill, not a woodworking technique.
Using a Screw as a Drill Bit: You can sometimes drive a coarse-threaded screw partway into the wood and then back it out. The threads will pull out some material, leaving a crude hole. This only works for very soft woods and small diameters, and it often splits the wood along the grain.
Worth knowing before you start: Any method that involves brute force (punching) or damage (burning) compromises the wood fibers around the hole. That area is now weaker and more susceptible to cracking under stress. If the hole is for a screw or dowel, its holding power will be significantly reduced.
Frequently Asked Questions
Can you make a perfectly round hole without a drill?
You can get close, but not perfectly round. A coping saw or a sharp gouge can create a very clean round hole, but it will have slight imperfections. For a truly perfect circle, you need a lathe, a hole saw in a drill, or a specialized types of wood bits like a Forstner bit, which requires a drill press.
What’s the best tool for a square hole without a drill?
Sharp chisel and a mallet are the definitive tools for a square hole. Score the outline deeply with a knife, then systematically remove the waste from the center outward. For larger square holes, a jigsaw can cut the sides, but you’ll still need the chisel to square off the corners.
Is it safe to notch a floor joist?
It can be, but only within strict limits defined by the IRC (R502.8.1). The notch cannot exceed 1/6 of the joist’s depth, cannot be longer than 1/3 of the depth, and cannot be in the middle third of the joist’s span. When in doubt, consult the ICC building code notes or a structural engineer.
How do you make a hole in wood thicker than your chisel?
For thick wood, you work from both sides. Mark the hole outline on both faces of the board. Score and chisel halfway through from one side, then flip the board and complete the hole from the other side. This ensures clean edges and prevents massive tear-out on the back.
Can you use a manual hand drill instead?
Absolutely. A traditional brace or an eggbeater-style hand drill is the classic “without a power drill” solution. They require specific drill bits for wood with a rounded or square shank. They’re slow but offer excellent control and produce very clean holes.
Before You Go
Making a hole without a drill forces you to think about the material and the method. You learn the grain of the wood, the importance of sharp tools, and the real meaning of patience.
Remember the hierarchy: for small holes, a chisel is precise. For large or internal holes, a saw is efficient. For structural work, the IRC code is law. And for round holes, skip the hole saw and reach for the coping saw or a hand drill.
The goal is to understand that every tool has a purpose, and sometimes the older, slower method teaches you more about the craft than the loud, fast one ever could. Your next project will be better for it.
