Mastering Your Radial Arm Saw: Setup, Safety & Basic Cuts
This post contains affiliate links. As an Amazon Associate, we earn from qualifying purchases.
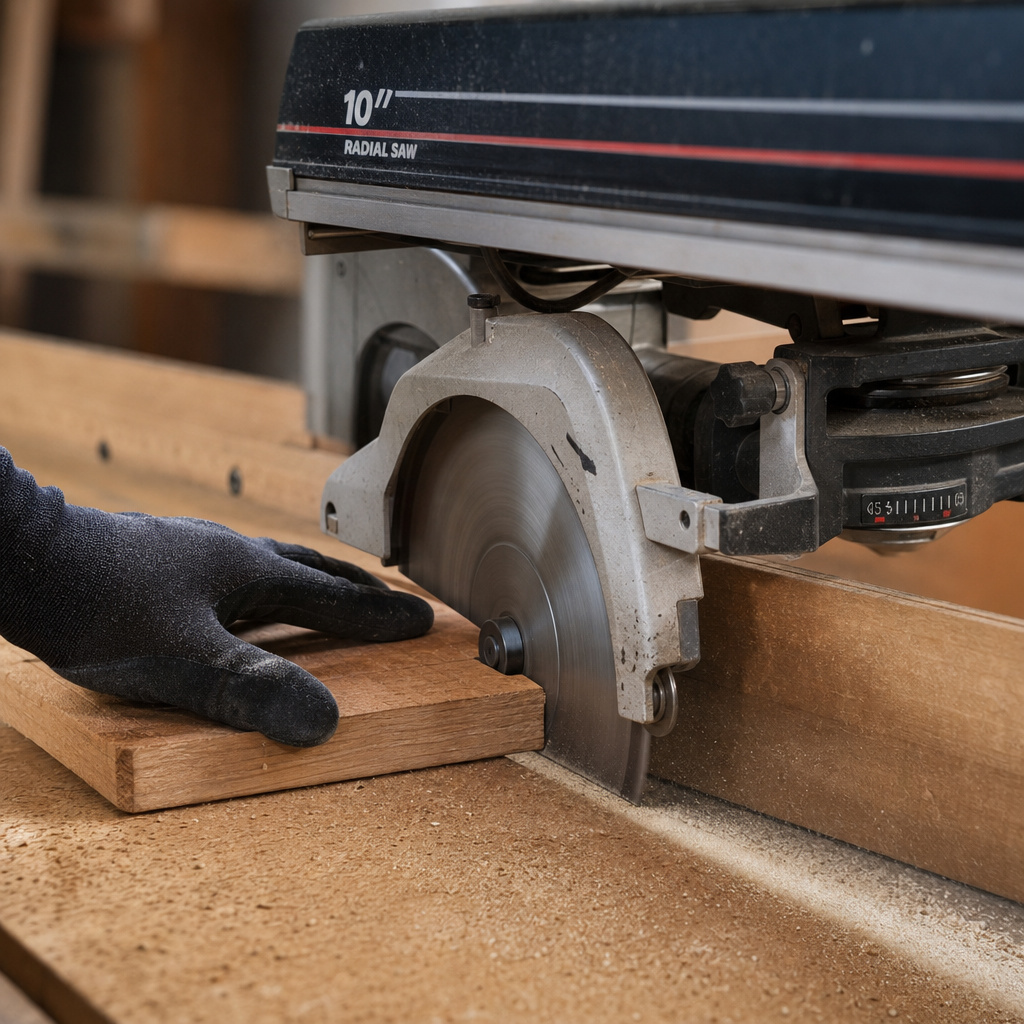
A radial arm saw is a stationary power saw where the motor and blade assembly are suspended on a horizontal arm that can be pulled across the workpiece. It’s used primarily for crosscutting, mitering, and making dado cuts by pulling the spinning blade through wood secured against a fence.
Most people see the long arm and assume it’s just a big miter saw. They miss that the real power, and the real danger, is in its versatility. A table saw excels at ripping, a miter saw at angles, but a radial arm saw tries to do everything. That’s where you get into trouble if you treat it like any other saw.
This guide walks through the non-negotiable safety steps, the critical setup that most people skip, and the specific techniques for the cuts it does well. I’ll also tell you the one job you should never, ever do with it.
Key Takeaways
- Alignment is everything. A radial arm saw that’s even a half-degree out of square will produce tapered, inaccurate cuts. You must check and adjust the blade’s 90-degree relationship to both the table and the fence before any serious work.
- The blade must pull itself into the work. For crosscutting, the blade should rotate toward you. This pulls the workpiece down against the table and back against the fence. A blade spinning the wrong way will climb and kick the wood at you.
- Ripping is a bad idea. While physically possible, ripping on a radial arm saw is inherently dangerous. The cutting forces work against you, pushing the stock away from the fence and creating a major kickback risk. Use a table saw.
- Wait for the blade to stop. The single most common bad habit is reaching for the cut-off piece before the blade has fully stopped spinning. That exposed blade is still a threat for 10-15 seconds after you let go of the handle.
- Use a sharp, purpose-built blade. A dull or incorrect blade forces you to push harder, increasing the chance of binding and kickback. An 80-tooth crosscut blade leaves a finish-ready edge on plywood and hardwood.
A radial arm saw’s primary function is crosscutting lumber to length. The motor and blade are mounted on a yoke that travels along a horizontal arm above the work table. The workpiece is held stationary against a rear fence while the spinning blade is pulled through it. This design also allows for precise miter and bevel adjustments by rotating the arm and tilting the motor, respectively.
Before You Start: The Safety Rules You Can’t Skip
Before you touch the power switch, there are rules. These aren’t suggestions. I’ve seen a 2×4 kicked back hard enough to dent a garage door. I’ve smelled the ozone-burnt-plastic smell of a motor straining against a misaligned cut. Your hands stay behind the fence line. Every time.
Before you start: The blade guard and anti-kickback pawls are not optional. The guard prevents contact with the blade; the pawls grab the wood if it tries to kick back. Operating without them turns a minor slip into a trip to the ER. Also, never wear gloves or loose sleeves, they can get caught in the blade instantly.
- Eye and ear protection are mandatory. Not glasses, industrial-rated safety goggles that seal around your eyes. Sawdust finds a way in. Hearing protection is non-negotiable; the whine of a 15-amp motor at full load is over 100 decibels.
- Unplug for any adjustment. Changing the blade, adjusting the fence, setting a miter angle, if your hand is near the blade path, the plug is out of the wall. I don’t care if you’re just “checking” the alignment.
- Know the “no hands” zone. Mark a line on the table 6 inches in front of the fence. Your hands never go past that line when the blade is spinning. Use a push stick or a sacrificial scrap block to maneuver small pieces.
- Let the blade reach full speed. Pulling the trigger and immediately dragging the blade into the work is a recipe for a stalled motor, a burnt blade, or a kickback. Wait for the sound to settle into its high-pitched whine.
- Return the saw and let it stop. After the cut, push the carriage all the way back to the rear stop. Take your hand off the handle. Wait. Look at the blade and count until it’s motionless. Then retrieve your workpiece.
What You Need to Get Started
You don’t need a shop full of gadgets, but you do need a few specific items. Trying to set up a radial arm saw with a warped framing square is like trying to tune a piano with a rock.
- The Saw: A vintage DeWalt, a modern Delta, or a Bosch. What matters more than brand is condition. The bearings in the arm should roll smoothly with no side-to-side play. The motor should start without a groan.
- Blades: You need at least two. A high-tooth-count crosscut blade (80 teeth for a 10-inch) for clean finish cuts. A stacked dado set for, well, dados. Don’t use a general-purpose “combination” blade for fine work, it tears out plywood veneer.
- Squares: A reliable combination square for quick checks. A high-quality machinist’s square for the final, critical alignment of the blade to the fence. The cheap stamped steel squares from a big-box store are often not square.
- Safety Gear: Industrial safety goggles, earmuffs or plugs, and a dust mask. Sawdust from this thing hangs in the air for an hour.
- Push Stick/Block: A simple shop-made L-shaped block of 3/4-inch plywood. It keeps your fingers a safe 8 inches from the blade when crosscutting short pieces.
- Lubricant & Cleaning Supplies: A light machine oil (3-in-1 oil works) for the column and arm ways. Denatured alcohol and a rag for cleaning pitch off the blade.
The Critical First-Time Setup
A radial arm saw straight from the crate or the previous owner is almost never ready to cut. The factory settings drift in shipping. The previous guy probably tweaked something and never put it back. This setup isn’t a one-time thing, check it every few months of heavy use.
- Secure the Base. Bolt the saw’s stand to the floor or a massive workbench. If it rocks, your cuts will rock. This is the first step everyone ignores and the first reason cuts aren’t square.
- Lubricate the Column. Raise and lower the saw a few times. If it’s sticky, wipe the central column with a light coat of machine oil. A dry column makes depth adjustments a fight, and you’ll tend to set the blade too deep just to avoid the struggle.
- Adjust the Rollers. The motor yoke rides on rollers along the arm. There should be zero side-to-side wobble, but the carriage must still roll with just a finger’s pressure. Adjust the eccentric bushings or set screws until it moves smoothly without play. Too tight and you’ll wear a groove in the arm; too loose and the blade will wander mid-cut.
- Level the Table. Place a long level across the table support rails. If it’s out, loosen the bolts at the rail ends and tap them with a mallet until the bubble is centered. A sloped table means your workpiece isn’t sitting flat against the fence.
- Square the Blade to the Table. This is the make-or-break step. Unplug the saw. Raise the blade fully. Place your machinist’s square on the table, against the blade body (not a tooth). Check near the arbor and at the blade’s front. If light shows through, loosen the motor tilt lock, adjust, and re-tighten.
- Square the Blade to the Fence. With the blade still at 90 degrees to the table, pull the carriage forward. Place your square against the fence and the blade body. Any deviation here gives you a tapered cut, the back of the board is wider than the front. Loosen the yoke swivel lock, tap the motor until it’s square, and lock it down hard.
- Set the Pointer to Zero. Now that the blade is physically square, adjust the miter scale pointer to read 0 degrees. Don’t just trust the pointer to tell you when you’re square; use it to remember the square position after you’ve swung the arm for a miter.
I spent three hours trying to figure out why my crosscuts on a used DeWalt were always 1/16-inch wider at the back. I checked the blade square to the table a dozen times. The problem was the fence itself, it had a slight bow from years of improper storage. I had to joint it flat on a table saw before the saw would cut true. The machine can be perfect, but if the fence isn’t straight, nothing else matters.
How to Make a Basic Crosscut
This is the saw’s bread and butter. Done right, it’s smooth, accurate, and safe. Done wrong, it’s nerve-wracking.
Step 1: Set the Blade Depth. Lower the blade so it extends no more than 1/16 inch below the bottom of your workpiece. Deeper than that increases friction, heat, and the chance of binding. You should see just a sliver of blade teeth protruding. Lock the height.
Step 2: Position the Workpiece. Hold your board firmly against the fence with your left hand. Your hand should be at least 6 inches away from the blade’s path. For a piece shorter than 12 inches, use your push block to hold it.
Step 3: Start the Saw and Let It Spin Up. Pull the trigger. Wait a full two seconds for the motor to reach operating speed. You’ll hear the pitch change from a grind to a clean whine.
Step 4: Make the Cut. With a firm grip on the saw handle, pull the carriage smoothly toward you. Let the blade do the cutting, don’t force the pace. A steady, moderate pull is key. Forcing it causes the motor to bog down and the blade to deflect, creating a rough cut and burning the wood.
Step 5: Return and Wait. Once the cut is complete, push the saw carriage all the way back to its rear position. Release the trigger. Keep your hands away from the table until the blade is completely stopped. That last part is critical. A coasting blade has enough torque to cause a severe injury.
What happens if you skip a step? If you don’t let the blade reach full speed, the initial torque can stall the motor or cause the blade to grab and kick the workpiece. If you don’t return the saw to the rear, the exposed blade hangs over your work area, creating a hazard when you go to retrieve your pieces. It’s a simple discipline that prevents the majority of accidents.
Advanced Cuts: Miters, Bevels, Dadoes, and the Ripping Question
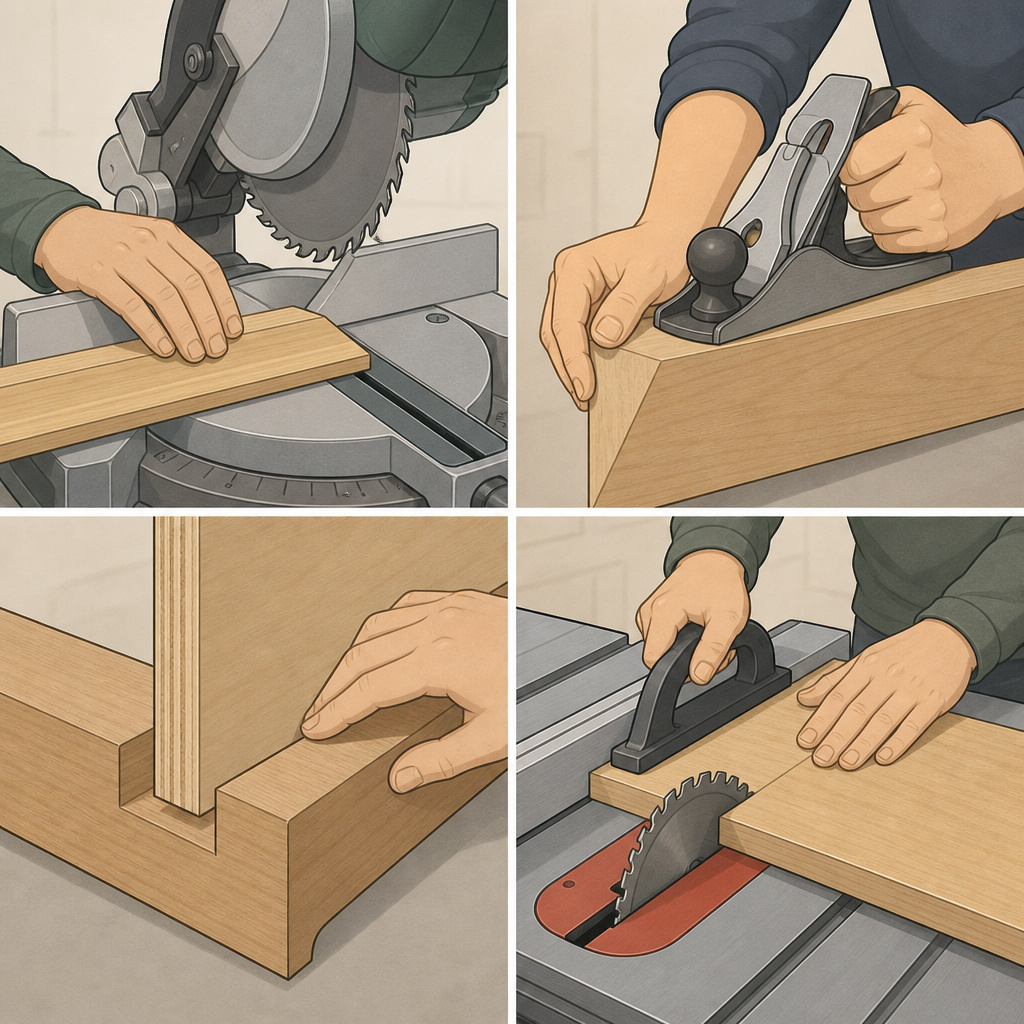
Once it’s tuned for square crosscuts, you can unlock the saw’s other functions. Each one requires a specific setup and a return to the fundamental safety rules.
Making Precise Miter Cuts
Swing the arm to your desired angle, say, 45 degrees. The scale is a guide, not a gospel. Always make a test cut on scrap and check it with a reliable protractor or a pre-cut template. Lock the arm rotation tightly. The cutting technique is identical to a crosscut: hold the workpiece, pull smoothly. The cutting technique guide for other tools emphasizes a similar controlled, steady motion.
Cutting a Bevel
Instead of swinging the arm, you’ll tilt the motor. Loosen the bevel lock, tilt to your angle (like 30 degrees for a chamfer), and re-lock. Crucially, you must re-check that the blade is parallel to the fence after tilting. The tilt mechanism can throw off that alignment. A bevel cut requires even slower feed speed, as you’re engaging more of the blade’s surface area.
Making Dado Cuts and Rabbets
This is where the radial arm saw shines. Install a stacked dado set. Set the blade height to exactly the depth of your dado (e.g., 1/2 inch). You’ll make multiple passes to achieve the full width.
1. Make the first pass to define one side of the dado.
2. Slide the workpiece over along the fence for the next pass.
3. Repeat until the channel is clean. For a rabbet, you’re just cutting the edge of the board. Use the fence as a depth stop.
The One Cut You Should Avoid: Ripping
Yes, you can configure a radial arm saw to rip. You rotate the blade 90 degrees so it points along the fence, lock the carriage in place, and feed the wood into it like a table saw. Don’t do it.
Here’s the mechanical reason why it’s dangerous: In a table saw, the blade rotation pulls the workpiece down onto the table and into the fence. In a radial arm saw rip configuration, the blade rotation wants to lift the workpiece and throw it away from the fence, toward you. The anti-kickback pawls and riving knife are your only defense, and on older saws, they’re often missing or inadequate.
| Operation | Blade Direction | Forces on Workpiece | Inherent Risk Level |
|---|---|---|---|
| Crosscutting | Pulls toward operator | Down into table, back into fence | Low (when set up correctly) |
| Ripping | Spins parallel to fence | Up off table, away from fence | High (kickback toward operator) |
| Dadoing | Pulls toward operator | Down into table | Medium (multiple passes increase chance of wander) |
If you absolutely must rip on a radial arm saw, the rules multiply. You need a sharp negative-hook blade specifically for radial arm rip cuts. You must verify the riving knife is aligned perfectly behind the blade.
You need featherboards clamped to the table to hold the stock against the fence. And you need a healthy fear. A table saw is the right tool for ripping. Use it.
Troubleshooting Common Problems
Even with perfect setup, things go wrong. Here’s how to diagnose the usual suspects.
Problem: Tapered Cuts (Wider at the back)
The blade is not square to the fence. It’s that simple. The back of the blade is cutting a wider path than the front. Unplug, re-square the blade to the fence using your machinist’s square, and lock the yoke. This is the most common alignment issue.
Problem: Burn Marks on the Wood
This is usually a combination of a dull blade and forcing the cut. The wood rubs against the sides of the blade teeth instead of being cleanly sliced. Check your blade maintenance routine. A sharp blade should glide. Also, check that the blade isn’t gummed up with pitch, clean it with denatured alcohol.
Problem: The Saw “Climbs” or Grabs the Wood
The blade is rotating the wrong direction for a crosscut. It should be turning toward you, pulling the wood down and back. If it’s turning away from you, it will try to climb up and over the workpiece, throwing it back at you. Stop immediately. Unplug and check the motor wiring or blade installation.
Problem: Rough, Torn Cuts
You’re using the wrong blade. A 24-tooth framing blade will shred plywood. You need a high-tooth-count crosscut blade (80+ teeth for a 10-inch) for sheet goods and finish work. Also, ensure you’re not trying to cut too fast. Let the blade’s speed do the work.
Problem: Motor Bogs Down or Smells Hot
You’re overloading it. This happens with dense hardwoods, a dull blade, or a cut depth that’s too aggressive. For hardwoods, take two lighter passes instead of one deep one. That smell is the varnish on the motor windings cooking. Let it cool down for 20 minutes.
Maintenance and Care Schedule
A radial arm saw is a precision instrument. Treat it like one, and it will last decades. Neglect it, and it becomes a dangerous, inaccurate anchor in your shop.
After Every Use (5 minutes)
- Blow out sawdust from the arm tracks, column, and motor vents with compressed air. Sawdust is abrasive and attracts moisture.
- Wipe down the table and fence with a dry rag. Check for any nicks or debris that could prevent a workpiece from sitting flat.
- Give the blade a quick visual inspection for damaged or missing teeth.
Monthly (15 minutes)
- Apply a single drop of light oil to the arm roller bearings and the column lift mechanism.
- Check the tightness of the arbor nut and all locking levers (arm, yoke, bevel, height). Vibration loosens them.
- Verify blade-to-fence squareness with your machinist’s square. It drifts.
Annually (1 hour)
- Unplug the saw. Remove the blade and clean the arbor flange and washer with a solvent to remove any rust or pitch buildup.
- Inspect the power cord for cracks or frays, especially near the strain relief.
- Consider a professional tool blade care service for sharpening if you’ve done a lot of work. A professionally sharpened Forrest or Freud blade will perform like new.
A saw that’s hard to push, burns wood, or makes a whining sound is telling you it needs maintenance. Ignoring it doesn’t make the problem go away, it makes the next cut unpredictable. The five minutes you spend on post-project cleanup and inspection is cheaper than a new blade or a doctor’s visit.
Frequently Asked Questions
Can I use a radial arm saw like a table saw for ripping?
Technically yes, practically no. The forces are wrong and it’s significantly more dangerous. A table saw is designed for ripping; the radial arm saw is not. Reserve it for crosscuts, miters, and dadoes.
My radial arm saw is vintage and doesn’t have a riving knife or guard. Is it safe?
It’s less safe. You can sometimes retrofit older models with aftermarket guards. If you can’t, your margin for error is zero. You must be hyper-vigilant about blade condition, feed speed, and keeping your body out of the line of fire. Consider it a dedicated crosscut machine only.
What’s the best blade for general use on a radial arm saw?
An 80-tooth, 10-inch crosscut blade from a quality manufacturer like Forrest, Freud, or CMT. The high tooth count gives a clean cut in plywood and solid wood, and the thin kerf reduces strain on the motor. Keep a separate stacked dado set for joinery.
How often should I check the alignment?
Check the blade squareness to the fence every time you move the saw or if you notice your cuts aren’t perfect. For a saw that stays in one place, check it at the start of a big project and once a month under regular use. It takes two minutes with a square.
Why does my saw drift to one side when I’m cutting?
The roller bearings on the arm are likely out of adjustment. They need to be snug against the arm with no side play, but still roll freely. An uneven roller will cause the motor to cant slightly, making the blade want to walk left or right during the cut.
Is a radial arm saw obsolete compared to a miter saw and table saw?
For a one-tool shop, yes, a miter saw and table saw combo is safer and more efficient. But in a dedicated woodshop with space, a well-tuned radial arm saw is a phenomenal crosscut and dado station. It’s a specialist, not a generalist.
The Bottom Line
A radial arm saw demands respect and precision. Its value isn’t in being a do-everything machine, but in being an exceptionally good crosscut and dado station when dialed in. The time you invest in the initial setup, leveling, squaring, and adjusting, pays back in accuracy and safety on every single cut. Keep the blade sharp, keep the alignment true, and keep your hands behind the fence. It’s a powerful tool that rewards careful technique and punishes complacency. Use it for what it’s best at, and you’ll have a workshop workhorse for life.