How to Trim Evergreen Bushes with an Electric Trimmer Safely
This post contains affiliate links. As an Amazon Associate, we earn from qualifying purchases.
Trimming evergreen bushes with an electric trimmer requires matching three things: the right timing (early spring before new growth), the correct tapered shape (base wider than top), and a strict one-third rule for the total volume you remove. Skip any one, and you get bare patches, brown tips, or a hedge that takes three years to recover.
Most people grab the trimmer, cut a flat top, and shear the sides straight up and down. That blocks sunlight from the lower branches. Within a season, the bottom half turns sparse and leggy, while the top gets dense and heavy. You end up with a hedge that looks thin from the street and requires corrective pruning for years.
This guide walks through the gear, the seasonal timing, the physical technique for different evergreen types, and the post-cut cleanup that keeps your bushes healthy. It also covers what happens when you break the rules, because everyone does, once.
Key Takeaways
- Trim in early spring before new buds appear, or right after flowering for spring-blooming evergreens like azaleas. Late fall trimming invites frost damage on new growth.
- Always cut a tapered “A-frame” shape, not a flat-topped box. The base must be wider than the top to let light reach lower branches and prevent bare spots.
- Remove no more than one-third of the hedge’s total leafy volume in a single session. Cutting more shocks the plant and can stall growth for a full season.
- For conifers (pine, spruce), cut just the new green growth. Going into the older brown wood leaves permanent dead patches that won’t regreen.
- Check for bird nests before every cut, especially from March to August. If you find one, delay trimming until the young birds have fledged, it’s the law in many places, and it’s the right thing to do.
Before You Start
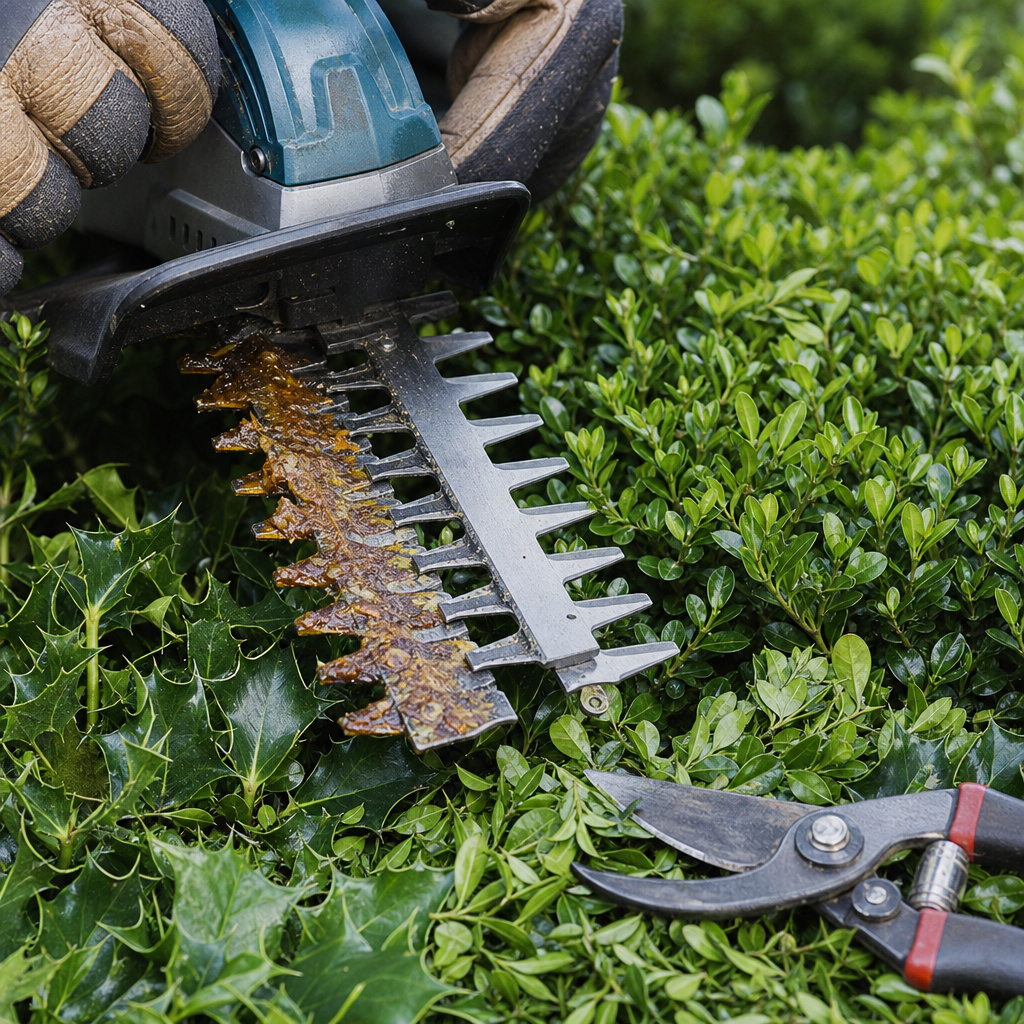
Before you start: Electric trimmer blades move at 3,000–4,000 strokes per minute. If they strike a rock hidden at the base, the sudden impact can torque the tool and throw it toward your legs. Always clear the footing. Corded trimmers add a trip hazard, run the cord over your shoulder, not across your path. Sap from conifers gums up blades fast; clean them with a citrus-based degreaser immediately after the job, or the next cut will be sluggish and tear foliage.
The Gear You Actually Need
You need more than just the trimmer. The wrong blade length, missing safety gear, or skipping the hand tools makes the job longer and riskier.
A 24-inch blade is the sweet spot for most residential evergreen hedges. It balances reach against weight. The 30-inch models, like the Stihl HSE 42, are fantastic for tall screens but wear out your shoulders after twenty minutes. For small boxwoods, a 16-inch cordless model like the DeWalt 20V Max Hedge Trimmer is lighter and precise.
Safety goggles are non-negotiable. Evergreen debris, especially from conifers, is stiff and sharp. A flicked piece hits your eye at the same speed the blade moves.
Cut-resistant gloves (not just garden gloves) protect your hands when you pull down branches to clear the base. Wear sturdy boots. If you’re using a corded model, plug it into a GFCI outlet or use an RCD adapter.
You also need hand pruners. An electric trimmer is for shearing soft growth and shaping. It cannot cleanly remove a thick, old branch.
Trying to force it through tears the plant tissue and often jams the blades. Use pruners for those few thick stems. A pruning saw is for the rare, overgrown trunks you might find in a neglected hedge.
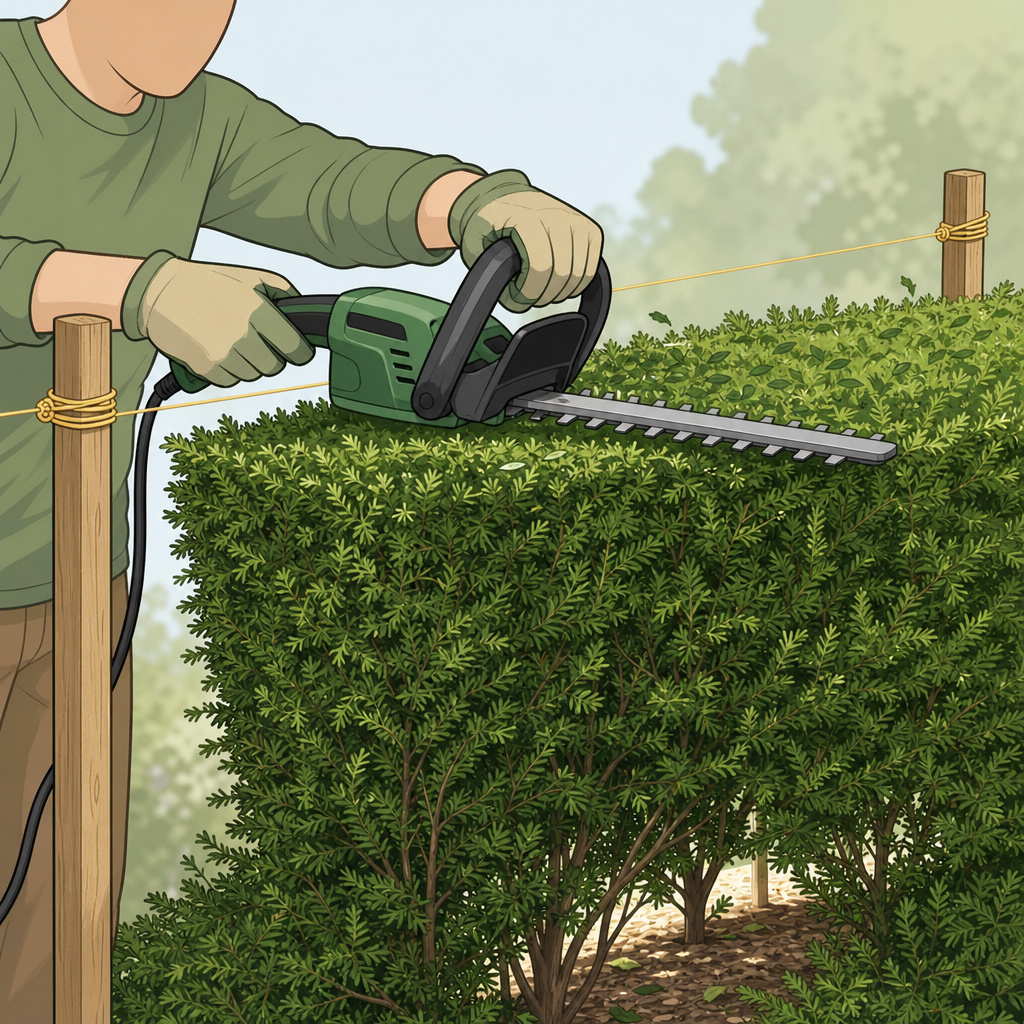
For a straight top, set two wooden stakes at the ends of the hedge and run a mason’s line between them at your desired height. It’s a visual guide that prevents dips and bulges. Without it, you’ll overcorrect by eye and create a wavy line.
When Is the Right Time to Cut?
Timing isn’t just about convenience. It dictates how the hedge regrows and whether it flowers the next year.
For most evergreens, conifers like yew, holly, and most non-flowering hedges, the best window is early spring, just before new growth starts. You’re trimming last year’s growth, and the plant redirects energy into fresh, dense shoots. The cuts heal fast as the season warms up.
For spring-blooming evergreens like azaleas, rhododendrons, and some camellias, trim immediately after they finish flowering. If you cut in early spring, you’ll remove the buds that were set the previous fall and get no blooms that year. Wait until the petals drop.
Avoid heavy trimming in late fall. The mild stimulus can push out new growth that won’t harden off before the first frost. Those tender shoots die back, leaving brown tips and opening spots for disease over winter.
Here’s a quick reference for common evergreen types:
| Evergreen Type | Best Trimming Time | If You Trim at Wrong Time |
|---|---|---|
| Conifers (Yew, Pine) | Early spring | New growth is slow, brown tips appear on old wood |
| Broadleaf (Holly, Boxwood) | Early spring | Cuts heal slower, may invite fungal issues in humidity |
| Spring Bloomers (Azalea) | After flowering ends | No blooms next season, hedge looks healthy but bare |
| Summer Bloomers (Some Euonymus) | Late winter / early spring | Misses flowering cycle, reduces wildlife attraction |
One exception: severely overgrown hedges. If you need to reduce size by more than one-third, spread the work over three years. Cut back the oldest wood in winter, then shape the regrowth in spring. That’s the only safe way to resize without killing sections.
How Much Should You Actually Cut Off?
The one-third rule is absolute. It’s not a suggestion.
Measure it visually. Look at the hedge and mentally divide it into three layers: the outer green layer (this year’s growth), the middle layer (last year’s), and the inner core (old wood). You should only cut into the outer green layer. If you see brown stems after your trim, you’ve gone too deep.
On conifers, this is critical. The green needles grow only on the new wood. The older brown branches underneath are essentially dead scaffolding, they won’t produce new greenery.
If you cut into them, you create a permanent bald patch. The hedge will never fill that spot again. You’ll see it every day.
On broadleaf evergreens like holly, the older wood can sometimes produce new shoots, but it’s slow. Cutting into it still stalls regrowth for a full season. The hedge looks uneven and patchy.
Remove only growth less than a year old. The plant’s energy reserves are in the older wood; stripping too much forces it to rebuild from scratch, and you’ll wait until mid-summer for any meaningful fill.
How do you know you’ve hit the limit? The clippings pile tells you. If the pile looks like a small mound, you’re fine.
If it looks like you’ve clear-cut a section, stop. Another sign: the hedge looks “transparent” after trimming, with visible gaps between branches instead of a solid wall. That means you’ve removed the density layer.
For height reduction, don’t take more than 6 inches off the top in one year. Even that’s aggressive. Better to take 3–4 inches annually for three years.
Electric Trimmer Technique: Conifers vs. Broadleaf
The tool moves the same way, but what you cut and how it reacts differs by plant type.
For conifers (pine, spruce, fir, yew):
Start at the bottom of one side. Hold the trimmer blades vertical. Sweep upward in a single smooth motion, following the natural taper you’ve planned. Don’t stop mid-sweep, that creates a notch. Conifer sap is sticky. It will begin coating the blades after a few minutes, reducing cutting efficiency. You’ll hear the motor laboring slightly and see torn needles instead of clean cuts. That’s your cue to pause and clean the blades with a rag and degreaser.
Cut only the green needle growth. The brown wood underneath is your boundary. If you’re shaping a tall hedge, consider a “chamfer” at the top, a slanted flat plane instead of a sharp peak. It sheds snow better and reduces top-weight.
For broadleaf evergreens (holly, boxwood, laurel):
Same bottom-to-top sweep. The leaves are tougher and broader, so the trimmer blade needs to be sharp. A dull blade will shred leaves, leaving brown edges that look scorched. Those edges persist for months.
Broadleaf hedges often have thicker, sporadic branches inside. After your trimmer sweep, step back and look for any uncut thick stems poking out. Use your hand pruners to snip those individually. Trying to hit them with the trimmer will buckle the blade or crack the stem, leaving a wound that bleeds sap and attracts insects.
Working on a Slope
If your hedge runs along a sloping ground, keep the top line parallel to the ground, not the hedge bottom. That means the hedge will be taller at the low end and shorter at the high end. It looks professional from the street. Use your string line to set the height at each stake, adjusting for the slope. Cutting a level top on a sloping base creates a weird, leaning visual effect.
Shaping the Top and Sides
The top is easy to mess up. Your eyes lie.
Set your two stakes. Run the mason’s line. Pull it taut. Now trim along that line, keeping the blade flat.
Don’t angle it. Long strokes. If you see a dip, don’t immediately go back and cut more, you’ll often overcut and create a bigger dip. Finish the full pass, then step back and assess. Often, the dip is just an optical illusion against the string.
The sides need a taper. The exact angle isn’t fixed. A rough guide is about 5 degrees inward from bottom to top.
That’s enough to let light reach the lower branches without making the hedge look obviously triangular. A good way to check: after trimming, can you see the ground at the base from a side view? If not, the taper is too steep. If you can see the entire lower branch structure clearly, the taper is too slight.
For tall hedges above 6 feet, add a chamfer. Cut the top flat but slope the very top edge back at a 10-degree angle. This reduces the weight of snow accumulation and prevents the top from splaying outward under its own density.
Here are the common shaping mistakes and their consequences:
| Mistake | Immediate Result | Long-Term Consequence |
|---|---|---|
| Flat top, straight sides | Looks neat from afar | Lower half thins out within 12 months; requires hard prune |
| Over-tapered (sharp A-shape) | Hedge looks narrow, top-heavy | Base growth stunted due to excessive light exposure |
| Wavy top (no string guide) | Visibly uneven line | Difficult to correct without reducing overall height |
| Cutting into old wood | Brown stems visible | Permanent bare patches; regrowth only from new tips |
What About Battery Voltage?
Cordless trimmers free you from the cord trip hazard. But battery voltage dictates runtime and cutting power through dense growth.
For typical evergreen trimming, one hedge, up to 30 feet long, a 20V (or 18V) lithium-ion battery system will usually finish the job on one charge. Models like the Ryobi 40V Hedge Trimmer offer more torque for thicker branches and longer runtime for multiple hedges. The trade-off is weight. The 40V tool is heavier, and that fatigue changes your technique by the end; your sweeps get shorter, and you might start pushing the blade instead of guiding it.
If you have conifers that produce heavy sap, the extra torque helps. The gummed blades require more motor power to maintain speed. A low-voltage battery might stall or slow visibly.
Always have a spare battery charged. The worst moment is when you’re halfway up a side and the tool dies. You leave a half-cut hedge for days, and the uneven growth looks terrible.
Post-Trimming Cleanup and Care
The job isn’t done when you put the trimmer down.
First, rake all clippings off the hedge surface. Leaving them blocks light from the fresh cuts, slowing regrowth. It also traps moisture against the stems, which can promote mildew on broadleaf types.
Clean your trimmer blades immediately. Use a rag and a citrus-based degreaser (Simple Green works) to remove sap and plant residue. For broadleaf hedges, a stiff brush removes leaf pulp. Then lubricate the blades with a light machine oil. This prevents rust and ensures the next start is smooth.
Never store a trimmer with sap-coated blades. The residue hardens in a week, effectively gluing the blade mechanism. Next spring, you’ll need to soak the whole head in solvent to free it, and the seals might degrade.
Mulch around the base of the hedge with compost or wood chips in late winter or early spring. This feeds the roots and retains moisture. Water the hedge deeply during drought conditions, especially in the first month after trimming. The plant is redirecting energy to regrowth and needs consistent water.
Inspect the hedge weekly for the first month. Look for uniform budding along the cuts. If you see sections that aren’t sprouting, you might have cut into old wood. Mark those spots, they’ll need special attention next year, perhaps with a light feed of nitrogen fertilizer to stimulate side-shoots.
Frequently Asked Questions
Can I use an electric trimmer on thick evergreen branches?
No. Electric hedge trimmers are designed for shearing soft, leafy growth up to about 1/4-inch diameter. For thicker branches, use hand pruners (up to 1/2-inch) or a pruning saw. Forcing the trimmer through thick wood will jam the blades, strain the motor, and leave a ragged cut that harms the plant.
Why does my evergreen hedge have brown tips after trimming?
Brown tips usually mean you used dull blades. Dull blades tear plant tissue instead of cutting cleanly, causing cell damage that shows as browning within days. On conifers, brown tips can also mean you cut into the older brown wood, which cannot produce new green growth. Sharpen your blades before each major trimming session.
How often should I trim evergreen bushes?
Most evergreen hedges need trimming once a year, during the recommended seasonal window (early spring or after flowering). Fast-growing varieties like some privets might need a light mid-summer touch-up to maintain shape. Never trim more than twice a year, as it depletes the plant’s energy reserves.
Is it safe to trim evergreen bushes in the summer?
Light shaping touch-ups are safe in summer, but avoid heavy cutting. Summer trimming removes foliage that helps the plant cope with heat and drought. It can stress the hedge, leading to wilted sections and slowed growth. Stick to the primary trimming in spring.
What’s the difference between trimming conifers and broadleaf evergreens?
The main difference is the growth material. Conifers have needle-covered green new wood and bare brown old wood, you must cut only the green. Broadleaf evergreens have leaves on both new and older wood, but older wood regrows slower. Also, conifer sap gums up blades faster, requiring immediate cleaning.
Can I encourage flowering on my evergreen hedge by trimming?
Yes, for flowering evergreens like azaleas. Trim right after the blooms fade. This allows the plant to set buds for the next year during the summer. Avoid spring trimming on these types, as it removes the budded growth. For non-flowering evergreens, trimming doesn’t affect flowering.
The Bottom Line
Trim your evergreen bushes in early spring, or after flowering for bloomers. Use a sharp electric trimmer with a 24-inch blade, safety goggles, and gloves. Cut a tapered shape, never a box. Remove only one-third of the greenery. Sweep sides bottom to top, cut the top against a string line, and use pruners for thick branches. Clean sap off the blades right after the job. Check for nests before you start. Breaking the one-third rule or cutting into old wood creates problems that last years, not seasons. Follow the sequence, and the hedge fills in dense and healthy by mid-summer.