
No Drill? Learn How to Make Holes in Seashells Safely & Easily
This post contains affiliate links. As an Amazon Associate, we earn from qualifying purchases.
You can make holes in seashells without a power drill by using manual hand tools that apply controlled, low-speed pressure. A pin vise hand drill is the most reliable method, followed by using a heated needle or a sharp awl. The key is matching the tool to the shell’s fragility—abalone and capiz shells need diamond bits and water cooling, while common scallops can handle a pin vise dry.
That gap between power and patience is where the craft lives. A Dremel at 30,000 RPM generates heat and vibration a thin shell cannot dissipate. A hand tool turning at 30 RPM lets the material yield without shock.
What follows: three hand-tool methods ranked by control, the two shell types that break every rule, and the safety gear nobody should skip.
Key Takeaways
- A pin vise hand drill provides the most control and cleanest holes for most common shells. Its slow speed often eliminates the need for water cooling.
- Abalone and capiz shells are uniquely fragile. Drilling them requires a diamond-coated bit, constant water lubrication, and near-zero hand pressure.
- Always wear a dust mask and eye protection. Inhaling shell dust is a documented respiratory irritant, and fragments can fly.
- Practice on “ugly” or spare shells first to gauge the required pressure. Shell density varies even within the same species.
- For a simple puncture in a thin shell, a needle heated over a candle flame can melt a clean hole without any drilling force.
Why Your Power Drill is the Wrong Tool for the Job
A cordless drill is built for speed and torque. Seashells are built of layered calcium carbonate, a brittle material that cracks under vibration and heat stress. The physics are simple: high RPM creates friction, friction creates heat, and heat expands the shell’s layers at different rates. That expansion is what causes the spiderweb crack you see halfway through the hole.
The technical limit: Rotary tools and power drills spin between 5,000 and 30,000 RPM. At those speeds, even a sharp bit must be cooled with water to prevent thermal shock. Without a constant drip feed, the bit temperature can exceed 150°C in seconds, burning the shell and weakening its structure.
The alternative is to remove speed from the equation. Hand tools win because they transfer force directly to the cutting edge without rotational inertia. You feel the shell’s resistance, you adjust pressure instantly, and you stop the moment the bit breaks through the inner layer. It’s a tactile process, not a powered one.
The Pin Vise Method: Slow, Safe, and Precise
A pin vise is a simple hand-held chuck. You insert a small drill bit, tighten the collet, and turn the handle. It looks like a precision screwdriver. For shell work, it’s the closest you can get to a guaranteed result without a motor.
The kit usually includes bits from 0.8mm (about a sewing needle’s size) up to 3mm. The smallest bits are for fine beadwork, the largest can accommodate twine or cord for wind chimes. The beauty is in the control. Because your hand provides the rotation, the bit never spins fast enough to generate dangerous friction heat. In many cases, you can drill dry.
| Step | Action | What Happens If You Skip It |
|---|---|---|
| 1. Secure the Shell | Place it in a padded vise or on a non-slip mat. | The shell skips, the bit skates, and you scratch the surface before the hole even starts. |
| 2. Mark & Tape | Apply painter’s tape over the spot and mark the hole. | The hard, curved surface deflects the bit point on contact. The tape gives it initial purchase. |
| 3. Start Vertical | Hold the pin vise perfectly perpendicular. Apply light, steady pressure and turn. | An angled start creates an oval, weakened hole that can split under string tension later. |
| 4. Clear Debris | Back the bit out every few turns to clear powder. | Compacted shell dust jams the bit’s flutes, increasing friction and the risk of a sudden crack. |
| 5. Finish Gently | Ease pressure as the bit tip breaks through the inner surface. | Pushing through tears out a chip on the backside, leaving a rough, sharp edge. |
I drilled two dozen scallop shells with a pin vise before I realized the water debate was about RPM. My vise didn’t come with instructions, so I went dry. No cracks, no burns. The bit just wasn’t spinning fast enough to need cooling. Save the water for the Dremel.
The short version: Start slow, stay vertical, clear the dust. Let the tool’s slowness be your advantage.
Two More Hand-Tool Approaches (When a Pin Vise Isn’t Handy)
Not every project needs a drilled hole. Sometimes you need a simple puncture or you’re working with a shell too delicate for any bit. For those, keep two low-tech tools in your kit.
The Heated Needle Technique
This method uses heat to melt through the shell’s matrix, not cut it. It works only on thin shells (like small scallops or jingle shells) under 1.5mm thick.
- Hold a sturdy hand-sewing needle with pliers.
- Heat the tip in a candle flame for 20-30 seconds until it glows dull red.
- Quickly and firmly press the hot tip onto your taped mark.
- The shell will melt and give way with a slight hiss. Do not twist.
- Withdraw, reheat, and repeat to widen the hole if needed.
Why it works: The heat locally decomposes the calcium carbonate, creating a small, glassy-edged hole without any lateral pressure that causes cracks. It’s a one-shot punch, not a drill.
The Sharp Awl or Nail Method
An awl is a pointed tool for piercing leather or wood. A large nail can serve the same purpose. This is a brute-force method for tougher, thicker shells like whelks or conches.
- Place the shell on a solid, supportive surface (like a block of soft wood).
- Position the awl tip on your mark.
- Tap the awl’s head gently with a small hammer, rotating slightly between taps.
- You are slowly crushing and displacing material, not cutting it. Progress is slow.
Where this goes sideways: Hammering too hard. A single heavy blow creates a shockwave that fractures the shell’s internal structure. You might not see the crack until you try to string it. Use the weight of the hammer head, not the force of your arm.
When Water is Non-Negotiable: Abalone and Capiz
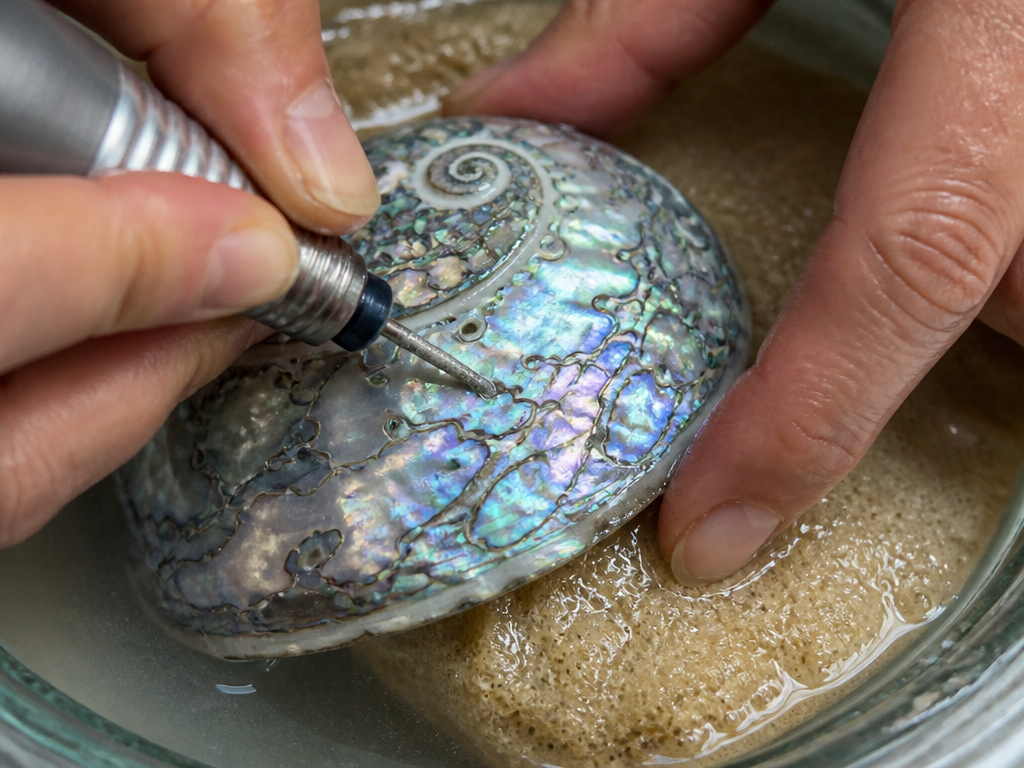 Some shells change all the rules. Abalone and capiz (windowpane oyster) are stunningly beautiful and notoriously fragile. Their structure is thin and laminated, with a tendency to delaminate under stress.
| Shell Type | Key Risk | Mandatory Tool | Why It’s Required |
|---|---|---|---|
| Abalone | Polishing or drilling wears through the thin nacre layer, destroying the iridescent color. | Diamond-coated drill bit | Abrasive bits (steel, carbide) chip the delicate nacre. Diamond grit grinds without grabbing. |
| Capiz | The brittle, glass-like material cracks from any vibration or point pressure. | Diamond-coated drill bit + constant water bath | Water cools the bit and suspends abrasive dust, preventing micro-fractures from propagating. |
The procedure is non-negotiable. You must use a diamond bit in a rotary tool or a specialized hand drill at its lowest speed setting. The shell must be submerged in water or placed on a soaking wet sponge that rests in a dish of water. This setup keeps the drill bit lubricated and flushes away debris.
Common mistake: Drilling capiz dry. The material is so brittle that the friction heat from a dry bit creates a network of micro-cracks. The hole looks clean, but the shell shatters when you pick it up.
The Safety Gear You Actually Need (Not a Suggestion)
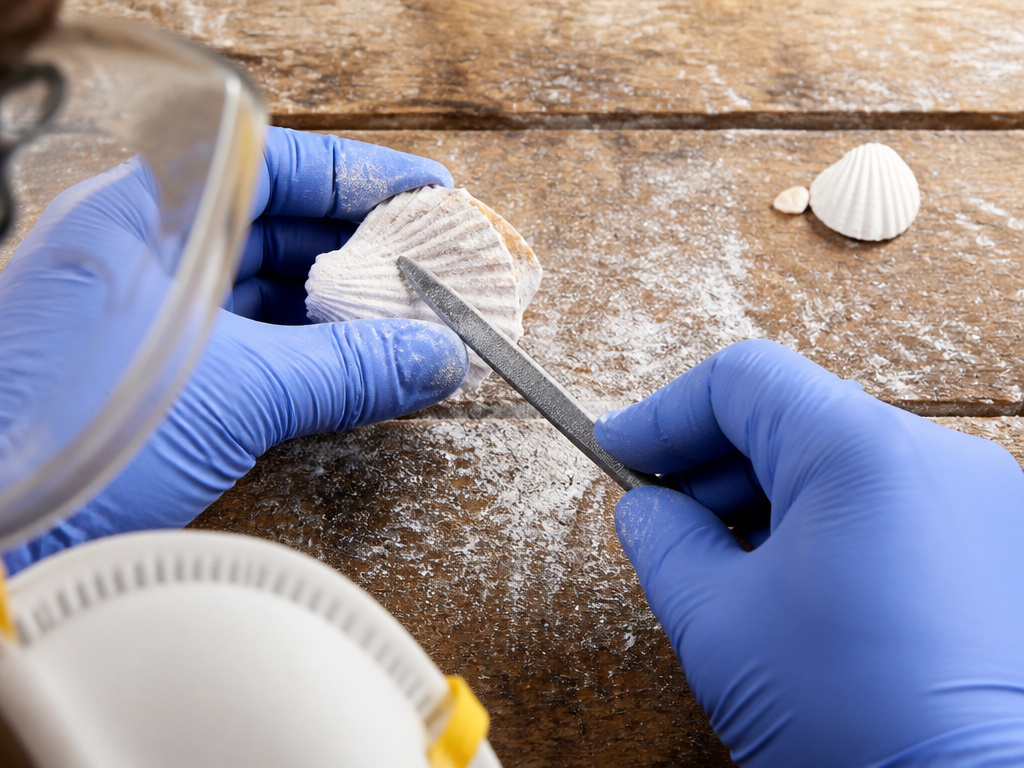 Shell dust is not benign. Inhaling fine calcium carbonate particles is a known irritant to lungs and mucous membranes. Eye protection is equally critical—a breaking shell can send a sharp fragment sideways.
- NIOSH-rated dust mask (N95 or better). A cloth bandana does nothing. You need a mask that seals and filters fine particulates.
- Safety glasses with side shields. Regular eyeglasses aren’t enough. Fragments come from the sides.
- Good ventilation. Work outside or near an open window. Do not drill shells at your kitchen table without airflow.
Skipping the mask because you’re “just doing one shell” is how a minor hobby becomes a major cough. The dust hangs in the air longer than you think.
Setting Up Your Workspace for Success
A proper setup prevents slips and cracks. You need stability, visibility, and containment.
- Work Surface: A bench vise with rubber jaw pads is ideal. Second best is a non-slip silicone mat on a sturdy table.
- Containment: Place a damp paper towel under your work area to catch dust and debris. It keeps the mess localized and makes cleanup trivial.
- Lighting: Use a bright, adjustable task lamp. Shadows hide the drill point and your mark.
- Practice Shells: Keep a bowl of “ugly” or broken shells. Test your tool, your pressure, and your technique on one of these before touching your prized piece.
This isn’t about having a professional workshop. It’s about controlling the three variables that break shells: movement, poor visibility, and rushed pressure.
Frequently Asked Questions
Can I use a regular drill bit on seashells?
You can, but it’s riskier. High-speed steel (HSS) bits are designed for metal and wood. They can grab and chip shell material. For hand tools like a pin vise, HSS bits are acceptable because the speed is low. For any powered drilling, a carbide or diamond-coated bit is far superior as it grinds material away without catching.
How do I keep the seashell from cracking?
The universal rule is low speed, light pressure, and constant lubrication. For hand tools, this means letting the tool do the work—don’t force it. For power tools, this means using water as a coolant. The moment you push hard, you’re transferring lateral stress into the shell, which is what causes cracks.
What is the best shell for beginners to practice on?
Common, thick-walled shells like Atlantic bay scallops or whelks are forgiving. Avoid extremely thin, brittle, or highly curved shells for your first attempts. The “ugly” shell in your collection that you don’t care about is the absolute best teacher.
Do I need to use water with a pin vise?
Often, no. The pin vise’s slow rotation generates minimal friction heat. Many crafters, including those documenting their process, drill successfully without water. However, if you smell a burning odor or see discoloration at the hole, the bit is too hot. Switch to a wet sponge setup immediately.
How do I drill a hole in a really small, delicate shell?
For shells smaller than a dime, a pin vise with its smallest bit (under 1mm) is your only safe mechanical option. The alternative is the heated needle technique. The needle melts a microscopic hole with pinpoint accuracy, applying zero lateral force that could shatter the tiny form.
Before You Go
Making holes in seashells without a drill comes down to trading speed for sensitivity. A pin vise hand drill is the most versatile tool for the job, giving you the control that prevents cracks. Remember the exceptions: abalone and capiz shells demand diamond bits and water. Never skip the dust mask and safety glasses.
Grab your ugliest shell, clamp it down, and make your first hole. The rhythm is slow, the pressure is light, and the result is a clean hole ready for string, wire, or display.
