
How to Drill Into Stucco | The 3-Step Prep That Stops Cracks
This post contains affiliate links. As an Amazon Associate, we earn from qualifying purchases.
To drill into stucco, you need three things matched before you pull the trigger: a carbide or diamond-coated masonry bit, confirmation you’re not drilling into synthetic stucco (EIFS) without checking the warranty, and a plan to seal the hole with ASTM C920 sealant. Skip the sealant, and water follows the screw into your wall framing within a single season.
That last point is the one every quick guide glosses over. Drilling is the easy part. The hole itself is a permanent breach in your home’s weather-resistant barrier, a direct path for moisture to reach wood sheathing and studs. A tube of caulk isn’t a suggestion; it’s the only thing standing between a simple mount and a four-figure repair bill for rot inside the wall.
What follows: how to tell hard cement stucco from soft EIFS with a knock test, the exact drill and bit combo that won’t crack the finish, and the two-stage sealing process that actually works. By the end, you’ll know how to hang a light fixture or mount a camera without calling a contractor for the water damage six months later.
Key Takeaways
- Tap the wall first. If it sounds hollow, you likely have EIFS (synthetic stucco). Drilling into it without following the manufacturer’s instructions can void the entire system’s warranty and lead to moisture intrusion.
- Never use a standard drill bit. Stucco will dull a high-speed steel bit instantly. You must use a carbide-tipped or diamond-coated masonry bit. For holes larger than 3/8 inch, a hammer drill is non-negotiable.
- Seal twice, before and after. Inject sealant into the clean hole before inserting the anchor, then apply a second bead around the fixture’s base after mounting. This double seal protects the punctured weather barrier.
- Expect to hit metal lath. The wire mesh behind traditional stucco will make your drill chatter. Don’t force it; use firm, steady pressure with a sharp masonry bit to push through.
- The anchor doesn’t hold the weight. The stucco itself is just a brittle shell. All load must be transferred to the structural backing (wood stud, sheathing, or block wall) via a correctly sized anchor.
The 3-Step Prep That Stops Cracks
Most drilling failures happen before the bit ever touches the wall. You bought the wrong bit, guessed at the wall type, or picked a spot hiding a pipe. This three-step check takes two minutes and saves the finish.
First, identify your stucco type. Knock on the wall with your knuckle. Traditional cement stucco feels solid and sounds dense, like tapping a rock. EIFS (Exterior Insulation and Finish System), the synthetic type common in homes built in the last 20-30 years, feels slightly soft and sounds hollow. This distinction changes everything.
Where this goes sideways: Drilling into EIFS without written manufacturer approval. The warranty for the entire exterior system can be voided by an unapproved penetration, and the foam backing offers no structural support for heavy loads.
If you have EIFS and are hanging anything heavier than a small house number, you need to find the manufacturer’s installation manual. If you have traditional three-coat stucco, you’re clear to proceed, but remember you’re drilling into a 7/8-inch thick layer of cement over wire lath and building paper.
Second, scan for hidden hazards. Avoid drilling directly above or below outlets, light fixtures, or hose bibs, where pipes or wires might run horizontally through the wall. Use a stud finder with AC wire detection if you have one. Also, steer clear of control joints, corners, and any existing cracks.
Third, mark with painter’s tape. Place a small piece of tape over your exact drill point. This gives the bit tip some grip so it doesn’t “walk” across the textured surface, and it significantly reduces chipping around the hole’s edge. It’s the cheapest insurance you can buy.
Choosing Your Weapon: Drill & Bit Guide
You cannot use the same bit you drill wood with. Stucco is an abrasive cementitious material that will destroy a high-speed steel (HSS) bit in seconds, overheating it and likely cracking the surface as it dulls.
The mandatory tool is a carbide-tipped masonry bit. The carbide tip is hard enough to grind through the sand and cement. Diamond-coated bits are also excellent but are overkill for most DIY jobs.
| Hole Size | Recommended Tool | Why It Matters |
|---|---|---|
| Up to 3/8 inch | Standard cordless drill | A sharp carbide bit in a standard drill can work with patience. Let the bit cut; don’t force it. |
| 1/2 inch or larger | Hammer drill or rotary hammer | The hammering action is crucial for breaking through the aggregate. A standard drill will stall and overheat. |
| Any size through metal lath | Carbide masonry bit + firm pressure | The bit can cut through the thin galvanized wire. Forcing it or switching bits risks unraveling the lath. |
A hammer drill is the right tool for the job. It combines rotation with a percussive hammering action, essentially acting like a tiny jackhammer. This is what makes drilling into concrete or hard stucco efficient. If you’re mounting a security camera or a heavy light fixture, it’s worth the investment or rental.
The same logic applies when you need to drill into brick or drill into cinder block, the masonry bit is constant, but the tool power should match the material density and hole size.
Drill into stucco with a carbide-tipped masonry bit, using a hammer drill for holes over 3/8-inch in diameter. The hammer function fractures the hard cement aggregate, allowing the fluted edges of the bit to clear debris efficiently. Always start at a slow speed without hammering to establish a clean pilot hole and prevent surface spalling.
The Step-by-Step Drilling Process
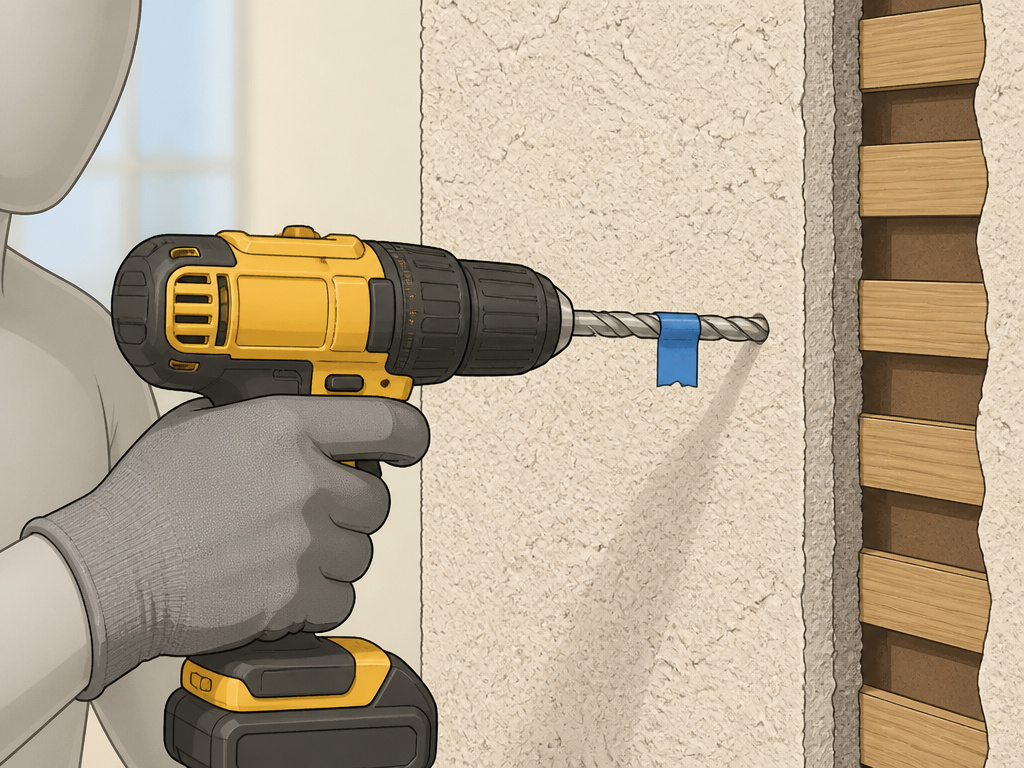
Now that you’re prepped and equipped, the actual drilling is the straightforward part. The goal is a clean, straight hole, deep enough for your anchor, without cracking the surrounding stucco.
- Mark your depth. Measure the length of your anchor and screw. Wrap a piece of painter’s tape around your masonry bit at a point 1/8 inch longer than that combined length. This is your depth stop. Drilling deeper than necessary weakens the wall and increases the risk of hitting something.
- Don the gear. Wear safety glasses and a dust mask. Stucco dust is fine and irritating.
- Start slow, straight, and without hammer. Position your drill perfectly perpendicular to the wall. On a low speed setting and with the hammer function OFF, start the hole. This initial pilot phase prevents the bit from skidding and chipping the surface.
- Engage the hammer and drill to depth. Once the pilot is established, you can increase speed and, if using a hammer drill, engage the hammer function. Apply steady, firm pressure. Let the tool do the work. If you hit resistance and hear a metallic chattering, you’ve encountered the wire lath. Keep steady pressure, a sharp carbide bit will grind through it.
- Clear the hole completely. Withdraw the bit periodically to clear dust. When at depth, use a small vacuum attachment, compressed air, or a blast from a turkey baster to remove all debris from the hole. A clean hole is essential for anchor seating and sealant adhesion.
If you’re drilling into a wood-stud wall and need a truly heavy-duty hold, use a stud finder first. Once your masonry bit punches through the stucco and sheathing, switch to a standard twist bit to finish the hole in the wood. This preserves the sharpness of your masonry bit.
Beating the Two Most Common Problems
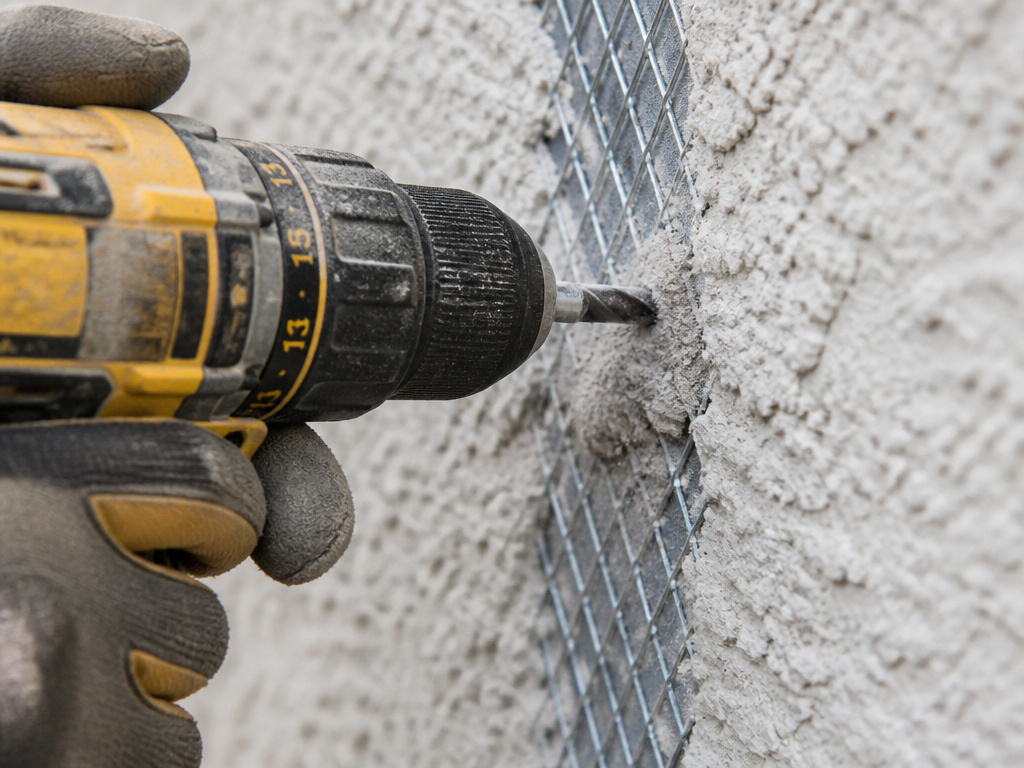
You’ll likely face one of two snags: a stubborn metal lath or the discovery that your wall is hollow EIFS. Here’s how to handle them without causing damage.
Problem 1: The drill bit chatters and won’t advance. You’ve hit the galvanized wire mesh (lath). Don’t panic and don’t force it sideways, which can unravel the lath and crack a dinner-plate-sized section of stucco. Apply firm, straight pressure. A sharp carbide bit will cut through the thin metal. If you’re using a cheap, worn bit, it may struggle. In that case, you could switch to a metal-cutting bit just to penetrate the lath, then switch back to the masonry bit. It’s fussy, but it works.
Problem 2: The wall is hollow EIFS. This changes the project. First, confirm the manufacturer and find their fastener guide. Second, understand that the foam insulation behind the acrylic skin has no holding power. You must use an anchor designed for hollow walls that expands behind the foam, like a toggle bolt. Most critically, you must use a flexible, elastomeric sealant compatible with the EIFS acrylic finish. Standard silicone may not adhere correctly and can lead to leaks.
The principles of careful drilling still apply, but the stakes for sealing are even higher because water trapped behind the foam cannot escape and leads directly to mold. This is why the drilling into siding process for vinyl or fiber-cement is different, those materials have different expansion properties and sealing requirements.
Seal the Hole Like a Pro
Drilling the hole is only half the job. If you stop here, you’ve built a water funnel into your wall. Stucco is a reservoir cladding; it gets wet and dries out. The weather-resistant barrier (the tar paper or house wrap behind it) is what keeps the sheathing dry. Your hole punctures that barrier.
The fix is a two-stage sealing process with a sealant that meets ASTM C920 specifications, this is the standard for high-performance elastomeric joint sealants. Sikaflex polyurethane or a high-quality silicone caulk are common choices.
- Seal the interior of the hole. After cleaning the hole, inject a bead of sealant into it. Then, insert your plastic anchor. The sealant will fill any microscopic gaps between the anchor and the stucco, creating the first water barrier.
- Seal the exterior perimeter. Once your screw is driven and the fixture is mounted, apply a continuous, smooth bead of sealant around the entire base of the fixture where it meets the stucco. Tool it with a wet finger or a caulking tool to ensure it adheres to both the fixture and the wall.
This double seal accounts for movement from thermal expansion and wind. It’s the same critical concept behind drilling into Hardie board or other cement sidings, the fastener is a potential leak point that must be locked down.
Selecting Anchors and Fasteners
Stucco itself is not structural. It’s a hard, brittle shell. The anchor’s job is to bypass the stucco and transfer the load to something that can hold it: the wood sheathing, a stud, or the concrete block behind it.
For light loads (small decorations, house numbers), a simple plastic expansion anchor is sufficient. The screw expands the plastic sleeve against the inside of the hole in the stucco and sheathing.
For medium to heavy loads (security cameras, lanterns, hose reels), you need an anchor that engages the structural backing. If you’re into a wood stud, use a long wood screw or lag bolt. If you’re not on a stud, use a toggle bolt or zip toggle that expands behind the sheathing. For heavy items on block walls, use a lead anchor or wedge anchor designed for masonry.
Never use the cheap zinc-plated screws that come with most anchor kits outdoors. They will rust, stain the stucco, and eventually fail. Always swap them for stainless steel screws. The extra cost is trivial compared to repairing rust streaks or a fallen fixture.
This decision tree mirrors the one you’d use for fastening screws into walls made of drywall or plaster, the mechanics of load transfer are universal, even if the base material changes.
Frequently Asked Questions
Can I drill into stucco with a regular drill?
You can, but only for small holes (under 3/8 inch) and only with a carbide-tipped masonry bit. A regular drill will work harder and slower, and you risk overheating the motor and the bit. For any hole 1/2 inch or larger, or for more than one or two holes, a hammer drill is the correct tool.
How do I know if I hit a wire or pipe?
If you’re drilling and meet sudden, soft resistance (for PVC) or see metal shavings (for wire sheathing), stop immediately. You should have scanned the area first. The best prevention is to avoid drilling in high-risk zones: vertically aligned with interior fixtures or within 1.5 inches of electrical boxes.
What’s the best drill bit for stucco?
Carbide-tipped masonry drill bit is the best and most cost-effective choice. Sizes like 3/16-inch and 5/16-inch are common for anchor pilot holes. Diamond-coated bits last longer but are significantly more expensive and unnecessary for typical homeowner use.
Do I always need an anchor?
Yes. The holding power of stucco alone is poor. An anchor distributes the load and provides a secure mating surface for the screw. The only exception is if you are drilling directly into the wood wall stud behind the stucco, in which case you can use a long screw without an anchor, but you must still seal the hole.
How do I patch a stucco drill hole if I change my mind?
Remove the anchor and clean the hole. For a small hole, fill it with an ASTM C920-compliant exterior sealant or stucco patching compound, tool it smooth, and texture it to match while wet. For larger holes, you may need to patch with new stucco in layers, scratch coat, brown coat, finish coat, which is a job best left to a pro if you want it to be invisible.
The Bottom Line
Drilling into stucco isn’t a test of strength. It’s a test of patience and procedure. Get a carbide masonry bit for your drill, take two minutes to tap the wall and tape the spot, and have your sealant gun loaded and ready before you make the first chip. The hole itself is simple. Protecting your home from the water that wants to follow that hole is the entire game.
When in doubt, drill a test hole in an inconspicuous area first, behind a downspout or in a corner of the garage. It tells you everything about your wall’s composition and your tool’s performance before you commit to the perfect spot. That’s the habit that separates a clean, lasting install from the one that costs you later.
