Learn How to Charge a Trimmer Without the Official Charger
This post contains affiliate links. As an Amazon Associate, we earn from qualifying purchases.
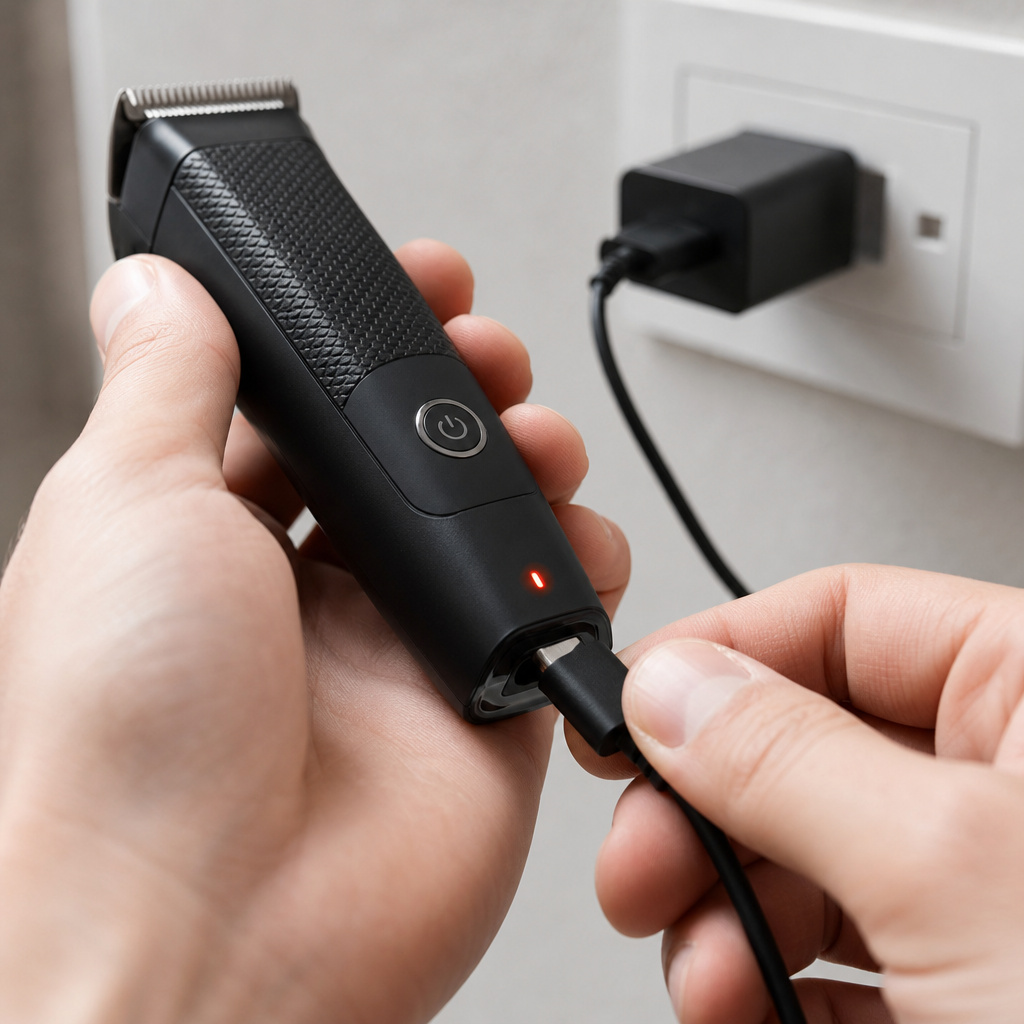
You can charge a trimmer without its original charger by using a compatible USB cable and power source, a universal 5V adapter with the correct plug size, or by building a temporary DIY charger from an old 5V phone adapter. The critical step is matching the voltage (almost always 5V DC) and confirming the polarity of the connections to avoid damaging the battery.
Most guides skip the polarity check. They tell you to find an adapter and plug it in. That works until the inner contact on your homemade plug is negative and the trimmer’s circuit board is positive. The magic smoke comes out in under three seconds. I’ve seen it.
This guide walks through three methods, from the safest plug-and-play USB option to the last-resort DIY hack. We’ll cover how to read the specs on your trimmer, why amperage isn’t as scary as you think, and the one tool you need to avoid frying a $150 grooming kit.
Key Takeaways
- Voltage is king, amperage is a suggestion. Your trimmer needs exactly 5 Volts DC. A 5V/2A power supply is safe for a trimmer rated for 5V/1A; the device only draws the current it needs.
- Polarity will destroy your trimmer if reversed. The inner pin of a barrel jack must be positive (+). Use a $10 multimeter to check before connecting any DIY charger.
- USB charging is the first and best option. If your trimmer has a USB-C or micro-USB port, any quality 5V USB power bank or wall adapter will work, though charging may be slower.
- Continuous trickle charging kills lithium-ion batteries. Once the indicator shows a full charge, unplug the trimmer. Leaving it plugged in for days degrades cell capacity faster than occasional fast charging.
- A swollen battery is a stop sign. If the battery compartment feels tight, the casing is warped, or the trimmer won’t hold a charge, alternative charging is unsafe. Replace the battery or the tool.
Charging a modern personal grooming trimmer without its dedicated charger requires matching three specifications: a 5 Volt DC supply, correct plug polarity (center-positive standard), and a current rating equal to or greater than the device’s input amperage. The internal charging circuit regulates the current draw, making a higher-amp supply safe as long as voltage is exact.
Before You Start: The Non-Negotiables
Before you start: You are working with electricity and lithium-ion batteries. Incorrect voltage can permanently damage the charging circuit. Reversed polarity can cause a short circuit, overheating, or battery fire. Work in a dry, well-ventilated area and never leave a makeshift charger unattended. If the battery or trimmer case becomes warm to the touch (not slightly warm, but hot), disconnect immediately.
This isn’t about being paranoid. It’s about not ruining your tool. The first time I tried to jury-rig a charger for a Philips Norelco trimmer I’d left at a cabin, I used a 12V adapter from a router because the plug fit.
It fit perfectly. The trimmer made a faint pop sound and never powered on again. The repair cost was more than the trimmer. Voltage must match.
How to Identify Your Trimmer’s Charging Needs
The label is your map. Unplug the trimmer and turn it over. Look for the fine print near the serial number or model sticker. You need two numbers: the input voltage and the input current.
You’ll see something like “INPUT: 5V DC 1000mA” or “5V ⎓ 1A”. That’s your target. 5V is non-negotiable. The 1000mA (or 1A) is the current the trimmer is designed to draw. A power source rated for 5V and 2A (2000mA) is fine—the trimmer will only pull 1A. A source rated for 5V and 0.5A (500mA) might not deliver enough power, resulting in extremely slow or no charging.
Next, examine the charging port.
* USB-C or Micro-USB: You’re in luck. This is a standard port. Proceed to Method 1.
* Small, round barrel jack: This is a proprietary DC jack. Note its diameter. You’ll need to match the plug size (e.g., 2.1mm inner diameter) or use the hack in Method 3.
* Docking station with metal contacts: The most difficult. This usually requires the exact OEM charger. Alternative methods are high-risk and not recommended.
If the label is worn off, search online for your trimmer’s model number and “specifications” or “user manual PDF.” The official manual is the authoritative source for its electrical requirements.
Which Trimmer Charging Method Is Right For You?
Not every workaround fits every situation. The method you choose depends on your tools, your comfort level, and how badly you need a shave right now.
| Method | Best For | Tools Needed | Risk If Done Wrong |
|---|---|---|---|
| USB Cable & Power Source | Trimmers with standard USB ports | USB cable, 5V USB wall adapter/power bank/laptop | Very low. Slow charging if source is underpowered. |
| Universal 5V Adapter | Trimmers with barrel jacks | Universal adapter with adjustable voltage (set to 5V) and plug tips | Medium. Wrong voltage setting fries the board. Wrong polarity damages battery. |
| DIY Charger from Phone Adapter | Emergency only, barrel jack trimmers | Old 5V phone charger, wire strippers, multimeter (mandatory) | High. Reversed polarity causes immediate, irreversible damage. |
The universal adapter is the middle ground. I keep a Kensington or similar universal 5V adapter in my workshop kit.
It has a dial to set voltage and a pouch of a dozen different plug tips. For a barrel-jack trimmer, you find the tip that fits snugly, set the dial to 5V, and verify the polarity symbol on the adapter matches the diagram on the trimmer (usually a circle with a dot in the center and a + sign). It’s saved me more than once.
But if you don’t have one, and the trimmer has a USB port, the next section is all you need.
Method 1: The Simple USB Cable Fix
If your trimmer has a USB-C or micro-USB port, you’ve already won. This is the manufacturer’s concession to universality. The process is stupidly simple, but a few details matter.
- Find a quality USB cable. Use the cable that came with your phone or tablet. A frayed cable with exposed wires is a hazard—don’t use it.
- Choose a 5V power source. This can be:
- A USB wall adapter (like a phone charger) rated for 5V/2A.
- A portable power bank.
- A USB port on a computer or laptop.
- Connect and observe. Plug the cable into the trimmer, then into the power source. Within 10-30 seconds, a small LED on the trimmer should light up or begin flashing. This is the charging indicator.
Why this works: The USB standard delivers 5 Volts. The trimmer’s internal charge controller handles the rest. Charging from a laptop USB port (which typically outputs 0.5A) will be much slower than from a 2A wall adapter, but it will work. This is the method Philips officially references for its USB-capable trimmers, noting that charging times may vary with the power source.
The only mistake here is using a “fast charging” wall adapter that only outputs higher voltages (like 9V) when it doesn’t detect a compatible phone. Most modern adapters will default to 5V for a simple device like a trimmer, but an old, cheap one might not. If the charging light doesn’t come on, try a different power source.
Method 2: Using a Universal DC Adapter
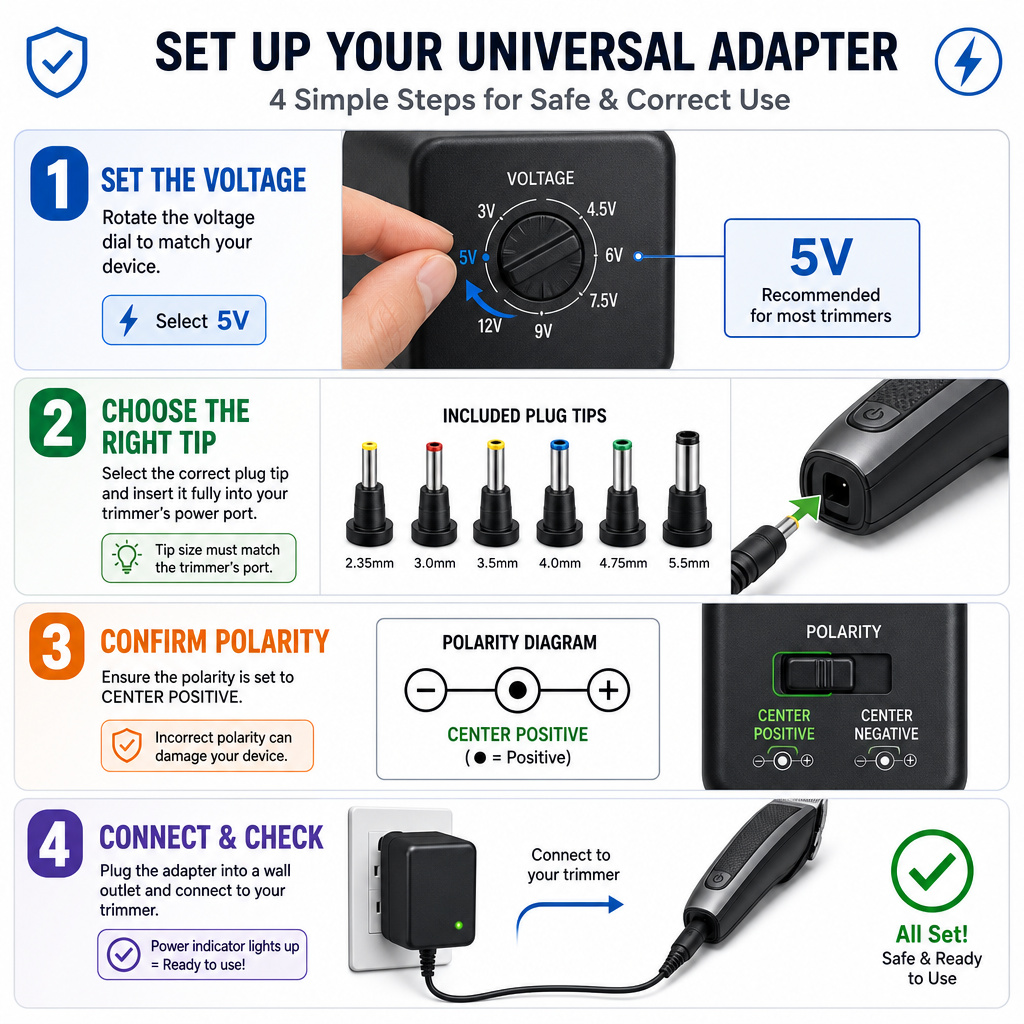
For trimmers with a barrel-type charging jack, a universal adapter is the most reliable off-the-shelf solution. The goal is to recreate the original charger’s output.
Here’s how to get it right:
- Set the voltage. Turn the adapter’s voltage selection dial to 5V. This is the most critical step. Double-check it.
- Select the correct plug tip. Test the plastic tips from the adapter’s kit until you find one that fits the trimmer’s jack snugly. It should not be loose.
- Confirm polarity. Look for a polarity diagram on the universal adapter, usually near the plug socket. It will show a symbol: a circle with a central dot and a plus sign. The central dot represents the inner pin of the plug, which should be positive (+). This must match the polarity requirement of your trimmer, which is almost always center-positive. The adapter should let you flip a switch to change this setting if needed.
- Connect and monitor. Plug the adapter into the wall, then connect it to the trimmer. Watch for the charging indicator. Feel the battery area after 5 minutes. It should be ambient temperature or slightly warm. If it’s hot, disconnect.
I learned the polarity lesson the hard way with a universal adapter that had a loose polarity switch. It was bumped to the wrong setting. The trimmer didn’t charge, and the battery drained completely overnight.
It wouldn’t take a charge from the original charger after that. The battery was dead. Now I tape the switch in place after setting it.
Method 3: The Emergency DIY Charger
This is the last resort. You’re making a temporary charger from an old 5V DC wall adapter (like a defunct phone charger). This is for when you’re stranded and a store run isn’t an option.
You absolutely need a multimeter for this. Without one, you are guessing with fireworks.
Step-by-Step Build:
- Cut the end off the old phone charger. Leave a few inches of cable attached to the adapter brick. Strip about half an inch of insulation from the red and black (or white) wires inside.
- Identify the wires. Typically, the wire with a white stripe or dashes is the positive (+). The solid color wire is negative (-). Do not trust this. You must verify.
- Test polarity with your multimeter. Set the multimeter to DC Volts (20V range). Plug the charger into the wall. Touch the black multimeter probe to one exposed wire, the red probe to the other. If the reading shows a positive voltage (e.g., +5.2V), the wire touching the red probe is positive. If it shows a negative voltage (e.g., -5.2V), the wire touching the black probe is positive. Note which is which.
- Create temporary contacts. You cannot just touch wires to the trimmer port. For a barrel jack, you need to connect the positive wire to the inner contact and the negative wire to the outer sleeve. In a pinch, you can use stiff wire, paperclips, or even the metal tips of pen refills (as shown in a popular YouTube hack) to bridge the gap. Attach the wires to these contacts with electrical tape.
- Make the connection. With the charger unplugged from the wall, connect your positive contact to the inner jack port and your negative contact to the outer sleeve. Secure everything so it won’t slip. Then plug the charger into the wall.
- Watch like a hawk. The charging light should come on. Charge for no more than 30 minutes for a test, then check for heat. If successful, you can charge for a full cycle but do not leave it unattended.
This method is purely functional and temporary. It exposes live wires. It’s a hack. Use it to get one charge, then order a proper replacement charger or follow proper weed trimmer storage protocols to avoid this situation in the future.
Will Using a Different Charger Hurt My Trimmer’s Battery?
This is the real worry. A single charge with a correct 5V source won’t hurt it. Long-term use is a different story.
The main risk isn’t from a slightly higher amperage supply. It’s from a poorly regulated voltage. A cheap, no-name power supply might output 5.5V or even 6V when under no load. That extra half-volt stresses the trimmer’s internal voltage regulator continuously, generating excess heat. Heat is the enemy of lithium-ion batteries.
Signs of battery stress include:
* The trimmer gets noticeably warm near the battery during charging, even when nearly full.
* Fully charged runtime is significantly shorter than it used to be.
* The battery indicator drops erratically during use.
If you must use an alternative charger regularly, invest in a quality, name-brand 5V USB adapter or universal adapter. It’s cheaper than a new trimmer. And remember, after a deep clean—which you should do regularly—ensure the unit is completely dry before attempting any charge, as outlined in our trimmer cleaning guide. Moisture and electricity are a terrible mix.
Frequently Asked Questions
Can I use any phone charger to charge my trimmer?
You can use any 5V phone charger. Check the small print on the charger brick. If it says “Output: 5V” or has a range like “5V/9V,” ensure it defaults to 5V for a non-phone device. Avoid using chargers that only list higher voltages like 9V or 12V.
How long does it take to charge a trimmer with a power bank?
It depends on the power bank’s output and the trimmer’s battery capacity. A typical trimmer with a 1000mAh battery charged via a 5V/1A power bank port will take roughly 1.5 hours. Using a 5V/2A port might be slightly faster, but the trimmer’s internal circuit will limit the current draw.
My trimmer won’t turn on even after charging. What’s wrong?
The issue might not be the battery. Hair and debris can jam the motor or switch. Disconnect from power, open the trimmer head (if possible), and clean out all clippings. Try turning it on again. If it’s still dead, the battery may have failed or the charging circuit could be damaged from a previous incorrect charging attempt.
Is it safe to leave my trimmer charging overnight with a universal adapter?
It is not recommended. While many modern devices have auto-cutoff circuits, a universal adapter or DIY solution may not communicate this properly. Continuous trickle charging degrades lithium-ion cells. Charge until the indicator shows full, then unplug.
The Bottom Line
Losing your trimmer charger is an inconvenience, not a disaster. Your first move is to check for a USB port—that’s the easiest fix. For everything else, match the voltage (5V), respect the polarity, and use a multimeter if you’re cutting wires. The DIY charger is a proof-of-concept, not a permanent solution. Once you’ve gotten that emergency trim, source a proper OEM or high-quality universal replacement. Your trimmer’s battery will thank you with years of reliable service, and you’ll avoid the distinct smell of fried electronics on a Monday morning.