
How to Blow Out AC Drain Line with an Air Compressor Safely
This post contains affiliate links. As an Amazon Associate, we earn from qualifying purchases.
To blow out an AC drain line with an air compressor, you need three things: a compressor with a regulator, a rubber-tipped blow gun, and strict pressure control. Set your compressor to a maximum of 30 PSI. Connect the blow gun to the T-pipe access point near your indoor air handler, seal the upstream line leading toward the unit, and deliver 2-3 short bursts of air. This clears algae and sludge without rupturing the standard 3/4-inch Schedule 40 PVC pipe.
That 30 PSI ceiling isn’t a suggestion. It’s the line between a cleared drain and a cracked pipe joint behind your drywall. Residential condensate lines are gravity-fed, not pressure-rated. Triple the recommended force, and the glue joints give out.
What follows is the field method, stripped of fluff. We’ll cover the specific tools that prevent air escape, the one sealing mistake that floods your furnace’s control board, and how to know when to put the compressor away and grab a shop vac instead.
Key Takeaways
- Never exceed 30 PSI. Residential PVC drain lines can rupture at pressures over 50 PSI. The safe, effective range is 10-25 PSI for stubborn clogs.
- Seal the upstream line. Before blowing air, you must plug the T-pipe branch that leads back to the indoor air handler. If you don’t, you force sludge and water into the internal drain pan, risking a short circuit in the furnace’s electrical compartment.
- Use a tapered rubber nozzle. A rigid plastic tip lets air escape around the pipe opening. A rubber nozzle conforms to create a vacuum-tight seal, directing all force toward the clog.
- Inspect the PVC first. If the visible pipe is yellowed or brittle, reduce pressure further—even 30 PSI could crack it.
- The wet/dry vac is often better. For heavy sludge blockages, applying suction at the outdoor drain exit with a shop vac is more effective and safer than trying to push the clog through with air.
Tools You Actually Need (Not a Marketing List)
Skip the generic “air compressor” advice. The wrong setup here wastes time and creates new problems. You need tools that match the physical reality of a 3/4-inch PVC drain line in a tight closet or attic.
The core tool is a portable pancake compressor or similar small tank model. You don’t need industrial CFM. You need a unit with a precise, reliable regulator. This is non-negotiable. A compressor without a gauge is a grenade waiting for your pipework.
Attach a standard air hose to the compressor’s outlet. At the other end, you need a specific attachment: a rubber-tipped blow gun. The tapered rubber end is what seals against the pipe opening. A metal or hard plastic nozzle will leak air, turning your concentrated blast into a weak puff. Some pros wrap the tip of a standard blow gun with electrical tape to improve the seal, but a dedicated rubber tip is best.
The part nobody mentions: A rigid plastic tip will allow air to escape around the edges of the 3/4-inch pipe. A tapered rubber nozzle conforms to the opening, ensuring every cubic inch of air is directed toward the clog. It’s the difference between clearing the line and just making noise.
You’ll also need a rag or a dedicated rubber expansion plug to seal the upstream pipe, a bucket for potential spillage, and a flashlight. If your compressor is new, ensure it’s filled with the correct synthetic compressor oil. A gallon of warm water for final flushing is a good idea.
The Single Most Important Safety Step: Regulating Pressure
This is where DIY attempts blow up—literally. Your air compressor can likely produce 100-150 PSI. Your drain line is built from Schedule 40 PVC, designed for gravity flow, not pressure.
| Pressure (PSI) | Effect on Drain Line | Risk Level |
|---|---|---|
| 10-25 PSI | Optimal for clearing algae and sludge. Effective force without joint stress. | Low |
| 30 PSI | Maximum safe limit per most HVAC pros. Effective for stubborn clogs. | Moderate |
| 30-50 PSI | Risk of “joint creep” or separation, especially on older pipes. | High |
| 50+ PSI | High probability of PVC rupture or glued joint failure. | Severe |
The numbers are not flexible. Set your regulator to 30 PSI maximum. If you’re dealing with an older system where the PVC looks discolored or feels brittle, dial it down to 15-20 PSI. The goal is to displace the clog, not the pipe.
Turn off your air conditioner at the thermostat and the circuit breaker. This is a two-part shutdown. You’re working with water and electricity in close proximity; the system must be completely dead.
Locate the condensate drain line access point. It’s almost always a white 3/4-inch PVC pipe with a T-shaped fitting or a removable cap near the indoor air handler or furnace. The horizontal pipe running from this T goes outside. The vertical pipe runs up to the drain pan under your evaporator coil.
The 7-Step Bump-Feed Method (and the One Step Everyone Skips)
This is a linear sequence. Jumping ahead to the air blast is how you spend the afternoon cleaning water out of a furnace.
Step 1: Seal the Upstream Line.
Before you touch the compressor, find the opening on the T-fitting that points back toward the indoor unit. Stuff a tightly balled rag into it or use a rubber expansion plug. This forces all the air and debris to travel outside, where you want it. If you skip this, pressurized air forces sludge and stagnant water back into the internal drain pan. Consequence: That pan can overflow into the furnace’s electrical compartment. A control board short is a repair that costs more than a service call.
Step 2: Connect and Seal the Blow Gun.
Firmly press the rubber-tipped nozzle of your blow gun into the open end of the T-fitting that points outside. Use your hand to clamp it tight. For a better seal, you can wrap a damp rag around the junction. The connection must be as airtight as possible.
Step 3: Verify Pressure and Position.
Double-check your compressor’s regulator. Is it at or below 30 PSI? Position yourself so the hose won’t snag or knock anything over when you pull the trigger.
Step 4: Apply Short, Controlled Bursts.
Squeeze the trigger for 2-3 seconds, then release. Listen. You might hear a gurgle or a pop. Repeat for 2-3 bursts total. Do not hold the trigger down. Long, sustained pressure builds heat and stress in the PVC and can push a clog deeper, making it worse.
Step 5: Inspect the Outdoor Termination.
Have someone watch the end of the drain line outside your home, or go check yourself. You should see water, black algae, or gelatinous sludge shoot out. That’s success. If nothing comes out, the clog may be too solid for air.
Step 6: Flush and Test.
Pour a gallon of warm water into the access point. It should drain freely and quickly out the outdoor end. If it backs up or drains slowly, the clog remains. You can try another round of air, but it’s likely time for Plan B.
Step 7: Restore and Clean Up.
Remove the rag from the upstream port. Wipe down the area. Turn the power back on at the breaker and then the thermostat.
When the Air Compressor Fails: Your Next Move
 A controlled 30-PSI burst doesn’t clear every obstruction. If your flush test fails, the problem is usually heavy, wet sludge that acts like a plug. Pushing it with more air is risky. This is when you pivot.
The professional’s first alternative is a wet/dry vacuum. This is often more effective because it pulls the clog toward you, rather than trying to shove it through 20 feet of pipe.
Where this goes sideways: Trying to force a solid clog with 40 or 50 PSI. The path of least resistance is no longer through the clog—it’s through the weakest glue joint in your wall. You’ll hear a pop, then see water staining the drywall a day later.
Connect the shop vac hose directly to the outdoor end of the drain line. Seal it as best you can with duct tape or your hands. Turn the vacuum on. While it’s running, have a helper pour water into the indoor access point. The suction will pull the water and the clog backward through the line and into the vacuum canister. This method is messier but far more powerful for dense blockages.
If that fails, the clog may be a solid object or severe calcification. This is the point to call a pro with a specialized, flexible HVAC drain snake. They have the tools to navigate the pipe’s entire run without damaging it.
Chemicals, Vinegar, and Prevention
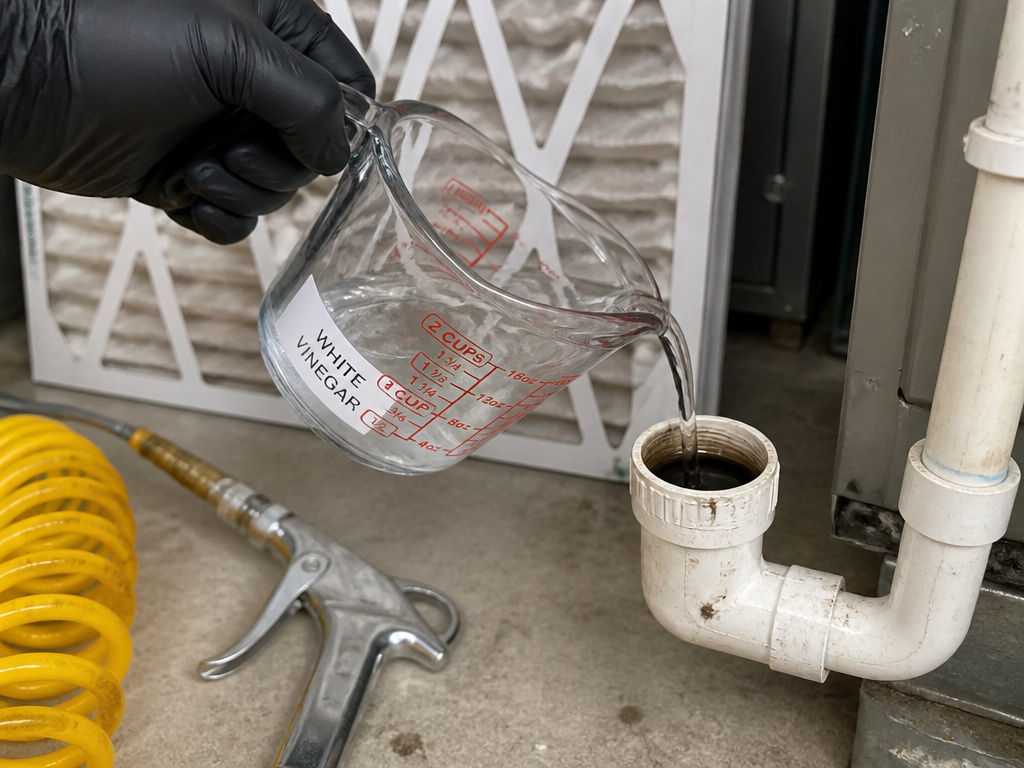 Should you pour vinegar or bleach down the line? The manufacturer advice is split. Carrier states vinegar may not fully prevent blockages because clogs often contain non-organic debris. Lennox suggests diluted vinegar as a maintenance flush.
The mechanic’s take: Vinegar is a decent monthly maintenance flush for keeping algae at bay. Pour a cup down the access point every few months during cooling season. It is not a cure for an existing, solid clog. Never use harsh chemical drain cleaners like Drano. They can damage the PVC and create toxic fumes, especially if you later use an air compressor.
Real prevention starts upstream. Change your furnace air filter every 1-3 months. A clean filter reduces the amount of dust that can mix with condensation and form sludge in the first place. During your annual AC tune-up, ask the technician to visually clear the drain pan and vacuum the line. It’s a five-minute job for them that can save you a weekend of hassle.
Bottom line: The compressor is a great tool for annual clearing and minor clogs. The shop vac is your heavy artillery. And a cup of vinegar is cheap insurance.
Frequently Asked Questions
What PSI should I use to blow out my AC drain line?
Do not exceed 30 PSI. The optimal and safest range is 10-25 PSI. Residential PVC condensate lines are not pressure-rated; exceeding 30 PSI risks separating glued joints or cracking the pipe, especially if it’s old or brittle.
Can I use my air compressor if there’s no T-fitting or access cap?
Yes, but it requires an adapter. Professionals use a small flexible extension hose attached to their air blow gun. They fish this hose into the primary drain pan outlet or the open end of the pipe, seal around it with a rag, and then apply air. This method is trickier and requires even more care with pressure.
Why is water backing up into my drain pan after I blow the line?
You almost certainly failed to seal the upstream side of the T-fitting. When you applied air, it forced water and debris back toward the indoor unit instead of outside. Always plug the pipe branch that leads to the air handler before you start blowing.
Is a wet/dry vacuum better than an air compressor?
For heavy, sludge-like clogs, yes. Suction pulls the obstruction out toward you. Compressed air tries to push it through the line, which can compact it further if it’s too dense. If air doesn’t work on the first try, switch to the shop vac method before increasing pressure.
How often should I clean my AC drain line?
Good rule is to flush it with a cup of vinegar at the start of the cooling season and maybe once more at the peak of summer. If you have a lot of dust or your filter often gets dirty, check the drain pan monthly for standing water, which is the first sign of a developing clog.
Before You Go
Clearing an AC drain line with an air compressor is a straightforward power-tool job when you respect the limits of the materials. The compressor is just the muscle; the real skill is in the regulator setting and the seal. Keep it at 30 PSI, plug the upstream port, and use a rubber-tipped gun. If the clog laughs at your air blast, don’t escalate—switch tactics to a wet/dry vacuum. That switch in approach is what separates a quick fix from a costly repair. Your system will drain, your floor will stay dry, and you’ll have used the right tool the right way.
