What is Rip Capacity on a Table Saw? The Complete Guide
This post contains affiliate links. As an Amazon Associate, we earn from qualifying purchases.
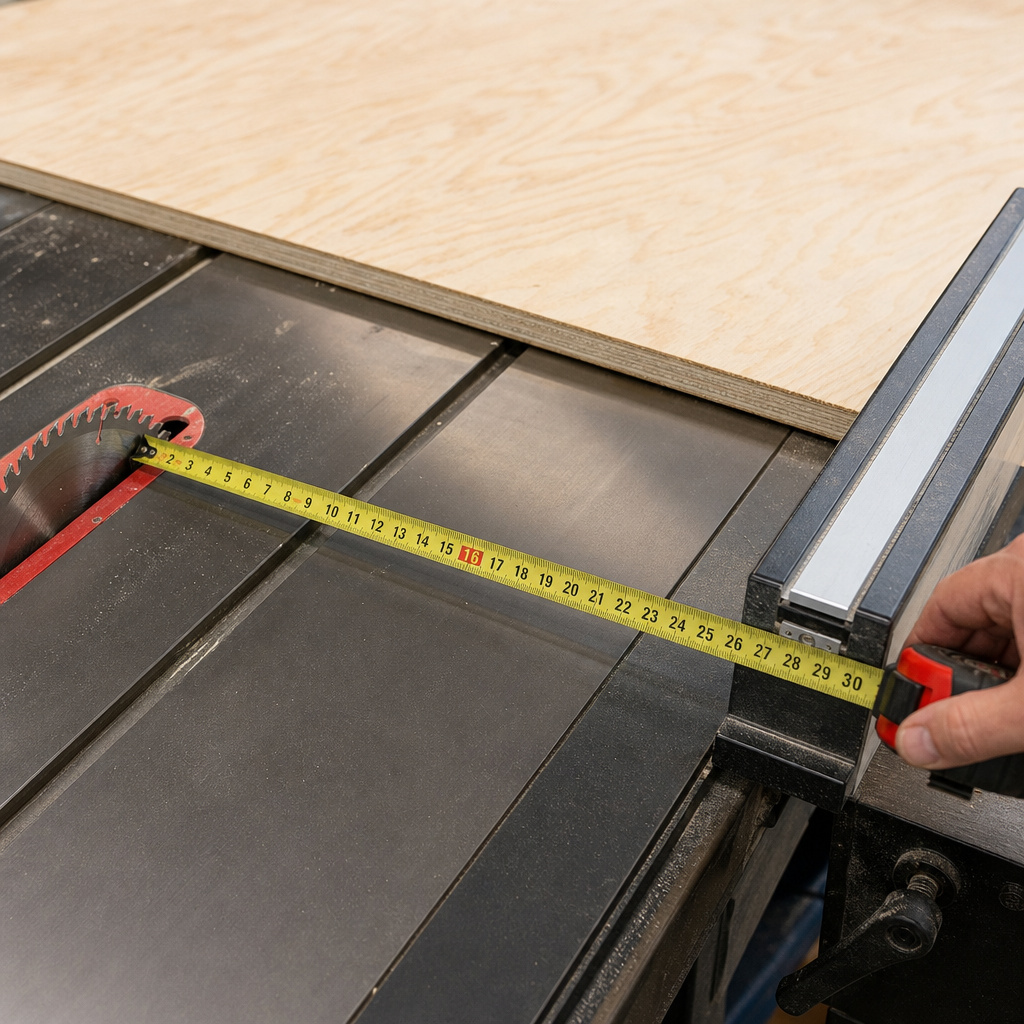
Rip capacity is the maximum distance between the saw blade and the rip fence, defining the widest board or sheet you can cut lengthwise in a single pass. It’s measured from the blade’s outer tooth to the fence’s inner face. For standard 4×8 sheet goods, you need at least 24 inches of right-side capacity to rip them in half.
Most people get this wrong. They think it’s the length of wood you can cut, or that a bigger number is always better. They buy a saw with a huge capacity, cram it into a tiny garage, and then only ever cut 2x4s.
This guide breaks down exactly what rip capacity is, how it changes with different saws, and how to pick the right amount for your shop and your projects.
Key Takeaways
- Rip capacity defines width, not length. A 30-inch capacity lets you rip a 30-inch wide panel, not a 30-foot long board.
- You need at least 24 inches of right-side capacity to split a 4×8 sheet of plywood down the middle. Less than that, and you’re forced to use a circular saw first.
- Fence quality matters more than advertised capacity. A wobbly fence on a 36-inch saw is more dangerous and less accurate than a rock-solid fence on a 24-inch saw.
- Left-side capacity is a real, usable feature on some saws. It lets you keep large, heavy sheet goods to the left of the blade, which is safer and more stable for right-handed users.
- Overbuying costs space and money. A cabinet saw with a 52-inch capacity needs a 10-foot deep infeed area. If your shop is 12 feet deep, you can’t use it.
How to Measure and Understand Rip Capacity
Grab a tape measure. Pull the rip fence on your saw all the way to the right. The number you’re after is the distance from the outermost point of the saw blade to the inner face of the fence, the side that touches the wood. That’s the official, right-side rip capacity.
Rip capacity is a linear measurement from the blade’s cutting edge to the fence’s guiding surface. It is not the distance from the blade to the edge of the table; extension wings can support wider workpieces, but the cut width is still limited by the fence’s travel on the rail system.
Most saws list this spec. You should still verify it. I’ve seen factory specs that measure from the blade center, not the tooth, adding a half-inch of fictional capacity. Your tape measure doesn’t lie.
Left rip capacity exists too. If your saw’s fence rails extend to the left of the blade, you can mount the fence there. This is less common on jobsite saws, but standard on many hybrids and cabinet saws.
It’s useful. When you’re ripping a big sheet of Baltic birch, having the bulk of the weight to the left of the blade, the same side as your body, feels more controlled. The offcut is a small strip to the right, easy to manage.
The fence is the whole game. A stamped steel fence that flexes when you push against it makes any rip capacity number meaningless. You’re not making a straight cut; you’re making a wish. A good fence, like a Biesemeyer T-square or a Vega Pro, locks down parallel to the blade every single time, with no front-to-back play. That’s when the number on the tape becomes real in the wood.
Why Rip Capacity Actually Matters for Your Projects
It dictates what you can build. Try making a 36-inch wide bookshelf carcass with a saw that only has 24 inches of capacity. You can’t.
You’d have to first crosscut the plywood to a narrower width, then rip it, creating more waste, more steps, and more chances for error. Rip capacity is permission. It’s the gatekeeper for your project plans.
For sheet goods, the 24-inch rule is non-negotiable. A 4×8 sheet is 48 inches wide. To rip it into two 24-inch pieces, you need the fence 24 inches from the blade.
If your saw maxes out at 22 inches, you’re stuck. You’ll have to rough-cut the sheet with a circular saw first, which introduces inaccuracy and extra handling. That one missing inch changes your entire workflow.
It’s a major safety factor. Attempting to rip a piece wider than your saw’s capacity is a sure path to kickback. The wood will bind between the blade and the fence, lift, and get thrown back at you.
I learned this the hard way early on, trying to rip a 26-inch panel on a saw with a 25-inch fence. The back of the board pinched just enough to twist. The panel shot back like a projectile, leaving a dent in the garage door I still see. The math doesn’t bend.
Capacity also interacts with power. A 1.75 HP jobsite saw might list a 25-inch capacity, but trying to rip a 3-inch thick piece of hard maple at that full width will stall the motor. The cut becomes unsafe and ragged. For thick, hard stock, you need both capacity and the motor torque to back it up. This is where hybrid table saw features with more powerful motors become relevant.
Common Rip Capacities by Saw Type (And What They’re Good For)
Not all saws are built the same. The category tells you a lot about the intended use and the realistic workload.
| Saw Type | Typical Rip Capacity | Best For | Workspace Needed |
|---|---|---|---|
| Jobsite / Portable | 12–25 inches | Trim work, small projects, portability to the job. | Minimal; fits in a truck bed. |
| Contractor | 24–36 inches | The serious DIYer; handles sheet goods and furniture projects. | Dedicated 8×8 ft. area. |
| Hybrid | 30–50 inches | Advanced hobbyists and small shops; blends contractor footprint with cabinet power. | Permanent stand, 10×10 ft. clearance. |
| Cabinet | 36–72+ inches | Professional shops, production work, large panels and heavy hardwoods. | Large, dedicated shop space. |
Jobsite saws like the DeWalt DWE7491RS or the Bosch 4100 often top out around 25 inches. That’s enough to split plywood, but just barely. The fence systems on these are lightweight for portability. They get the job done, but you feel the flex when pushing a full sheet. They’re tools for getting a task finished on-site, not for precision cabinetry.
Contractor saws are the workhorses of home workshops. A classic like the Delta 36-725T2 offers around 36 inches. This is the sweet spot for most non-professionals. It handles 90% of project sizes, and the saw doesn’t dominate the room. The fence is usually a step up from jobsite models, but often still the weak point. Many users eventually upgrade to an aftermarket fence, which transforms the saw.
Cabinet saws from SawStop, Powermatic, and Grizzly are in another league. Their capacity isn’t just about the fence travel; it’s about mass, stability, and power. A 52-inch capacity on a SawStop PCS means you can accurately rip wide veneered panels for a dining table without breaking a sweat. The fence is integral to the saw’s design, precise, heavy, and dead reliable. You pay for it in dollars and floor space.
The gap between contractor and cabinet saws is where hybrid saws live. Models like the Grizzly G0771Z offer cabinet-saw style trunnions and more power in a contractor-saw footprint, with capacities often around 30-32 inches. They’re a compelling upgrade path.
How Much Rip Capacity Do You Really Need?
Answer three questions.
First, what’s the widest board you’ll ever rip? Not the dream project, the actual one. If you build cabinets, 24 inches covers most base and upper cabinet parts.
If you build tabletops or doors, you might need 30, 36, even 40 inches. Be honest. Buying for a once-in-a-decade project is how tools become expensive dust collectors.
Second, how much room do you have? Rip capacity isn’t just the fence position. It’s the infeed and outfeed space.
To safely rip an 8-foot long sheet to its full width, you need about 4 feet behind the saw and 4 feet in front. For a 36-inch capacity cut, you still need the length clearance. Sketch your shop floor on graph paper with the saw’s dimensions. Most people run out of length before they run out of width.
Third, what’s your budget for the whole system? A $600 saw with a 36-inch flimsy fence is a worse choice than an $800 saw with a 28-inch excellent fence. Plan to spend money on the fence. Sometimes buying a used contractor saw and immediately installing a $300 Biesemeyer clone is the smartest financial and functional move you can make.
Here’s my rule of thumb, born from helping too many friends buy the wrong saw:
– Garage DIYer, mostly 2x4s and plywood for shelves: 24-28 inches is plenty.
– Furniture hobbyist building cabinets, tables, built-ins: 30-36 inches is the target zone.
– Serious woodworker or small pro shop: Start at 36 inches and go up to 52 if space and budget allow.
Anything over 52 inches is for specialized production work. You’ll know if you need it.
The Critical Link Between Rip Capacity and Safety
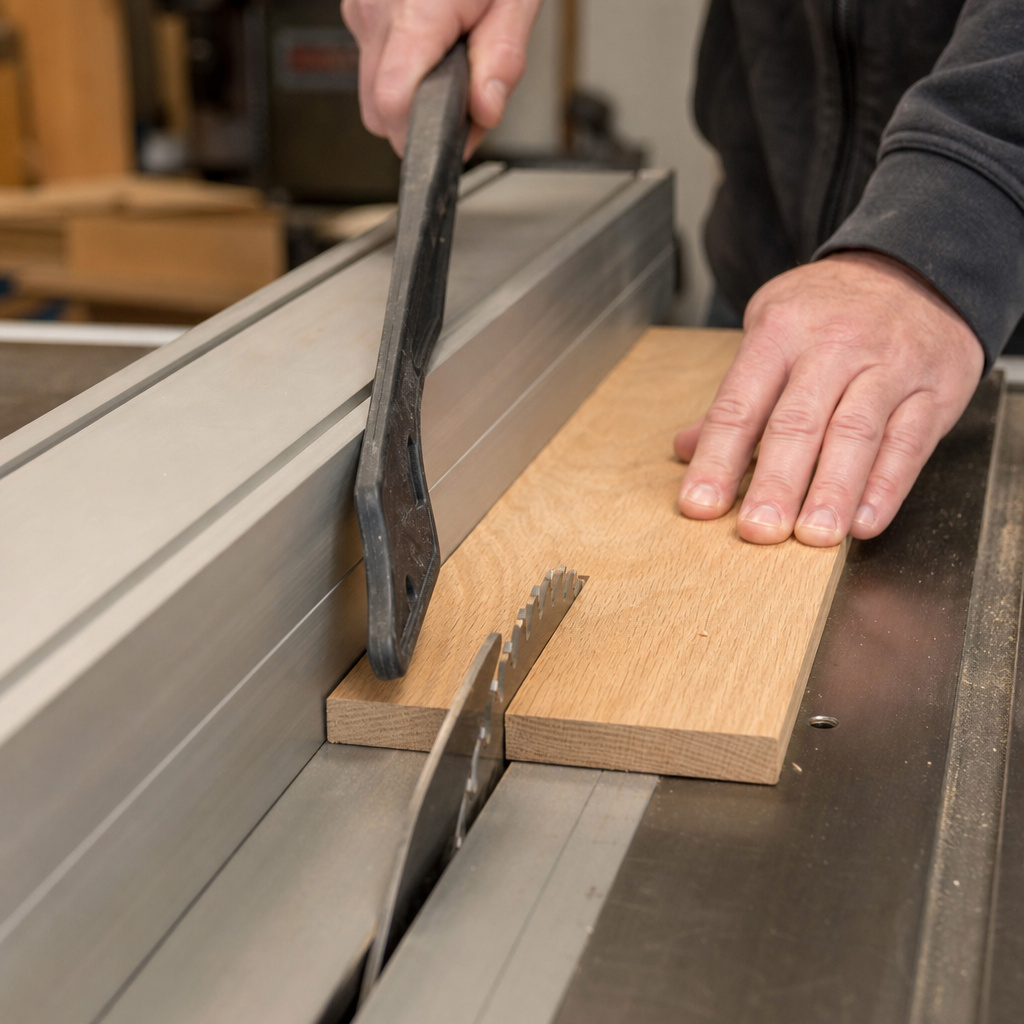
Before you start: The blade is exposed and the motor is powerful. Always use the rip fence for rip cuts, never freehand. Use a push stick when your hand gets within 6 inches of the blade. For cuts wider than 12 inches, use a featherboard to hold the workpiece against the fence. Kickback can happen in milliseconds and throws material with enough force to break bones.
The fence is your primary safety device for rip cuts. A misaligned fence, one that’s not parallel to the blade, is a kickback generator. The back of the blade pinches the workpiece, and it becomes a missile. Checking fence alignment is a five-minute ritual before any major ripping session.
Blade height matters more with wider cuts. Set the blade so the teeth protrude no more than 1/4 to 1/2 inch above the material. A blade set too high has more exposed, aggressive teeth that can grab and lift the workpiece, especially a wide, thin panel. It also increases the risk of severe injury if contact occurs.
For wide, heavy sheet goods, support is non-negotiable. Use roller stands or a dedicated outfeed table. Letting a 4×8 sheet tip off the back of the saw as you finish the cut is a great way to ruin the cut, damage the sheet, and wrench your back. I use a pair of collapsible roller stands that store against the wall. They’re worth their weight in gold.
Never bypass the riving knife purpose. This splitter behind the blade keeps the kerf open, preventing the wood from pinching the blade’s backside. It’s the single best kickback prevention device on the saw. If your cut requires removing it (like for a non-through cut), that’s a red flag to double-check your entire setup.
Upgrading Your Fence System to Maximize Capacity
An aftermarket fence is the best upgrade for any table saw short of a cabinet model. It turns a vague measurement into a precise, repeatable one.
The two main types are T-square fences (like Biesemeyer, Vega) and round-rail fences (like Shop Fox, many stock fences). T-square fences are generally more rigid and accurate. They lock at the front and back simultaneously, eliminating deflection. Round-rail fences can rack if not perfectly adjusted.
Installation is a weekend project. You’re drilling mounting holes in your saw’s table. Measure three times, drill once.
The key is getting the fence perfectly parallel to the blade along its entire travel. The instructions will have a method; follow it meticulously. The difference on the first test cut is shocking. The cut line is laser-straight, and the fence doesn’t budge under pressure.
I put a Vega Pro 40 fence on an old Craftsman 113 contractor saw. The stock fence had about 1/16th of an inch of play at the back. The Vega locked down with a solid clunk and had zero play. The saw’s effective accuracy, and my confidence in it, tripled overnight. The 30-inch capacity finally became a real 30 inches.
Does it add capacity? Not directly. But it makes every inch of the existing capacity usable and safe.
It also often extends the rail system, potentially adding a few more inches of travel. More importantly, a quality fence has a true, square face. Your workpiece slides smoothly without catching, reducing the effort required and improving control for those wide, nerve-wracking cuts.
Consider extension tables. Bolt-on wings or a custom-built outfeed table don’t change the rip capacity number, but they massively increase the practical capacity. They support large sheets throughout the cut, making the process safer and more accurate. Building a simple crosscut sled guide is another accessory that changes how you use your saw’s capabilities.
Frequently Asked Questions
Can I increase the rip capacity on my table saw?
Yes, but within limits. You can install longer fence rails and a compatible fence to gain more travel. However, the saw’s table and motor arbor were designed for a specific range. Extending capacity too far on a underpowered saw can lead to dangerous strain and inaccurate cuts. Consult your saw’s manufacturer or a reputable upgrade kit provider.
What’s the difference between rip capacity and crosscut capacity?
Rip capacity is width (fence to blade). Crosscut capacity is length (using the miter gauge). They’re independent. A sled or miter gauge determines how long a board you can crosscut, which is often much longer than your rip capacity is wide.
Is left-side rip capacity important?
It’s a nice-to-have, not a must-have, for most. It shines when working with large, heavy sheets. Keeping the bulk of the material on the left (for a right-handed user) provides better balance and control. If you rarely break down full sheets, standard right-side capacity is fine.
My saw has a 30-inch capacity, but the table is only 20 inches deep. How does that work?
The rip fence rides on rails that extend beyond the table’s edge. For a wide cut, the workpiece overhangs the table on the right side. This is why outfeed support is critical, the workpiece is only fully supported by the table for the first part of the cut.
Why does my cut burn when ripping at maximum capacity?
This usually points to a misaligned fence or a dull blade. At the far end of the fence travel, even a tiny misalignment causes the workpiece to pinch the blade. The friction creates burn marks. Check fence parallelism and use a sharp, clean blade designed for ripping.
The Bottom Line
Rip capacity is a fundamental spec, but it’s not the only one. It tells you the width your saw can handle, but the fence tells you how well it will handle it. Match the number to your most common project width, not your dream project. Remember the 24-inch threshold for plywood.
Your shop space is part of the equation. A saw with a 52-inch fence needs a room to breathe. Prioritize a quality, solid fence over a few extra inches of travel on a shaky one.
Finally, respect the limits. Pushing past your saw’s capacity is an invitation for kickback, ruined work, and injury. Work with the tool you have, not the one you wish you had.
{
“@context”: “https://schema.org”,
“@type”: “HowTo”,
“name”: “How to Determine and Use Table Saw Rip Capacity”,
“totalTime”: “PT20M”,
“tool”: [
{
“@type”: “HowToTool”,
“name”: “Tape measure”
},
{
“@type”: “HowToTool”,
“name”: “Straight edge or framing square”
},
{
“@type”: “HowToTool”,
“name”: “Safety goggles”
}
],
“step”: [
{
“@type”: “HowToStep”,
“name”: “Locate the blade and fence”,
“text”: “Place your table saw on a level surface. Retract the rip fence fully to one side so it is not near the blade.”
},
{
“@type”: “HowToStep”,
“name”: “Measure to the fence face”,
“text”: “Using a tape measure, find the distance from the outermost tooth on the blade to the inner face of the rip fence. This is your right rip capacity.”
},
{
“@type”: “HowToStep”,
“name”: “Check for left capacity”,
“text”: “If your saw allows the fence to be mounted left of the blade, repeat the measurement on that side to determine left rip capacity.”
},
{
“@type”: “HowToStep”,
“name”: “Verify with a test cut”,
“text”: “Make a test rip on a scrap piece of plywood at the maximum measured distance to confirm the cut is clean and the fence remains parallel.”
}
]
}
{
“@context”: “https://schema.org”,
“@type”: “FAQPage”,
“mainEntity”: [
{
“@type”: “Question”,
“name”: “Can I increase the rip capacity on my table saw?”,
“acceptedAnswer”: {
“@type”: “Answer”,
“text”: “Yes, but within limits. You can install longer fence rails and a compatible fence to gain more travel. However, the saw’s table and motor arbor were designed for a specific range. Extending capacity too far on a underpowered saw can lead to dangerous strain and inaccurate cuts. Consult your saw’s manufacturer or a reputable upgrade kit provider.”
}
},
{
“@type”: “Question”,
“name”: “What’s the difference between rip capacity and crosscut capacity?”,
“acceptedAnswer”: {
“@type”: “Answer”,
“text”: “Rip capacity is width (fence to blade). Crosscut capacity is length (using the miter gauge). They’re independent. A sled or miter gauge determines how long a board you can crosscut, which is often much longer than your rip capacity is wide.”
}
},
{
“@type”: “Question”,
“name”: “Is left-side rip capacity important?”,
“acceptedAnswer”: {
“@type”: “Answer”,
“text”: “It’s a nice-to-have, not a must-have, for most. It shines when working with large, heavy sheets. Keeping the bulk of the material on the left (for a right-handed user) provides better balance and control. If you rarely break down full sheets, standard right-side capacity is fine.”
}
},
{
“@type”: “Question”,
“name”: “My saw has a 30-inch capacity, but the table is only 20 inches deep. How does that work?”,
“acceptedAnswer”: {
“@type”: “Answer”,
“text”: “The rip fence rides on rails that extend beyond the table’s edge. For a wide cut, the workpiece overhangs the table on the right side. This is why outfeed support is critical, the workpiece is only fully supported by the table for the first part of the cut.”
}
},
{
“@type”: “Question”,
“name”: “Why does my cut burn when ripping at maximum capacity?”,
“acceptedAnswer”: {
“@type”: “Answer”,
“text”: “This usually points to a misaligned fence or a dull blade. At the far end of the fence travel, even a tiny misalignment causes the workpiece to pinch the blade. The friction creates burn marks. Check fence parallelism and use a sharp, clean blade designed for ripping.”
}
}
]
}