The Right Way to Sharpen Your Chainsaw Chain (Full Guide)
This post contains affiliate links. As an Amazon Associate, we earn from qualifying purchases.
Sharpen your chainsaw chain by matching three things: the correct round file size (printed on the drive link), the manufacturer’s specified filing angle (usually 30 degrees), and a consistent stroke count for each tooth. The process requires a file, a flat file for the depth gauges, a secure vise, and about 20 focused minutes.
Most people sharpen their chainsaw chain too late, after it’s already smoking in the wood and pulling to one side. By then, you’re not just touching up an edge — you’re reshaping damaged metal, and you’ll likely file more steel than needed, shortening the chain’s life. The other half of the crowd sharpens too often, not realizing a chain needs a few hours of runtime to seat its new edge and reach peak sharpness.
This guide covers the manual filing method from start to finish, including the mandatory depth gauge adjustment most tutorials skip. I’ll also touch on electric sharpener options, but the file is where you build the skill that makes every other method work.
Key Takeaways
- Use a round file sized to your chain’s pitch (e.g., 4.8mm for 3/8″ pitch); the wrong size ruins the cutter’s profile.
- Adjust the depth gauges (rakers) after every 3-4 sharpening sessions. Skipping this makes the saw cut poorly or kick back violently.
- Sharpen at the first sign of fine sawdust, not when the chain stops cutting. A dull chain heats up, wears the bar faster, and is dangerous.
- Count your file strokes (5-7 is typical) and apply the same number to every tooth. Uneven teeth cause the saw to pull sideways.
- A loose chain during sharpening wobbles and gives you an inconsistent edge. Snug it until you can just rotate it by hand.
Chainsaw sharpening with a round file requires matching the file diameter to the chain pitch, maintaining a consistent angle (typically 30 degrees) relative to the cutter’s top plate, and applying forward-pressure strokes only. The depth gauge clearance, checked with a specialized tool, must be lowered proportionally after several sharpenings to maintain proper chip thickness and prevent kickback.
How Do You Know When Your Chainsaw Chain Is Dull?
You don’t need to wait for the saw to bog down. The first sign is visual. A sharp chain pulls out coarse, curly wood chips that look like wood shavings from a hand plane. A dull chain produces fine, powdery sawdust that looks more like sand. That’s because the rounded cutters are rubbing and burning the wood instead of slicing it.
The physical feedback is unmistakable. You’ll find yourself leaning into the cut, applying more pressure to keep the saw moving. The saw might also start pulling persistently to one side — a sure sign the cutters on that side are shorter or more worn than the others. In the worst cases, you’ll see smoke coming from the cut even with good bar oil flow. That’s the chain overheating from friction.
If you hit dirt, a rock, or a nail, stop and check immediately. That single impact can flatten or chip multiple cutters. Running a damaged chain ruins the bar’s rails and accelerates wear on the drive sprocket. The cost of a new chain is always less than a new bar and sprocket set.
Tools You’ll Need to Sharpen a Chainsaw Chain
You can get by with a single round file in a pinch, but the right tools turn a chore into a five-minute tune-up. This is the kit I keep on my workbench.
- Round File: This is non-negotiable. Don’t use a workshop file. The diameter must match your chain. Common sizes are 4mm (for 1/4″ pitch), 4.8mm (for 3/8″ Low-Profile and .325″ pitch), and 5.5mm (for 3/8″ full and .404″ pitch). The size is usually stamped on the chain’s drive link. An Oregon 4.8mm file is my go-to for most homeowner saws.
- Flat File: A standard 6-inch mill bastard file works for dressing the depth gauges. A dedicated depth gauge tool with a built-in flat file is better.
- Filing Guide or Holder: A simple plastic handle that holds the file at the correct height above the tooth is huge for beginners. A STIHL filing angle plate that clips onto the bar is even better — it sets the angle for you.
- Bar Clamp or Vise: You need both hands free. A portable chainsaw bar clamp is perfect. A bench vise works if you have one.
- Depth Gauge Tool: This little plastic or metal gauge is critical. The Husqvarna depth gauge tool is inexpensive and has steps for different chain types. It shows you exactly how much to file off each raker.
- Safety Gear: Gloves protect your hands from the sharp cutters. Safety glasses stop metal filings from flying into your eyes. Use them.
You can add a chainsaw blade sharpening electric grinder later, but master the file first. The file teaches you what a sharp tooth should look and feel like.
How to Sharpen a Chainsaw Chain with a File (Step-by-Step)
Before you start: Disconnect the spark plug wire on a gas saw or remove the battery on a cordless model. A loose chain can whip if the throttle is accidentally bumped. The cutters are sharp enough to slice through leather gloves — handle the chain by the side plates, not the top.
Step 1: Secure and Clean the Saw
Clamp the saw’s bar firmly in a vise or bar clamp. Don’t clamp on the chain itself. Brush out the bar groove and every cutter tooth with a stiff nylon brush. I keep an old paintbrush dipped in mineral spirits for this. Gummed-up sawdust and resin hide the cutting edges and clog your file. A clean chain also lets you spot damaged or missing teeth.
Tension the chain so it’s snug against the bar. You should be able to rotate it by hand with a little resistance, but there should be no sag on the bottom.
A loose chain will wobble as you file, rounding off the edges of your cutters. I learned this the hard way on an old Homelite; I filed a whole chain with it too loose and the saw still pulled left. The fix was another full sharpening, this time with the chain tight.
Step 2: Find Your File Size and Mark a Starting Point
Look on the side of the chain’s drive links for markings. You’ll see something like “3/8 LP” or “.325”. Match that to your file size. If the chain is worn blank, check your saw’s manual. Using the wrong file is a permanent mistake — a 5.5mm file on a chain meant for 4.8mm will cut too deep into the gullet and weaken the tooth.
Pick a tooth on the side facing you and mark it with a paint marker or chalk. This is your “master tooth.” You’ll sharpen every tooth on this side until you return to this mark, ensuring you don’t miss any. It sounds obvious, but in a 72-tooth chain, it’s easy to lose your place.
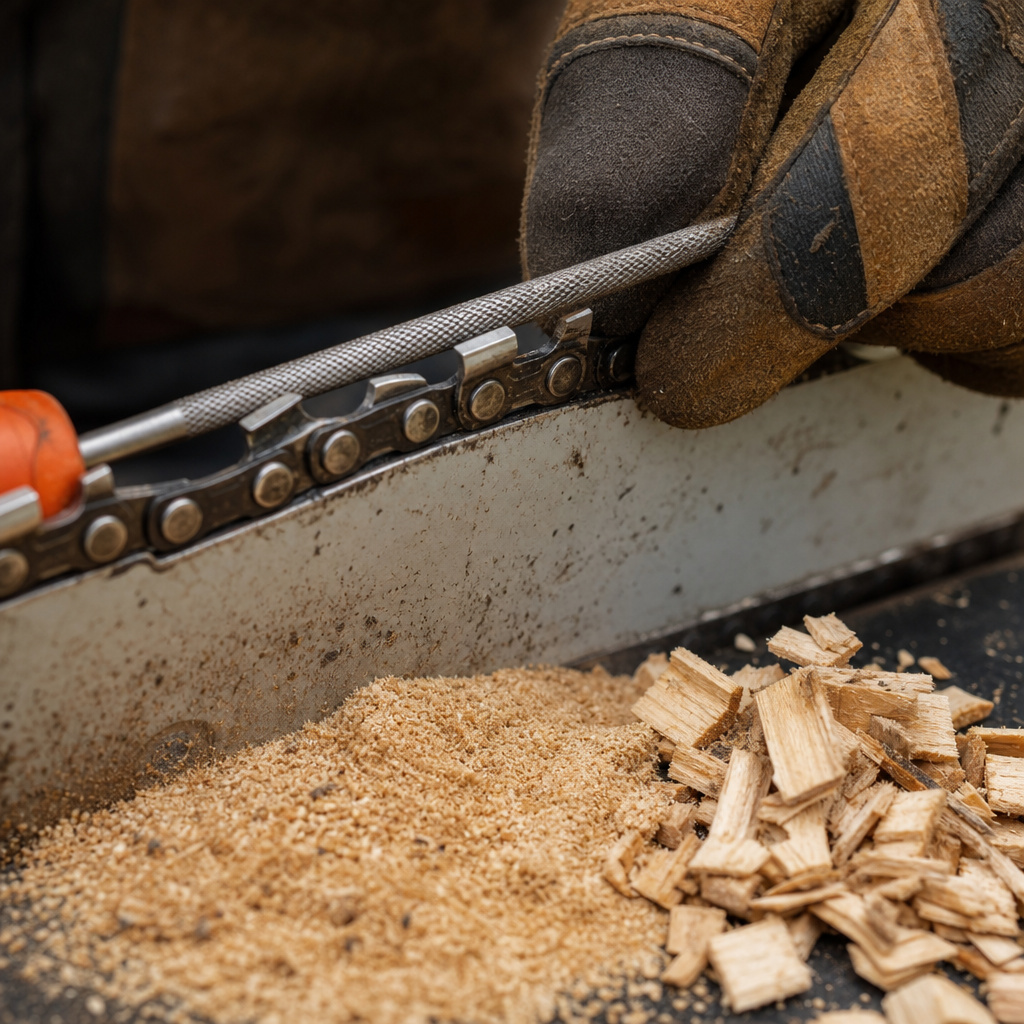
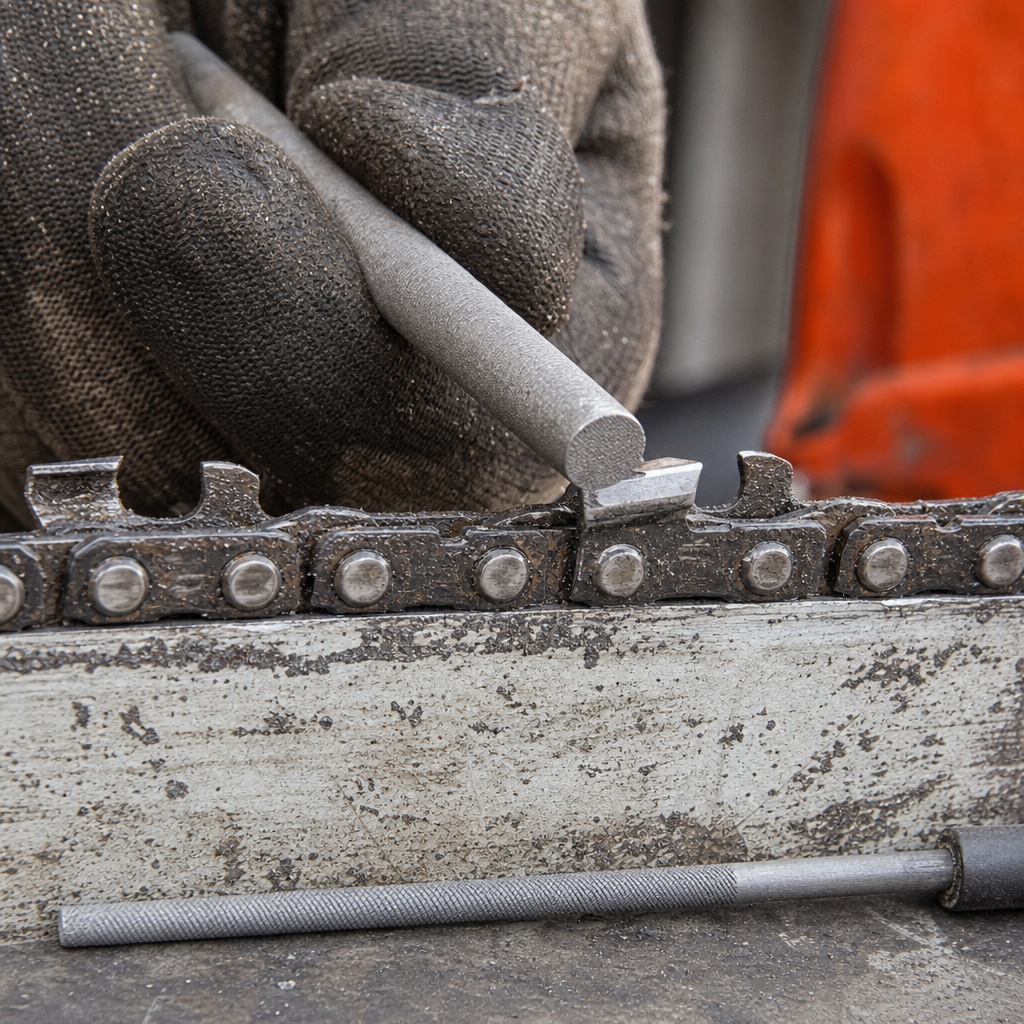
Step 3: File the Cutters with the Correct Angle and Rhythm
Place the round file into the curved gullet of the first cutter. The file should sit level with the ground (parallel to the bar’s side). Now, tilt it to match the cutter’s top plate angle. For most chains, this is 30 degrees. A STIHL filing guide that clips to the bar takes the guesswork out.
Here’s the rhythm most people get wrong. Push the file forward across the tooth with firm, even pressure. As you push, rotate the file slightly to follow the cutter’s curvature.
On the return stroke, lift the file clear of the tooth. Dragging it back dulls the file. It’s not a back-and-forth sawing motion. It’s a deliberate forward cut, lift, reposition, forward cut.
Do 5-7 consistent strokes. Count them. The goal is to restore a bright, shiny edge along the entire top plate of the cutter. If a tooth is badly damaged, you might need 10 strokes. Try to match that extra effort on the corresponding tooth on the other side to keep things even.
| Common Filing Angle | Typical Chain Pitch | Visual Check |
|---|---|---|
| 25 degrees | STIHL HEXA, some full-chisel chains | Top plate meets side plate in a sharp point. |
| 30 degrees | Most semi-chisel, low-profile chains | The most common angle; a good default. |
| 35 degrees | Chains for hard, frozen wood | Creates a more durable, less aggressive edge. |
Step 4: Work Your Way Around the Chain
Complete every cutter facing the same direction. Rotate the chain by hand, using the clutch or pulling the chain along. Keep your file strokes, angle, and pressure identical. This is where muscle memory kicks in.
Once you’ve done all the right-facing cutters, turn the entire saw around in the vise. Now repeat the entire process for all the left-facing cutters. Do not change your technique. The same angle, the same stroke count. This symmetry is what keeps the saw cutting straight.
Step 5: File the Depth Gauges (The Step Everyone Forgets)
After sharpening, the cutting teeth are shorter. This makes the depth gauges (the little humps in front of each cutter) relatively taller. If they’re too tall, the cutter can’t take a proper bite and the saw will just vibrate and dust.
Place a depth gauge tool over the chain. The tool rests on the top of the cutter, and a step indicates how much of the raker should protrude. File the raker down until it’s flush with the tool’s guide. Use your flat file, holding it perfectly level. A few light passes are all it takes.
File every depth gauge to the same height. An uneven set of rakers makes the saw cut in a jerky, unpredictable rhythm. Over-filing them is dangerous — it allows the cutter to take too deep a bite, which can grab the wood and cause violent kickback.
What About Electric Chainsaw Sharpeners?
Electric grinders are fast. A Dremel with a chainsaw sharpening attachment can touch up a chain in two minutes. They’re fantastic for restoring a badly damaged chain or if you have a pile of them to do. But they have a steep learning curve and remove metal aggressively.
The universal jigs that claim to fit any chain are where I burned my first chain. The clamp didn’t seat right on my Oregon chain, holding the grinding wheel at a 28-degree angle instead of 30. The saw cut, but it was slow and needed constant pressure. I only realized my mistake when I checked the angles with a guide. I had to file the entire chain again by hand to fix it.
If you go electric, buy a quality grinder with an adjustable angle and a vise that locks the chain solidly. Use it for major rehab, not for daily touch-ups. The file is still king for maintenance.
How Often Should You Sharpen Your Chainsaw Chain?
Sharpen at the first sign of fine sawdust. For a homeowner cutting clean firewood, that might be after every other tank of gas. If you’re cutting near the ground (where dirt is likely), check the edge after every use.
A professional falling trees might touch up the chain once or twice a day. The rule is simple: a sharp chain is safer, faster, and easier on your saw. Letting it go completely dull stresses the engine, wears the bar, and turns a simple job into a fight.
| Symptom | Likely Cause | Fix |
|---|---|---|
| Saw pulls hard to the left. | Right-side cutters are shorter or duller. | Sharpen right-side cutters, check for equal length. |
| Chain produces dust, not chips. | All cutters are dull. | Full sharpening of all teeth. |
| Saw cuts in a jerky, hopping motion. | Depth gauges are uneven. | File all depth gauges to uniform height. |
| New chain cuts a curved path. | Bar rail is worn unevenly. | File the bar rails flat or replace the bar. |
Common Chainsaw Sharpening Mistakes to Avoid
Using the wrong file size is the classic error. It seems minor, but it reshapes the entire cutting geometry. A file that’s too small won’t reach the full edge; a file that’s too large weakens the tooth at its base.
Ignoring the depth gauges is the safety mistake. I see it all the time. Someone sharpens the cutters perfectly, wonders why the saw still won’t bite, and then cranks down harder.
That’s when kickback happens. The depth gauge controls the bite. It’s a governor. Respect it.
Filing on the backstroke ruins your file. The hardened teeth on a round file are designed to cut in one direction. Dragging them backwards knocks those teeth off. Your file will feel smooth and stop cutting halfway through the job. Lift it.
Not cleaning the chain first is a time-waster. Filing over packed gum and pitch loads the file instantly. It skates over the metal instead of cutting it. You’ll work three times as hard for a worse result. A quick brush takes ten seconds.
Frequently Asked Questions
How many times can you sharpen a chainsaw chain before replacing it?
You can sharpen a chain until the cutting teeth are worn down to the line marked on their side. This line is the wear limit. Once a tooth is filed past that line, it’s too weak and should be replaced. A well-maintained chain might see 10-15 sharpenings. One that regularly hits rocks might only get 3 or 4.
Can you sharpen a chainsaw chain without taking it off?
Yes, absolutely. In fact, it’s the recommended method for routine touch-ups. Sharpening it on the bar ensures the filing angle is consistent relative to the bar itself. You only need to remove the chain for major repairs or to give it a thorough cleaning in solvent.
Why does my chainsaw chain get dull so fast?
Cutting dirty wood, dry wood with lots of sand on the bark, or pressure-treated lumber will dull a chain incredibly fast. So will letting the chain touch the ground. Even a second of contact with soil has the same effect as sandpaper on the edge. Always keep the tip of the bar up when moving between cuts.
What’s the difference between a full-chisel and semi-chisel chain?
Full-chisel chains have square-cornered cutters that cut faster and more aggressively in clean wood. They also dull faster if they hit dirt. Semi-chisel chains have rounded corners. They cut a tiny bit slower but stay sharp longer in less-than-ideal conditions and are more forgiving for beginners. Your sharpening angle might differ slightly between them.
Is it worth paying for professional sharpening?
Once a year, yes. A professional shop uses a precision grinder that can true up a chain perfectly, correcting any unevenness you might have introduced. It’s a good benchmark. For weekly or monthly maintenance, doing it yourself with a file is more economical and keeps you in tune with your tool’s condition.
The Bottom Line
Sharpening a chainsaw chain isn’t a mysterious art. It’s a mechanical process of matching a file to a specific shape and repeating a motion consistently. The real skill is in recognizing the signs of dullness early and having the discipline to stop and fix it before you ruin your cut, your bar, and your afternoon.
Keep your file clean, your depth gauges in check, and your strokes even. The saw will thank you with less vibration, less effort, and a pile of clean chips instead of a cloud of dust. That’s the sound of a job done right.