The Right Way to Thread a Weed Trimmer for a Tight, Even Feed
This post contains affiliate links. As an Amazon Associate, we earn from qualifying purchases.
Threading a weed trimmer requires matching three things: your trimmer head type (bump-feed, speed-feed, auto-feed, or fixed-line), the correct line diameter printed on the head, and winding the spool in the direction marked by the arrow.
Most guides skip the first step, identifying the head, and that’s why people spend twenty minutes wrestling with a spool that won’t feed. They assume every trimmer works the same. They don’t.
This guide covers the four main head types, the line specs that actually matter, and the winding sequence that prevents jams. If your line snaps every five minutes or the head won’t bump out new string, you’ve missed one of these.
Key Takeaways
- The head type dictates the entire threading process. A Ryobi 40V trimmer with a speed-feed head threads without removing the cover; a Stihl FS 131 with a bump-feed head requires full disassembly.
- Line diameter is stamped on the head or in the manual. Using thicker line than specified binds the mechanism; thinner line snaps against thick weeds.
- Wind both lines in the direction of the arrow on the spool. Winding backwards means the line won’t release when you bump the head.
- Soaking nylon line in water for 30 minutes before winding reduces brittleness and prevents premature snapping, especially in dry climates.
- After threading, extend only 4-6 inches of line. Longer tails whip against the guard and strain the motor.
Before you start: safety first
Before you start: A spinning trimmer head with loose line is a laceration hazard. Disconnect the power completely, unplug corded trimmers, remove the battery from cordless models, or turn off the gas engine and let it cool for five minutes. The head can spin from residual torque even after you switch it off. Also, wear gloves. Freshly cut line ends are sharp enough to slice skin.
How to identify your trimmer head type
Look at the head. The threading method is built into its design.
Bump-feed heads have a removable cover, usually secured by tabs or a screw. Inside is a spool you wind manually. Stihl FS series trimmers, most Husqvarna gas models, and older Ryobi corded units use this.
Speed-feed heads, like those on newer EGO Power+ and some DeWalt trimmers, have external eyelets. You thread the line through the holes and twist the head to wind it, no disassembly. Auto-feed heads accept pre-wound drop-in cartridges; you just replace the whole spool unit. Fixed-line heads, found on some lightweight electric models, have holes where you insert individual pre-cut lengths of line.
If you can’t tell, check the manual or look for a model number stamped on the head. Searching “[your trimmer model] head type” online usually yields a service diagram.
Which trimmer line should you use?
The line diameter is printed on the head itself, often something like “.095” or “.080”, or listed in the manual. Ignoring this causes two problems.
Thicker line than specified won’t fit through the exit holes cleanly. It binds, the bump mechanism fails, and you end up taking the head apart again within ten minutes of use. Thinner line cuts through light grass fine but snaps instantly against tougher weeds like blackberry shoots or woody stems.
Line shape matters too. Round line is the standard for general trimming. Square or twisted line, like Oregon Magnum Square Gator line, offers more cutting edges and lasts longer in dense vegetation. Star-shaped line is aggressive but can be harder to feed smoothly in bump heads.
Material is almost always nylon or a nylon co-polymer. Co-polymer lines resist abrasion better and are worth the slight extra cost if you’re cutting near rocks or fence lines.
Soaking nylon trimmer line in a bucket of water for about half an hour before winding makes it more flexible and less prone to snapping during the first few uses. Dry, brittle line will often crack right at the anchor point inside the spool on the initial bump.
Threading a bump-feed head step-by-step
This is the most common head type and the one that frustrates people the most.
- Remove the spool cover. Push the two plastic tabs inward (common on Stihl) or unscrew the retaining knob. Set the cover aside. If there’s a spring inside the head, note its position, it usually sits around the center post.
- Pull out the old spool and clean it. Remove any leftover line fragments. Wipe the spool and the inside of the head housing with a dry rag. Grass seeds and dirt here cause friction and jam the rotation.
- Cut two equal lengths of line. Each strand should be about 15 feet. An easy way to measure: stretch one arm’s length (roughly 5-6 feet) three times. Cut both strands together so they’re identical.
- Find the anchor holes on the spool. The spool has two small holes or slots, usually marked “A” and “B” or just opposite each other. Insert one line end into each hole, leaving about 3 inches protruding.
- Wind in the direction of the arrow. The spool has an arrow molded into it. Wind both lines simultaneously, keeping them parallel and avoiding overlaps. If the lines cross, they’ll lock together inside the spool and won’t feed. Stop when the spool is full but not bulging, overpacking prevents the cover from seating.
- Reinsert the spool and thread the exit grooves. Place the wound spool back into the head, ensuring any spring is correctly positioned. Hold the two line ends taut. Locate the two exit grooves on the head’s outer rim and drop each line end into one. The grooves are often offset, match them.
- Replace the cover and secure it. Snap or screw the cover back on. Pull the lines gently to ensure they’re seated in the grooves.
If you skip cleaning the spool housing, grit builds up around the spindle. The spool won’t rotate freely when you bump the head, and the line won’t advance. You’ll be taking it apart again next week.
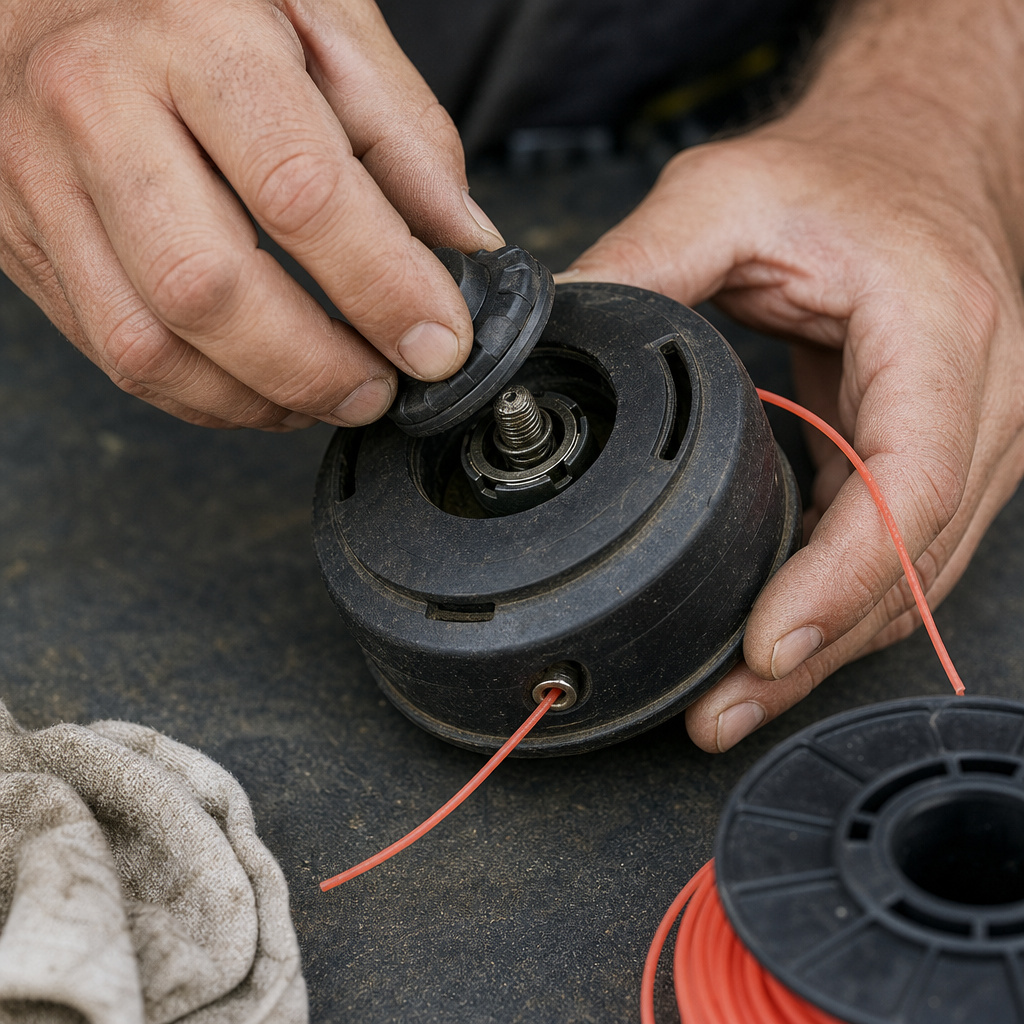
Threading a speed-feed head
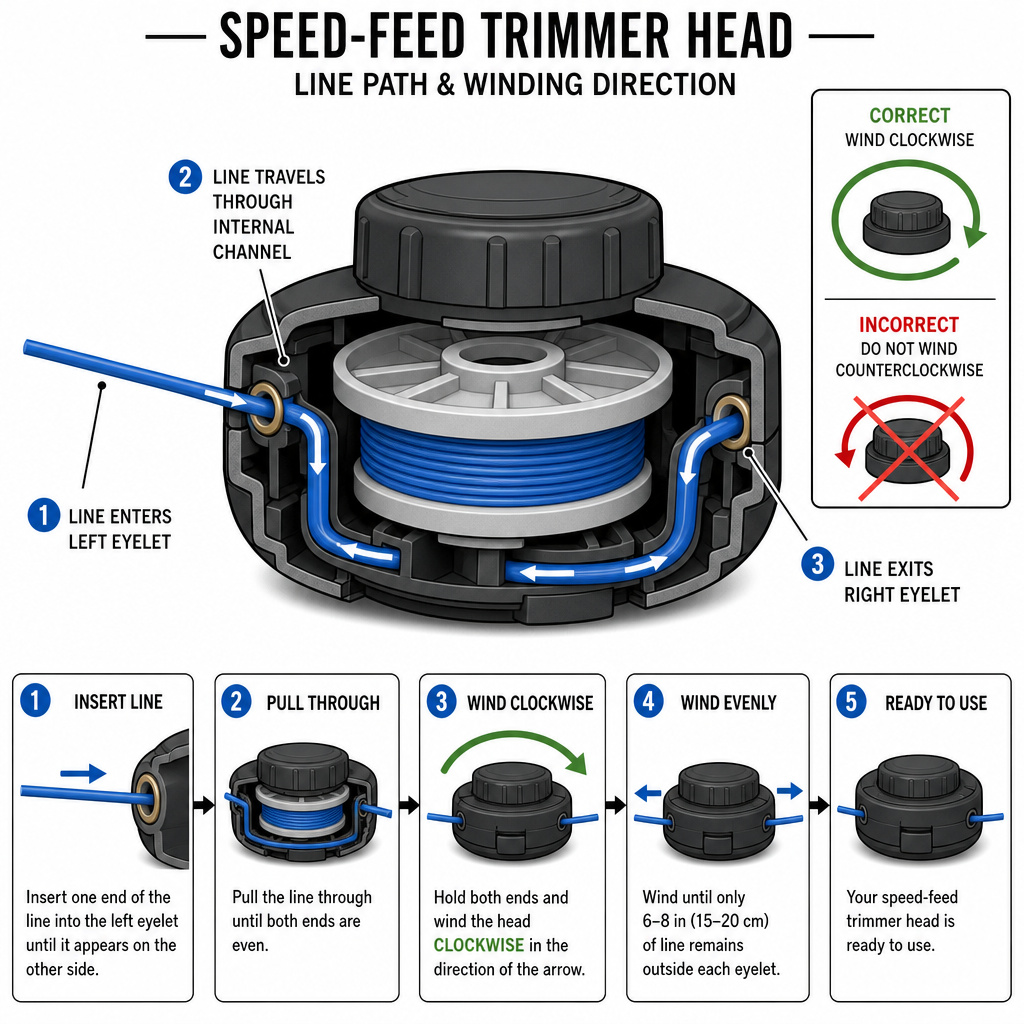
Speed-feed heads, like those on many EGO and Greenworks models, are designed for quick field reloads.
- Cut a single length of line. You’ll need about 10-12 feet.
- Thread the line through the eyelets. Feed one end through the first eyelet, then across the interior channel and out through the second eyelet. Pull until both ends are even.
- Wind the line by rotating the head. Hold both line ends. Rotate the head in the direction indicated (usually clockwise) until the line is wound inside. The head’s internal mechanism automatically grabs and winds it.
- Pull the lines to the desired length. Once wound, tug the lines to extend about 4-6 inches for cutting.
The advantage is no disassembly. The risk is that if you rotate the head backwards, the line won’t catch and you’ll just be pulling it out. Always follow the directional arrow stamped near the eyelets.
Using auto-feed cartridges and fixed-line heads
Auto-feed systems, common on some Black & Decker and Toro models, use pre-wound replacement spools. You simply remove the old cartridge and drop in the new one. No winding at all. Ensure the cartridge is the correct model for your trimmer, a B&D GC100 cartridge won’t fit a Toro head.
Fixed-line heads have two or four holes on the outer rim. You insert pre-cut lengths of line (typically 6-8 inches) into each hole until they click or lock. These are simple but inefficient for large areas, as you must stop and reload frequently.
| Head Type | Best For | Time to Reload | Common Pitfall |
|---|---|---|---|
| Bump-feed | Heavy-duty gas trimmers, large areas | 5–10 minutes | Overlapping winds jam the spool |
| Speed-feed | Cordless trimmers, quick field fixes | 1–2 minutes | Rotating head backwards fails to catch line |
| Auto-feed cartridge | Light-duty electric trimmers | < 1 minute | Using incompatible cartridge |
| Fixed-line | Small electric trimmers, tight spots | 2–3 minutes | Line pulls out if not locked securely |
What happens if I wind the line backwards?
The arrow on the spool indicates the rotation direction when the head is spinning. Winding the line opposite to this arrow creates a binding force.
When you tap the bump-feed head against the ground, the spool should rotate slightly to release new line. If wound backwards, that same tap pulls the wound line tighter against the spool’s core. The line doesn’t advance. You’ll tap harder, eventually forcing a release, but the mechanism strains and can wear out the spring clutch inside.
I wound a spool backwards on a Stihl FS 55 once. The line wouldn’t feed. After a dozen aggressive bumps, the spring clutch inside the head deformed and started slipping. The repair required a full head replacement, a $40 part plus labor. The arrow is there for a physical reason, not just a suggestion.
How long should the trimmer line be sticking out?
Extend the line to about 4-6 inches after threading. This is the optimal line length for balance between cutting reach and motor strain.
Longer line (8+ inches) increases the centrifugal force on the motor shaft. The trimmer vibrates more, the bearings wear faster, and the line whips against the guard, often melting or fraying at the tips. Shorter line (under 3 inches) doesn’t reach weeds effectively, forcing you to hold the trimmer closer to the ground and increasing debris kickback.
After initial extension, the bump-feed system will release more line as you tap the head. Monitor the length during use and tap to maintain the 4-6 inch range.
Common threading mistakes and how to fix them
People get impatient. They skip steps. Here’s what happens.
Using line that’s too thick. The line binds in the exit holes. The head won’t bump, or it releases line sluggishly. Fix: remove the line and replace with the correct diameter. Check the head stamp.
Overlapping the winds on the spool. Crossed lines inside the spool lock together. When you bump the head, only one line may feed, or neither feeds. Fix: unwind completely and rewind, keeping the two lines parallel. This is the most common reason for a restringing process to fail halfway through a job.
Not seating the line ends in the exit grooves. The lines lie loose inside the head cavity. When you start the trimmer, they tangle instantly and snap. Fix: after winding, pull each line end firmly into its groove before replacing the cover. You should feel a slight click as it seats.
Overfilling the spool. A bulging spool prevents the cover from locking flush. The cover can pop off during operation, throwing the spool. Fix: wind until the spool is full but the lines are still below the spool’s outer rim. You should be able to press the cover on with light pressure.
| Symptom | Likely Cause | Fix |
|---|---|---|
| Line won’t feed when bumped | Wound backwards; dirty spindle | Rewind following arrow; clean spindle |
| Only one line feeds | Lines crossed inside spool | Unwind and rewind keeping lines parallel |
| Line snaps immediately | Wrong diameter; brittle dry line | Use correct diameter; soak nylon line before winding |
| Head cover pops off | Overfilled spool | Remove some line so spool fits flush |
| Trimmer vibrates excessively | Line too long (8+ inches) | Trim line back to 4-6 inches |
Maintaining the trimmer head beyond the line
Threading is part of maintenance, but the head itself needs care.
After every few uses, remove the spool cover and clean out grass clippings, seeds, and dirt from the inner chamber. A buildup here adds friction. For gas trimmers, check the spindle bearing for smooth rotation. If it grinds, a light application of silicone spray (not grease) can free it. For battery trimmers, ensure the head attachment point is tight; a loose head wobbles and unevenly wears the line.
If you’re doing a full trimmer wire change, take the opportunity to inspect the bump mechanism’s spring and pawl. Replace if they’re worn or corroded.
Frequently Asked Questions
Why does my trimmer line keep breaking?
Nylon line degrades with UV exposure and heat. If you store the trimmer outdoors or in a hot garage, the line becomes brittle. Soaking it before use helps, but storing the trimmer indoors or keeping spare line in a sealed bag extends its life. Also, hitting rocks, pavement, or metal fence posts will snap any line instantly.
Can I use any trimmer line in my head?
No. The diameter must match the head’s specification. The shape (round, square, twisted) can vary, but the thickness is critical for the feeding mechanism. Using a thicker line than specified is the most common cause of jamming.
How often should I replace the trimmer line?
Replace the line when it’s worn down to about 2-3 inches remaining on the spool, or when it starts snapping frequently during normal use. For heavy-duty trimming, you might reload every 2-3 hours of operation. For light suburban lawns, a spool can last several months.
Do I need to replace the whole spool every time?
Only if the spool is damaged or the internal anchor holes are worn out. Most replacement steps involve winding new line onto the existing spool. Auto-feed systems require a new cartridge, but the head itself remains.
What’s the best way to cut the line to length?
Use a utility knife or heavy-duty scissors. Don’t use a standard pocket knife, the nylon can slip and cause a cut. Hold the line taut against a flat surface and slice through it. For speed-feed heads, cutting a single long strand is easier than trying to manage two separate pieces.
The Bottom Line
Threading a weed trimmer isn’t a mystery. Match the head type, use the line diameter stamped on it, wind following the arrow, and keep the winds parallel. Skip one, and you’ll be redoing it within the first hour of cutting.
Clean the head housing when you reload. Soak nylon line if it’s dry. Extend only 4-6 inches of line after threading. Those three habits keep the trimmer running through a full season without midday breakdowns.
If the line still won’t feed after a correct threading, the problem is usually inside the head, a dirty spindle, a worn spring, or a misaligned pawl. That’s a deeper fix, but it starts with doing the simple stuff right first time.