Removing a Ryobi Trimmer Head: Correct Method & Key Tips
This post contains affiliate links. As an Amazon Associate, we earn from qualifying purchases.
Removing a Ryobi trimmer head requires matching three things: your model’s locking mechanism (shaft button or pin hole), the correct thread direction (right-hand or left-hand), and using steady, controlled force, not impact, to break it free.
The single biggest reason people struggle is turning the head the wrong way. You stand there, wrench in hand, heaving with all your strength, and nothing happens. You’re just tightening it further, maybe stripping the plastic threads inside the head. That’s a $20 mistake.
This guide walks through the exact steps for every common Ryobi model, from the 18V cordless to the 40V HP brushless and older gas trimmers. We’ll cover how to identify your thread direction, engage the shaft lock, and what to do when the head is truly stuck. You’ll also learn what to inspect once the head is off to ensure your next one installs correctly.
Key Takeaways
- Thread direction is everything. Most Ryobi trimmers use a standard right-hand thread (turn counter-clockwise to loosen). A few older models use left-hand threads (clockwise to loosen). Turning the wrong way strips the head.
- Lock the shaft first. You must immobilize the driveshaft. Newer models use a shaft lock button. Older ones have a hole for a pin or screwdriver. Skipping this step lets the whole motor assembly spin.
- Clean the shaft threads after removal. Grass, dirt, and corrosion on the exposed shaft threads will prevent a new head from seating properly, causing vibration and premature wear.
- Use penetrating oil, not a hammer. A stuck head needs patience. Apply a lubricant like WD-40, let it soak for 10 minutes, then use a wrench on the head’s flats. Avoid impact tools that crack the housing.
- Reassembly has a specific click. When putting the bump knob or spool back on, listen and feel for a positive click or stop. If it spins freely, it’s not seated and will fail to feed line.
Before You Start: Safety First
Before you start: Disconnect all power. For cordless trimmers, remove the battery. For corded models, unplug them from the outlet. For gas trimmers, disconnect the spark plug wire and let the engine cool completely. The cutting head can spin from residual tension or an accidental trigger bump, and the edges are sharp enough to cut skin even when stationary.
Put on a pair of work gloves. They protect your hands from sharp plastic burrs on worn heads and give you a better grip. Have a clean workspace, a bench or a stable surface, so you don’t lose small parts like the locking pin or any washers that come off.
Tools You’ll Actually Need
You don’t need a full mechanic’s set. Gather these items before you begin, because searching for a tool with greasy hands halfway through is how springs get lost.
- Work gloves. Already mentioned, but worth repeating.
- Flat-bladed screwdriver or small pin/Allen key. This is for the shaft locking hole on models that have one. The key often comes with the trimmer.
- Adjustable wrench or a set of pliers. You’ll use this on the hexagonal flats found on most trimmer head bodies. An adjustable wrench lets you apply even pressure without rounding the corners.
- Penetrating oil (WD-40, Liquid Wrench). Essential for a head that hasn’t been off in years. The oil creeps into the microscopic gaps between the steel shaft and aluminum or plastic head threads, breaking the corrosion bond.
- Clean rag and a small wire brush. For cleaning the exposed shaft threads once the head is off. This step is non-negotiable for a good re-installation.
Most universal trimmer head installations require matching the shaft diameter and thread direction. A mismatch here means the head either won’t screw on or will vibrate loose within minutes of use.
How Do I Know Which Way to Turn the Trimmer Head?
This is the make-or-break question. Get it wrong, and you’re buying a new head.
Most Ryobi string trimmers, including the vast majority of 40V and 18V cordless models, use a standard right-hand thread. This is the same direction as most screws and bolts in the world: you turn them clockwise to tighten, counter-clockwise to loosen.
However, some older Ryobi gas models and trimmers designed as attachments for multi-tool systems (like some Expand-It models) can use a left-hand (reverse) thread. This is a safety feature. The idea is that the normal rotation of the head during use would tend to tighten a left-hand thread, preventing it from unscrewing itself.
Here’s how to be 100% sure before you apply force:
- Check for an arrow. Look on the side of the trimmer head itself. Some are molded with a small arrow and the word “LOOSEN” or an icon showing the turning direction.
- Consult the manual. Your model’s owner’s manual will state the thread direction. If you’ve lost it, a quick search for “[Your Ryobi Model Number] manual PDF” usually turns up the official document from Ryobi’s website.
- Apply the “Righty-Tighty” default. If there’s no arrow and no manual, assume a standard right-hand thread (counter-clockwise to loosen) first. Apply gentle, steady pressure. If it doesn’t budge, stop. Don’t force it. Try turning it clockwise. If it moves, you’ve got a left-hand thread.
| Thread Type | Direction to LOOSEN | Common Ryobi Models | Visual Cue |
|---|---|---|---|
| Right-Hand (Standard) | Turn Counter-Clockwise | Most 40V (RY40HPST01K), most 18V, newer gas | Arrow often points left/CCW |
| Left-Hand (Reverse) | Turn Clockwise | Some older gas models, certain attachment-capable shafts | May have no arrow or a clockwise arrow |
Step-by-Step Removal Process
Follow this sequence. Skipping steps or doing them out of order is how things break.
Step 1: Immobilize the Driveshaft
You cannot unscrew the head if the shaft inside is spinning. Ryobi uses one of two locking systems.
For models with a SHAFT LOCK BUTTON (common on 40V/18V):
Locate the rubber or plastic button on the gear housing, just above the trimmer head. Press and hold it firmly. You should feel it click and lock in place. While holding it, try to rotate the trimmer head by hand. The head should turn independently while the shaft inside stays still. If the whole assembly turns, the button isn’t fully engaged. Press harder.
For models with a LOCKING HOLE (common on older/gas):
Rotate the head until you see a small hole in the metal collar (the “bell”) just above the head. Align it with a corresponding hole in the stationary part of the gear case. Insert your screwdriver, Allen key, or the provided pin straight through both holes. It will seat with a slight click. The shaft is now locked.
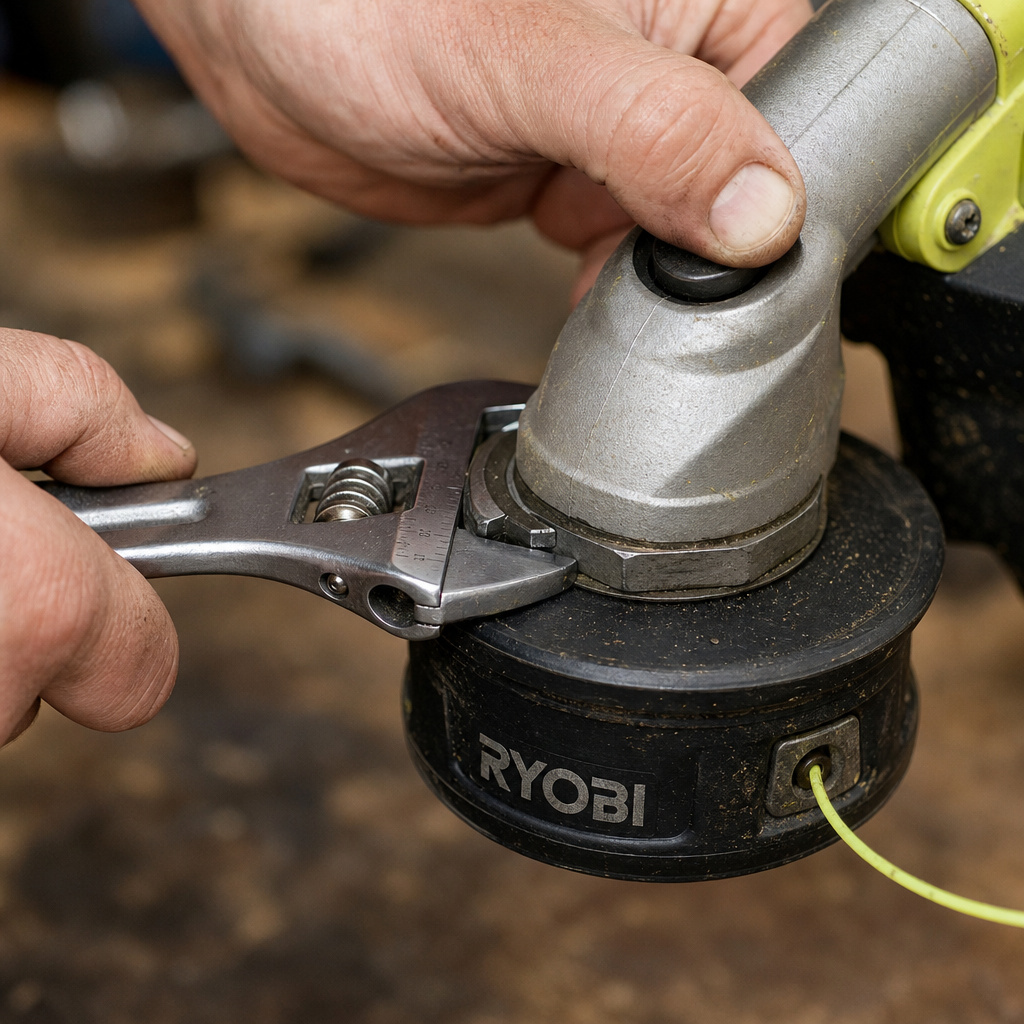
Step 2: Apply Steady Force in the Correct Direction
With the shaft locked, fit your adjustable wrench onto the hexagonal flats of the trimmer head. If the head is round, you may need to use a strap wrench or a pair of channel-lock pliers padded with a rag to avoid crushing it.
Take a breath. Apply slow, increasing pressure in the loosening direction you identified. You want a steady pull, not a jerk. A good, seated head will often release with a distinct crack or pop as the thread seal breaks.
If it doesn’t move, stop. Do not jump on the wrench. You’ll either strip the plastic, break the locking pin, or injure yourself.
Step 3: Dealing with a Stubborn, Stuck Head
This happens. Salt, moisture, and years of vibration weld the head to the shaft. Brut force fails here. Finesse wins.
- Apply penetrating oil. Spray it liberally where the head meets the shaft. Let it soak for at least 10–15 minutes. Tap the head gently with the handle of your screwdriver to create vibrations that help the oil wick in.
- Re-engage the shaft lock and try again. The oil often provides just enough lubrication to break the corrosion.
- Use careful heat (advanced, gas models only). If it’s a metal-headed gas trimmer, you can briefly apply heat from a heat gun (not a torch) to the head’s base. Metal expands faster than the steel shaft, breaking the bond. Never do this on a plastic-headed electric trimmer. You’ll melt it.
- The last resort. If all else fails, you may need to remove trimmer head without Allen key using more creative methods, like carefully cutting the head off with a Dremel tool. At that point, the head is sacrificial.
I once spent 45 minutes fighting a head on a used Ryobi gas trimmer I’d bought. I was turning it the right way, had the pin in, used my full weight. Nothing. I gave up, sprayed it with Liquid Wrench, and went to make a coffee. Came back 20 minutes later, placed the wrench, leaned in gently, and it spun off like it was buttered. The lesson wasn’t about strength. It was about letting the chemistry work.
Step 4: Disassemble the Head Components
Once the main head assembly is unthreaded and off the shaft, you often need to take it apart further to access the spool for Ryobi 18V trimmer string replacement or to clean it.
Most bump-feed heads have a central “bump knob” on the bottom. Press the two plastic tabs on its sides (or turn it to an unlock symbol) and pull it off. Underneath, you’ll find the spool. Lift it out. Note the orientation of any springs or washers.
What to Do Once the Head Is Off
Don’t just slap a new head on. This is your chance to perform critical maintenance.
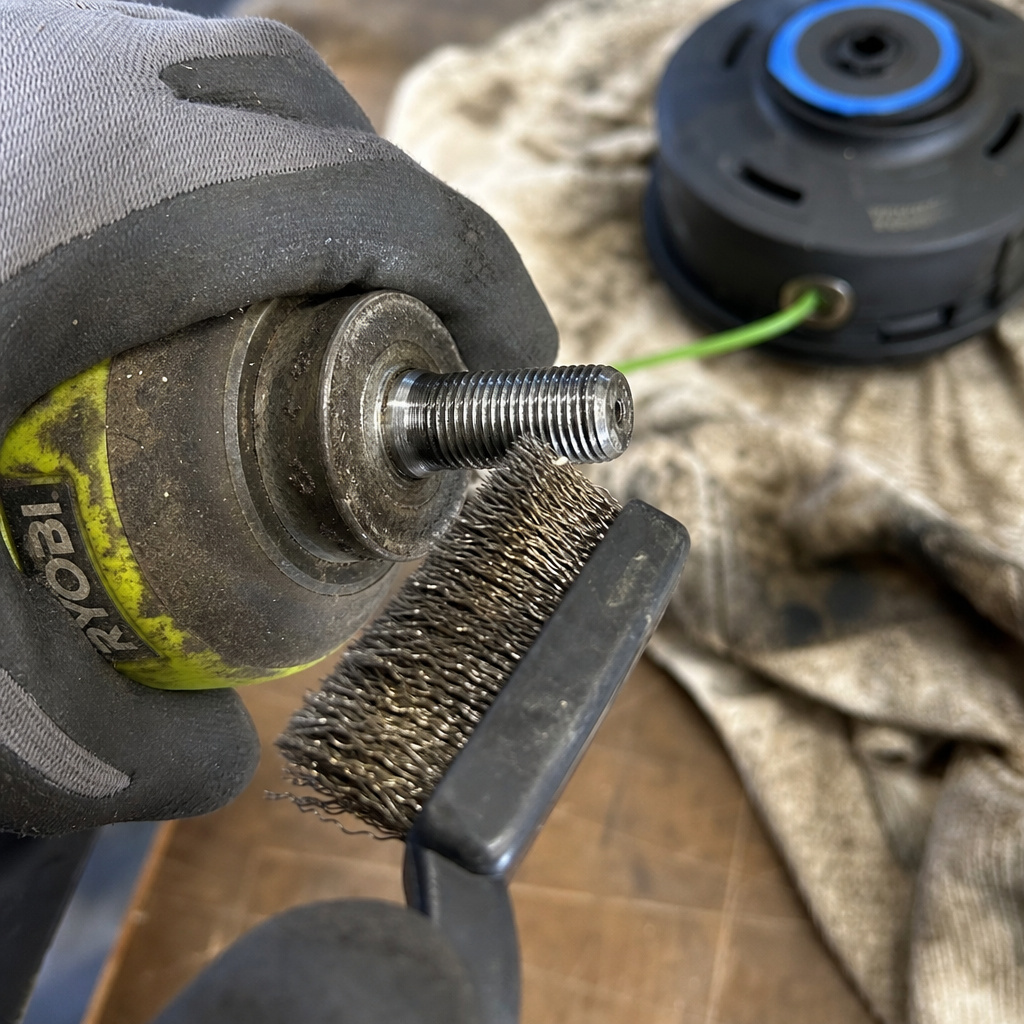
Clean the Shaft Threads.
Use your wire brush to scrub every thread on the exposed shaft. Remove all dirt, dried grass, and rust. Wipe it down with a rag. Thread a new head onto the clean shaft by hand a few turns. It should spin on smoothly, without catching. If it doesn’t, your threads are damaged.
Inspect the Gear Case Seal.
Look at the rubber or plastic seal (the “oil seal”) where the shaft exits the gear housing. If it’s cracked, dry, or leaking grease, it needs replacement. A failed seal lets dirt into the gearbox, which grinds the gears into metal dust within a season.
Check for Shaft Play.
Grab the very end of the shaft and try to wiggle it up and down and side to side. There should be virtually no movement. Any noticeable play indicates worn bearings inside the gear housing. This causes excessive vibration and uneven cutting.
Reassembly and Reinstallation
Do everything in reverse, but pay attention to the feel.
- Hand-thread the new head. Screw the new head or the cleaned old head onto the shaft by hand as far as it will go. This ensures you’re not cross-threading.
- Lock the shaft and tighten. Engage the shaft lock again. Use your wrench to tighten the head firmly. “Firmly” means snug plus about a quarter-turn. You’re not trying to achieve lug-nut torque. Overtightening stresses the plastic and can crack the housing. The trimmer’s vibration will actually help seat it further during use.
- Reassemble the spool and bump knob. Make sure the spool’s eyelets align with the exit holes in the head. When pressing the bump knob back on, listen for a definitive click. If it doesn’t click and spins freely, it’s not engaged with the spool’s drive lugs. It won’t feed line.
- Reconnect power and test. Reinstall the battery or plug, or reconnect the spark plug wire. Start the trimmer and let it run at idle for 30 seconds. Listen for any new rattles or vibrations, which indicate something is loose.
If you’re moving to a different style of head, like an aftermarket model, the process for a universal trimmer head installation has additional steps, like installing the correct spacer or adapter kit.
Frequently Asked Questions
Why won’t my Ryobi trimmer head unscrew?
You’re likely turning it the wrong way or haven’t locked the shaft. The head and shaft spin together, giving the illusion it won’t budge. Confirm the thread direction, ensure the shaft lock button is fully depressed or the pin is fully seated in the hole, then try again. If it’s corroded, you need penetrating oil.
Do I need special tools to remove a Ryobi trimmer head?
No. The tools you need are likely in your garage: a screwdriver, an adjustable wrench, and maybe some penetrating oil. The specialized tool is just the pin or Allen key to lock the shaft, which usually comes with the trimmer.
Can I use any universal trimmer head on my Ryobi?
Not blindly. You must match the shaft diameter (measure it) and the thread direction. A head designed for an 8mm left-hand thread will not fit a 10mm right-hand shaft. Always check the product specifications against your trimmer’s manual. A mismatch can ruin the shaft threads.
What should I check on the shaft after removing the head?
Clean the threads thoroughly with a wire brush. Inspect them for damage, cross-threading looks like gouged metal. Check the rubber seal around the shaft for cracks. Feel for any side-to-side wobble in the shaft, which points to internal bearing wear. A clean, straight shaft is the foundation for the next head.
The Bottom Line
Removing a Ryobi trimmer head is a straightforward job that gets complicated only when you skip the fundamentals. Find and use the shaft lock. Know your thread direction, counter-clockwise for most. Use penetrating oil and patience instead of brute force on a stuck head. The five minutes you spend cleaning the shaft threads after removal will save you from vibration and poor performance later.
When the job is done, take the extra minute for a full trimmer cleaning guide to keep the rest of the tool in good shape. That head will come off much easier next season.