Methods for Removing Small Stripped Screws Without a Drill
This post contains affiliate links. As an Amazon Associate, we earn from qualifying purchases.
To remove small stripped screws without a drill, you need a manual screw extractor, the correct size pliers, or a chemical solvent like isopropyl alcohol. Match the extractor size to the screw diameter, wedge it into the damaged head with a hammer, and turn it out with a wrench. For screws seized by resin or corrosion, a 15-minute alcohol soak breaks the bond before manual removal.
That 15-minute soak isn’t a suggestion, it’s the manufacturer’s spec for Phrozen 3D printer vats. Skip it, and you’re forcing metal against cured polymer, which rounds the head past any tool’s grip. The difference between a salvageable M3 screw and a drilled-out hole is patience and solvent.
What follows: the exact manual extractor sequence, the plier types that work on raised heads, the rotary-tool trick for flush screws, and the torque table that tells you how much force you’re fighting. You’ll also see why woodworking fixes wreck electronics and where a $20 extractor kit beats a $200 service call.
Key Takeaways
- Manual extractors like the Sock-It-Out don’t need a drill, hammer the tapered end into the stripped head and turn with a wrench.
- Soak resin-contaminated screws in isopropyl alcohol for 15 minutes per Phrozen’s help guide; it dissolves the bond without force.
- Needle-nose or locking pliers only work if the screw head is proud of the surface by at least 2mm.
- Prusa explicitly warns against using general woodworking methods on printer screws; the wrong technique cracks plastic housings.
- Match your tool size to the screw’s nominal diameter (M3, M4) using the manufacturer’s torque table to avoid over-tightening next time.
Before You Start: Safety & Setup
Before you start: Wear ANSI/OSHA-compliant safety glasses. A slipping extractor or flying metal fragment travels at eye level. If using a chemical solvent like alcohol or penetrating oil, work in a ventilated area away from sparks, the fumes are flammable.
Clear your workspace. You need good light and a stable surface. Gather your tools: the manual extractor set, a hammer, a fitting wrench (usually included), needle-nose pliers, isopropyl alcohol (91% or higher), and clean rags. For small electronics, add a strong magnet to your kit, it can pull debris from the screw hole.
Identify your screw. Is it a standard M3 machine screw from a 3D printer frame, or a smaller Phillips head from a gadget? The size dictates your extractor pick. If the head is completely flush, a rotary tool might be your only non-drill option.
The Manual Screw Extractor Method (No Drill Required)
This is your first resort when the head is stripped but still accessible. A tool like the Sock-It-Out extractor works by cold-welding its hardened steel into the softer screw metal.
Step 1: Select the extractor. The tool is sized by the screw’s major diameter, not the Allen key size. For an M3 screw, use the extractor marked for M3. The taper should look slightly smaller than the damaged head.
Step 2: Seat the extractor. Hold the extractor perfectly vertical over the stripped head. Strike it firmly with a hammer, you’re not pounding, just driving the tapered ridges into the metal until you feel it wedge and stop. This creates a mechanical lock.
Step 3: Turn it out. Grip the extractor’s square base with the provided wrench or a small spanner. Turn counter-clockwise with steady, increasing pressure. The extractor’s grip deepens as you turn, so a smooth motion works better than a jerk.
Step 4: If it’s frozen. If the screw doesn’t budge, stop. Apply a drop of penetrating oil (like WD-40 Specialist Penetrant) directly where the extractor meets the screw. Let it soak for five minutes. The oil wicks into the microscopic gaps and breaks the corrosion bond. Then try again.
Where this goes sideways: Hammering the extractor at an angle. The tapered teeth bite unevenly, the wrench slips, and you shear off the extractor’s tip inside the screw head. Now you have hardened steel stuck in a stripped hole, a much harder problem.
Why this works without a drill? The extractor’s reverse-tapered teeth are harder than the screw. As you hammer, the metal deforms around them, creating a custom, negative-shape grip that a wrench can transmit torque through. A drill-powered extractor needs a pilot hole; this one skips that step.
| Screw Size | Manual Extractor Size | Typical Wrench Size | Maximum Torque (kgf·cm) |
|---|---|---|---|
| M2 | #2 | 5mm | 1.79 |
| M3 | #3 | 6mm | 6.42 |
| M4 | #4 | 8mm | 15.3 |
The torque values are from Phrozen’s standard tightening table. They tell you how much rotational force the screw was designed to handle before the head strips. Your manual extractor must exceed that to break it free.
When Pliers Are the Right Tool
Pliers work on one condition: the screw head protrudes enough to grab. On a 3D printer vat frame or a piece of furniture, that’s often true. On a laptop chassis or router casing, it’s almost never true.
Needle-nose pliers are for precision. Open the jaws, slide them over the sides of the screw head, and squeeze. Turn counter-clockwise. The sharp, serrated jaws bite into the metal. Use them on screws 4mm or smaller.
Locking pliers (Vise-Grips) are for brute force. Adjust the jaw to clamp tightly on the head, lock the mechanism, and turn. They transfer tremendous torque but can crush a small screw head if set too tightly. Best for M4 and larger.
The failure mode is slippage. If the jaws slip even once, they polish the already-rounded head, making every subsequent method harder. That’s why you must degrease the head with alcohol first and ensure the pliers are perfectly perpendicular.
Common mistake: Using standard slip-joint pliers on a small screw. The smooth jaws and wide profile can’t concentrate enough force on a tiny head. They slip every time and damage the surrounding material.
The Chemical Solvent Soak for Seized Screws
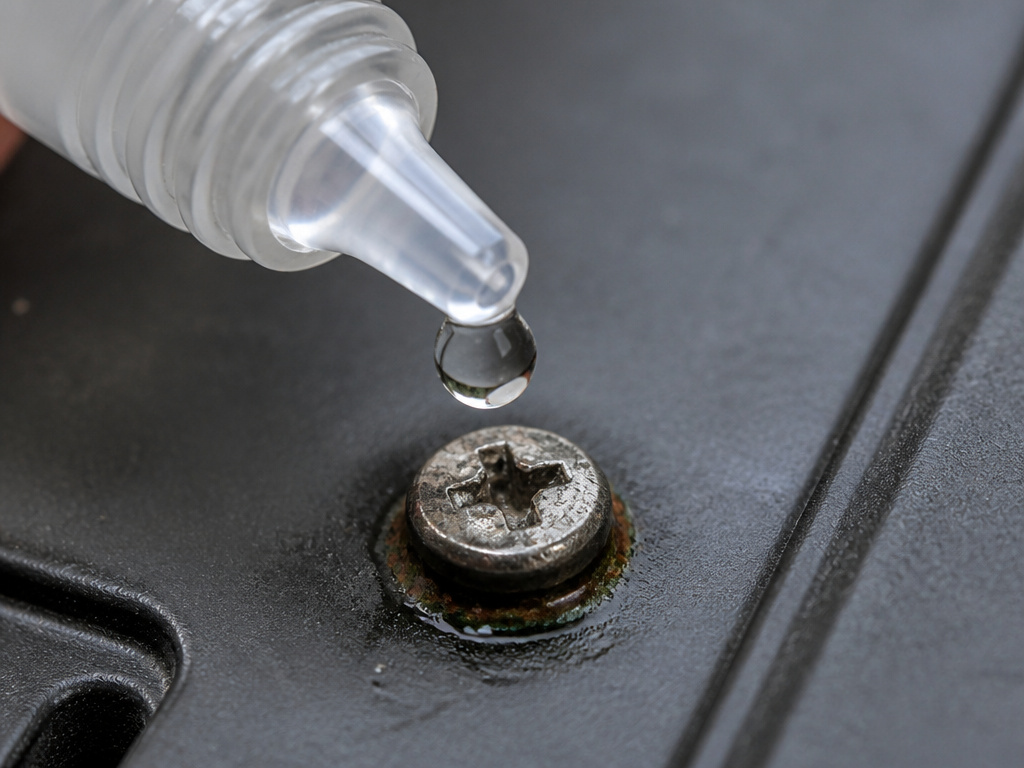 When a screw is stuck by cured resin, threadlocker, or corrosion, force alone fails. You need chemistry. Phrozen’s help center specifies a 15-minute soak in isopropyl alcohol for resin-clogged vat screws.
Process: Drip 91% or higher isopropyl alcohol into the screw head and around the base. Let it sit for a full 15 minutes, set a timer. The alcohol dissolves the resin’s bond without attacking the metal. After soaking, try the manual extractor or pliers again. If it still won’t move, repeat the soak.
For other compounds: Use acetone for cured super glue (cyanoacrylate). Use a dedicated threadlocker solvent (like Loctite Chisel) for red or blue threadlocker. Penetrating oil is for rust and general corrosion.
Why the wait? Solvents work by wicking into the microscopic space between the screw threads and the base material. That takes time. Rushing the process means you’re still fighting the full bond, and you’ll strip the head further.
Creating a New Slot with a Rotary Tool
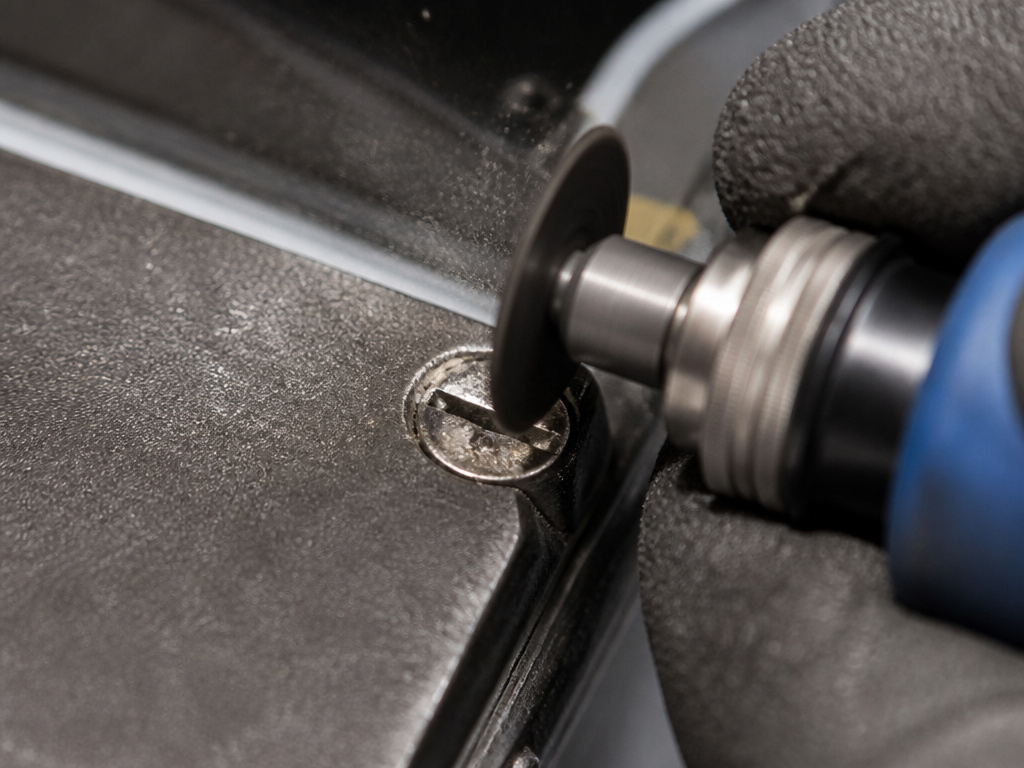 If the head is flush or recessed, and you own a rotary tool (like a Dremel), you can cut a new drive slot. This is the most aggressive non-drill method.
Step 1: Fit a cutting wheel. Use a reinforced abrasive cut-off wheel (model 409 or 420). Don’t use a grinding stone, it’s too wide and uncontrollable.
Step 2: Steady your hand. Brace both hands against the workpiece. You’re aiming to cut a single, straight slot across the screw head, deep enough for a flathead screwdriver to engage.
Step 3: Make the cut. Touch the spinning wheel to the center of the screw head and cut across its diameter. Go slow, you only need a 1-2mm deep slot. Stop immediately if you hit the surrounding material.
Step 4: Use a flathead. Select a flathead screwdriver that fits the new slot snugly. Apply downward pressure and turn.
The part nobody mentions: The cutting wheel throws microscopic metal dust. It gets into bearings, electronics, and your lungs. Mask off the area with tape, wear a respirator, and clean thoroughly with a magnet and compressed air afterwards.
This method works because you’re replacing the damaged complex drive pattern (Phillips, Torx, hex) with a simple, robust slot. It turns a problem of grip into a problem of torque, which a good screwdriver handles easily.
Why “General Woodworking Methods” Can Break Your Printer
Prusa’s knowledge base includes a direct warning: “Methods specific for woodworking might damage your printer.” This isn’t hypothetical.
Wood screws are often softer steel set in a forgiving material. A hammer-driven impact driver or a pipe wrench on a protruding head is standard. In electronics, that same force transfers directly into brittle plastic posts or thin aluminum threads. The screw comes out, but the $150 part it was holding is now cracked.
The comparison: A manual extractor concentrates force into the screw. A woodworking impact driver delivers a shock through the screw and into the housing. For a printer like the Prusa Mini or a Phrozen Sonic Mini 8K S, that shock can fracture the linear rod mounts or the mainboard tray.
So when do you ignore this? Only when the screw is in a metal-on-metal application, like a bench vise base or a saw fence. Even then, the risk of snapping the screw shaft inside the threaded hole goes way up.
Manual vs. Powered Extraction: A Side-by-Side Look
You have two philosophies: mechanical grip (manual) versus cutting and torque (powered). For small screws without a drill, manual wins in most cases.
| Method | Best For Screw Size | Risk If Misapplied | Time Required |
|---|---|---|---|
| Manual Screw Extractor | M2 to M4 | Shearing extractor tip in head | 2-5 minutes |
| Pliers (Needle-nose) | M3, M4 (protruding) | Polishing head, making it slicker | 1-3 minutes |
| Chemical Soak | Any seized screw | None, but delay if solvent is wrong type | 15+ minutes |
| Rotary Tool Slot Cutting | M3 and larger | Damaging surrounding material, metal dust contamination | 5-10 minutes |
The manual screw extractor is the default pick for most small, stripped fasteners. It requires no pilot hole, works on recessed heads, and when paired with a solvent soak, beats corrosion. The Sock-It-Out kit covers M2 to M6.
The rotary tool method is your last non-drill resort. It’s destructive to the screw but saves the threaded hole. Use it when the head is too damaged for an extractor to bite.
How to Avoid Stripping Screws Next Time
Stripping happens at the intersection of the wrong tool and too much force. The fix is knowing the specs before you turn.
Use the exact tool. A 2.5mm hex key in a 2.0mm socket will round the head within two turns. For small screws, invest in a precision hex set (Bondhus or Wiha) where the tolerances are tight.
Follow the torque table. For an M3 screw in aluminum, the target torque is 6.42 kgf·cm. That’s light finger-tight plus a gentle nudge, not wrist strain. Over-tightening is the main cause of future stripping.
Clean the threads. Before reinstalling any screw blown out by resin or dirt, run a tap through the threaded hole or use a toothpick to clear debris. A single grain of sand acts as a wedge, seizing the screw.
Bottom line: A stripped small screw doesn’t mean the project is over. It means you switch from a driver to a remover. Start with chemistry, move to a manual extractor, and save the cutting wheel for the truly stuck. Your threaded hole will thank you.
Frequently Asked Questions
Can I use a rubber band to remove a stripped screw?
Only if the damage is very slight. The rubber band trick fills gaps in a worn Phillips head, providing extra friction. For a completely rounded head or a small hex socket, it does nothing. It’s a first-attempt trick for wood screws, not a solution for precision M3 machine screws.
What if the screw head is completely flush?
If the head is flush with the surface, pliers and most extractors can’t grip. Your non-drill options narrow to two: cut a new slot with a rotary tool, or use a very thin, sharp chisel and a hammer to tap a notch in the head’s edge for a punch to rotate it. Both are advanced and risk surface damage.
Is a manual extractor better than a drill-type extractor?
For small screws, yes. A drill-type extractor requires a perfectly centered pilot hole, which is difficult to drill in a tiny, hard, spinning screw head. A manual extractor like the Sock-It-Out skips the drilling, wedges directly into the damaged head, and is less likely to walk off-center and damage the surrounding material.
How do I know if my screw is an M3 or M4?
Measure the screw’s major diameter (the thickest part of the threads) with calipers. M3 measures 3mm, M4 measures 4mm. If you don’t have calipers, the screw that holds a 3D printer’s fan shroud is usually M3; a vat frame screw on a Phrozen Sonic Mini 8K S is M4 x 10mm.
Can I reuse a screw after extracting it?
Almost never. The extraction process deforms the head and often damages the threads. Even if it looks okay, the metal has been stressed and is more likely to strip next time. Always replace an extracted screw with a new one of the same grade and size.
Before You Go
Small stripped screws test patience more than skill. The sequence is logical: identify the cause (resin, corrosion, over-torque), apply the correct solvent, then use the gentlest mechanical method that fits.
Keep a manual extractor kit in your toolbox. For the price of a pizza, it solves 90% of these problems without reaching for a drill. Remember the manufacturer data, that 1.5~2 kgf·cm torque for a Phrozen vat screw is less force than you use to open a jar. Your goal isn’t to win a strength contest; it’s to break a chemical bond and let the tool do the work.
